Brother International BES Embroidery Software 2 Instruction Manual - English - Page 78
Adjusting Motif settings for an Appliqué, Border
 |
View all Brother International BES Embroidery Software 2 manuals
Add to My Manuals
Save this manual to your list of manuals |
Page 78 highlights
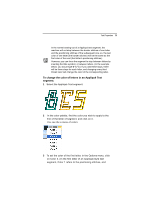
76 Pacesetter BES Lettering 2 Instruction Manual In the Stitch Length box, enter the stitch length of the positioning and tack down runs. In the Appliqué width box, enter the width of the blanket stitching. In the Blanket density box, enter the spacing for the Blanket stitching. 4 Click Apply. Adjusting Motif settings for an Appliqué Border After you select the Appliqué stitch type, you can adjust any of the default settings available. You must make all changes to the Appliqué stitches from the Appliqué box. To adjust Motif settings for Appliqué: 1 Select the Appliqué text segment. 2 In the Properties panel, in the Appliqué Type field, select Motif. 3 Adjust any of the following settings in the Properties panel: In the Stitch Length box, enter the stitch length of the positioning and tack down runs. In the Inset box, select a percentage to inset the edge of the appliqué border, relative to the outline of the lettering. From the Motif list, select a Motif pattern that will be used as the Appliqué stitching.
-
 1
1 -
2
-
3
-
4
-
5
-
6
-
7
-
8
-
9
-
10
-
11
-
12
-
13
-
14
-
15
-
16
-
17
-
18
-
19
-
20
-
21
-
22
-
23
-
24
-
25
-
26
-
27
-
28
-
29
-
30
-
31
-
32
-
33
-
34
-
35
-
36
-
37
-
38
-
39
-
40
-
41
-
42
-
43
-
44
-
45
-
46
-
47
-
48
-
49
-
50
-
51
-
52
-
53
-
54
-
55
-
56
-
57
-
58
-
59
-
60
-
61
-
62
-
63
-
64
-
65
-
66
-
67
-
68
-
69
-
70
-
71
-
72
-
 73
73 -
 74
74 -
 75
75 -
 76
76 -
 77
77 -
 78
78 -
 79
79 -
 80
80 -
 81
81 -
 82
82 -
 83
83 -
84
-
85
-
86
-
87
-
88
-
89
-
90
-
91
-
92
-
93
-
94
-
95
-
96
-
97
-
98
-
99
-
100
-
101
-
102
-
103
-
104
-
105
-
106
-
107
-
108
-
109
-
110
-
111
-
112
-
113
-
114
-
115
-
116
-
117
-
118
-
119
-
120
-
121
-
122
-
123
-
124
-
125
-
126
-
127
-
128
-
129
-
130
-
131
-
132
-
133
-
134
-
135
-
136
-
137
-
138
-
139
-
140
-
141
-
142
-
143
-
144
-
145
-
146
-
147
-
148
-
149
-
150
 |
 |