Brother International BES Embroidery Software 2 Instruction Manual - English - Page 8
Parts of the Workspace
 |
View all Brother International BES Embroidery Software 2 manuals
Add to My Manuals
Save this manual to your list of manuals |
Page 8 highlights
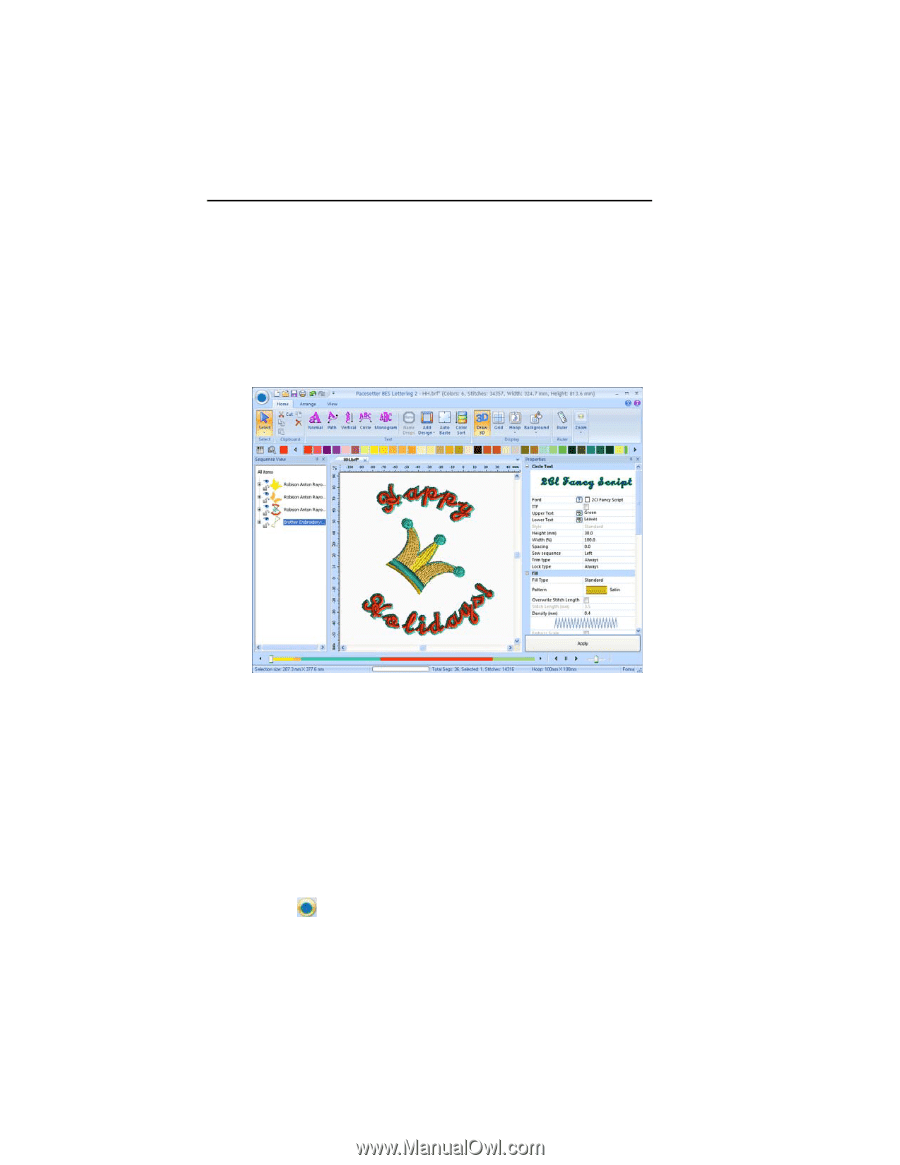
6 Pacesetter BES Lettering 2 Instruction Manual Parts of the Workspace The Pacesetter BES Lettering 2 workspace contains a number of different areas which have distinct functions. The sections that follow give an overview of what each of these areas does, and the kinds of information about the design that they contain. Title Bar The Title Bar appears at the top of the Pacesetter BES Lettering 2 design window. The Title bar displays information about the design that is open in the workspace: its name, the number of stitches and colors in the design, and the overall width and height. Pacesetter Button At the top left-hand corner of the window is the Pacesetter Button . Clicking on the Pacesetter Button to gives you access to a menu of useful tools, such as New, Save, Print, and
-
 1
1 -
2
-
 3
3 -
 4
4 -
 5
5 -
 6
6 -
 7
7 -
 8
8 -
 9
9 -
 10
10 -
 11
11 -
 12
12 -
 13
13 -
14
-
15
-
16
-
17
-
18
-
19
-
20
-
21
-
22
-
23
-
24
-
25
-
26
-
27
-
28
-
29
-
30
-
31
-
32
-
33
-
34
-
35
-
36
-
37
-
38
-
39
-
40
-
41
-
42
-
43
-
44
-
45
-
46
-
47
-
48
-
49
-
50
-
51
-
52
-
53
-
54
-
55
-
56
-
57
-
58
-
59
-
60
-
61
-
62
-
63
-
64
-
65
-
66
-
67
-
68
-
69
-
70
-
71
-
72
-
73
-
74
-
75
-
76
-
77
-
78
-
79
-
80
-
81
-
82
-
83
-
84
-
85
-
86
-
87
-
88
-
89
-
90
-
91
-
92
-
93
-
94
-
95
-
96
-
97
-
98
-
99
-
100
-
101
-
102
-
103
-
104
-
105
-
106
-
107
-
108
-
109
-
110
-
111
-
112
-
113
-
114
-
115
-
116
-
117
-
118
-
119
-
120
-
121
-
122
-
123
-
124
-
125
-
126
-
127
-
128
-
129
-
130
-
131
-
132
-
133
-
134
-
135
-
136
-
137
-
138
-
139
-
140
-
141
-
142
-
143
-
144
-
145
-
146
-
147
-
148
-
149
-
150
 |
 |