Brother International DS-620 Users Guide - Page 23
Preview settings, Setup, Preview, Automatic, Paper
 |
View all Brother International DS-620 manuals
Add to My Manuals
Save this manual to your list of manuals |
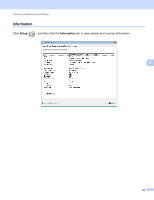
Page 23 highlights
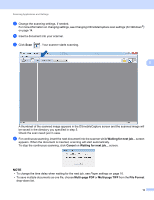
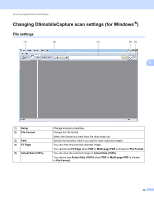
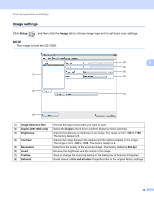
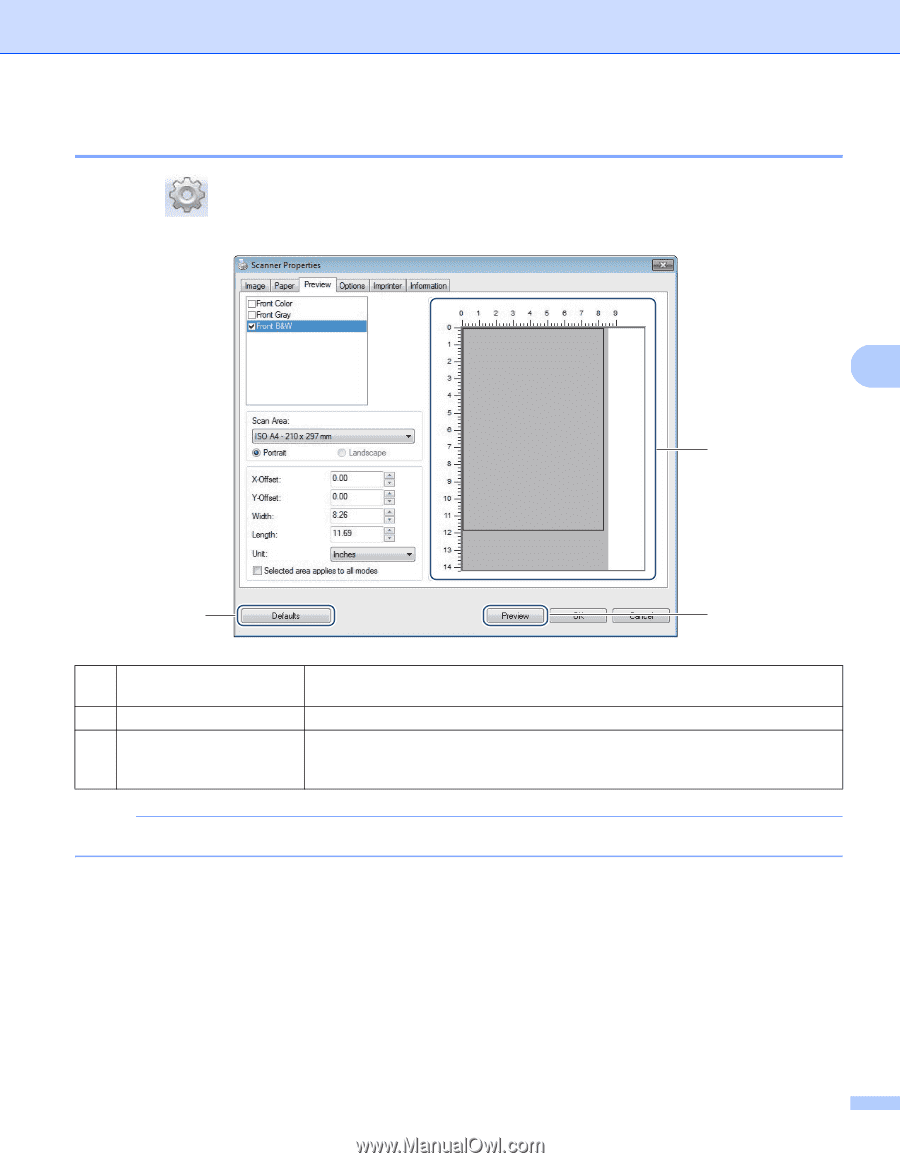
Scanning Applications and Settings Preview settings Click Setup , and then click the Preview tab to preview your image before the final scan so that you can set your scan area correctly. 5 (1) (2) (3) (1) Preview Window (2) Defaults (3) Preview When you click Preview (3), the scanned image will appear in this area. This preview image lets you define your scan area. Reset values in this and all other Properties tabs to the original factory settings. Click to start the preview scan. The scanned image will appear in the Preview Window (1). Note that the scanned image is only for the preview and will not be saved. NOTE If you chose Automatic cropping, in the Paper tab screen, you cannot preview your scan on this screen. 18
-
 1
1 -
2
-
3
-
4
-
5
-
6
-
7
-
8
-
9
-
10
-
11
-
12
-
13
-
14
-
15
-
16
-
17
-
 18
18 -
 19
19 -
 20
20 -
 21
21 -
 22
22 -
 23
23 -
 24
24 -
 25
25 -
 26
26 -
 27
27 -
 28
28 -
29
-
30
-
31
-
32
-
33
-
34
-
35
-
36
-
37
-
38
-
39
-
40
-
41
-
42
-
43
-
44
-
45
-
46
-
47
-
48
-
49
-
50
-
51
-
52
-
53
-
54
-
55
-
56
-
57
-
58
 |
 |
Scanning Applications and Settings
18
5
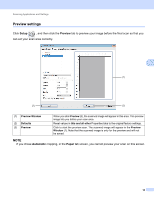
Preview settings
Click
Setup
, and then click the
Preview
tab to preview your image before the final scan so that you
can set your scan area correctly.
NOTE
If you chose
Automatic
cropping, in the
Paper
tab screen, you cannot preview your scan on this screen.
(1)
Preview Window
When you click
Preview
(3), the scanned image will appear in this area. This preview
image lets you define your scan area.
(2)
Defaults
Reset values in
this and all other
Properties tabs to the original factory settings.
(3)
Preview
Click to start the preview scan. The scanned image will appear in the
Preview
Window
(1). Note that the scanned image is only for the preview and will not
be saved.
(3)
(1)
(2)