Brother International DS-620 Users Guide - Page 31
Options settings, Options
 |
View all Brother International DS-620 manuals
Add to My Manuals
Save this manual to your list of manuals |
Page 31 highlights
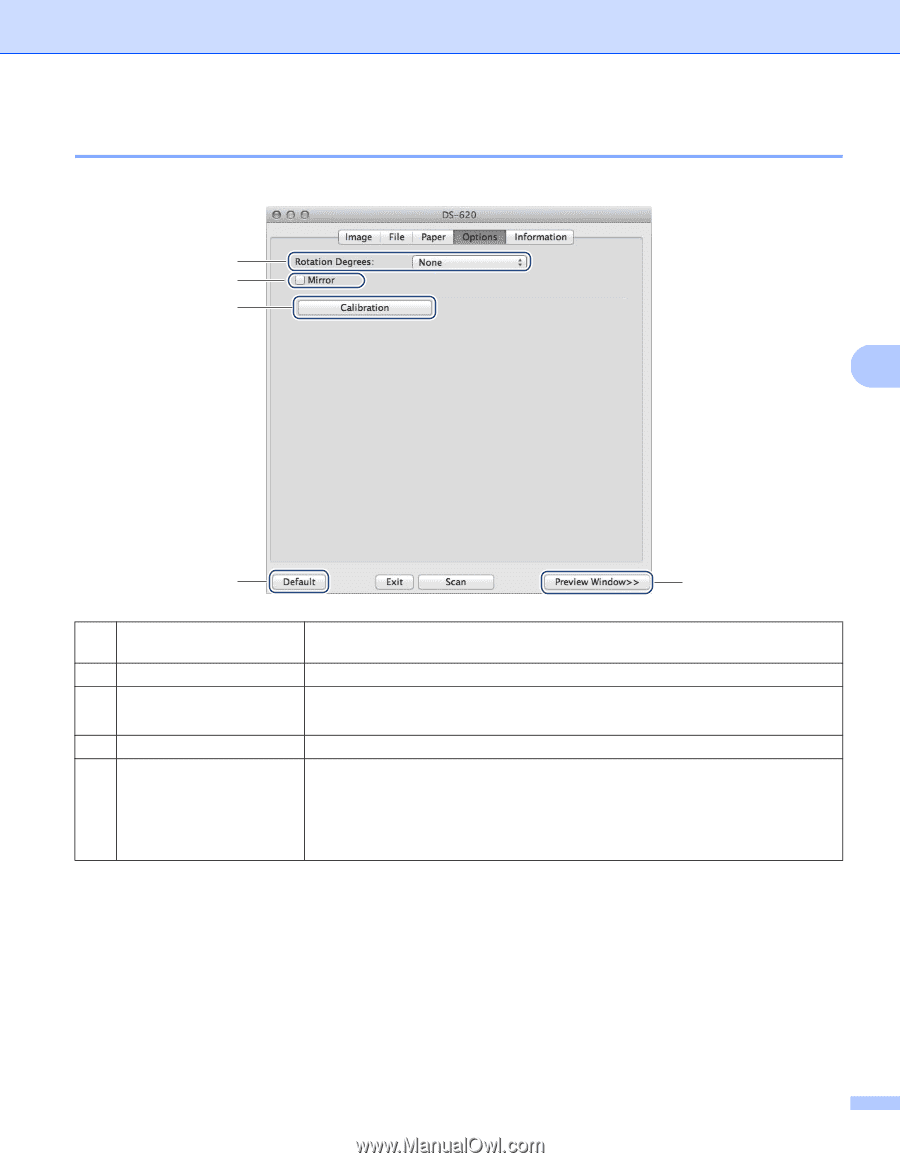
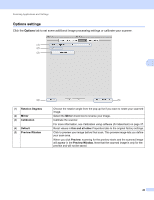
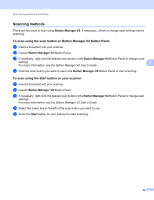
Scanning Applications and Settings Options settings Click the Options tab to set some additional image processing settings or calibrate your scanner. (1) (2) (3) 5 (4) (1) Rotation Degrees (2) Mirror (3) Calibration (4) Default (5) Preview Window (5) Choose the rotation angle from the pop-up list if you want to rotate your scanned image. Select the Mirror check box to reverse your image. Calibrate the scanner. For more information, see Calibration using software (for Macintosh) on page 37. Reset values in this and all other Properties tabs to the original factory settings. Click to preview your image before final scan. This preview image lets you define your scan area. When you click Preview, scanning for the preview starts and the scanned image will appear in the Preview Window. Note that the scanned image is only for the preview and will not be saved. 26
-
 1
1 -
2
-
3
-
4
-
5
-
6
-
7
-
8
-
9
-
10
-
11
-
12
-
13
-
14
-
15
-
16
-
17
-
18
-
19
-
20
-
21
-
22
-
23
-
24
-
25
-
 26
26 -
 27
27 -
 28
28 -
 29
29 -
 30
30 -
 31
31 -
 32
32 -
 33
33 -
 34
34 -
 35
35 -
 36
36 -
37
-
38
-
39
-
40
-
41
-
42
-
43
-
44
-
45
-
46
-
47
-
48
-
49
-
50
-
51
-
52
-
53
-
54
-
55
-
56
-
57
-
58
 |
 |