Brother International DS-620 Users Guide - Page 30
Paper settings, Paper
 |
View all Brother International DS-620 manuals
Add to My Manuals
Save this manual to your list of manuals |
Page 30 highlights
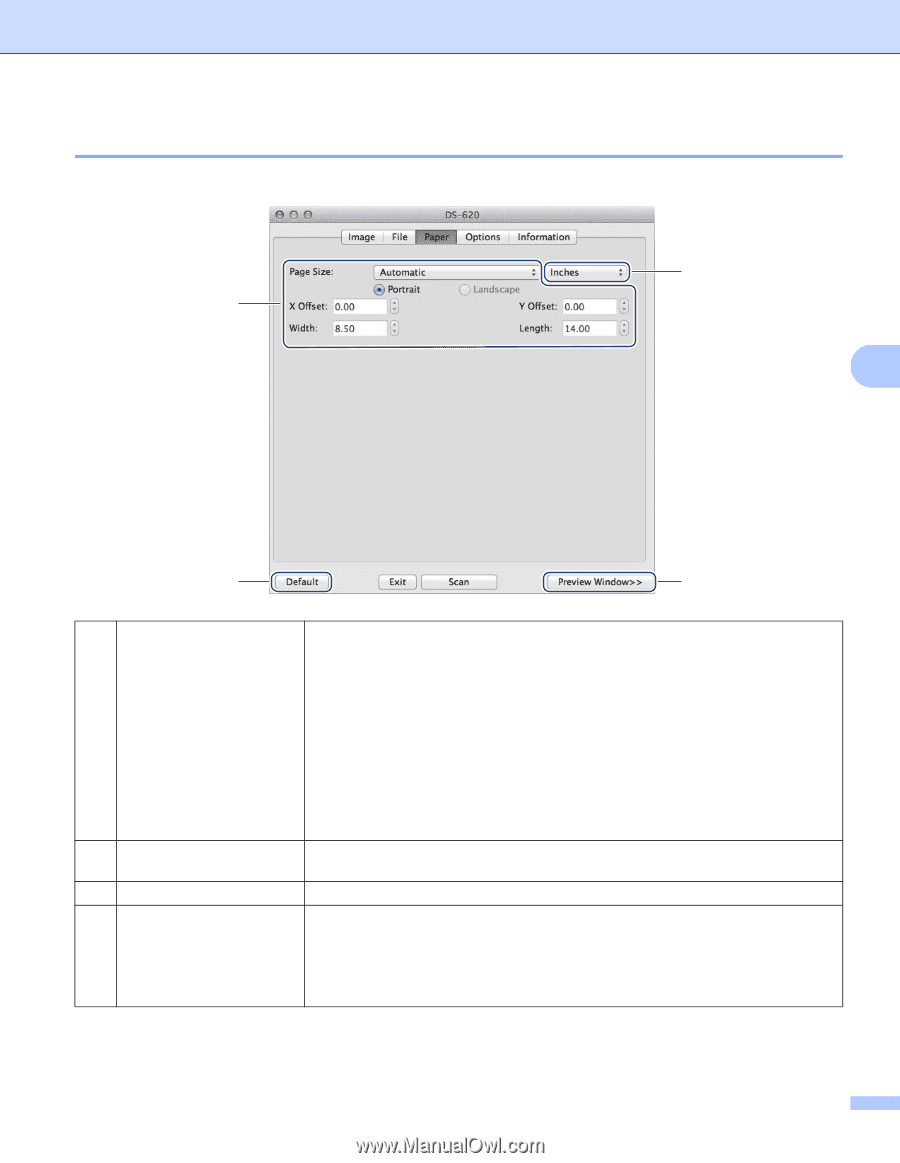
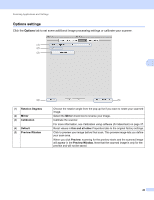
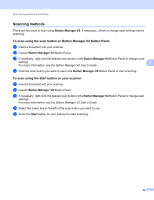
Scanning Applications and Settings Paper settings Click the Paper tab to define values related to image output. (1) (2) 5 (3) (1) Page Size (2) Unit (3) Default (4) Preview Window (4) Page Size allows you to capture a portion of the scanned document. Choose your paper size from the Page Size pop-up list, define the X Offset and Y Offset values or specify Width and Length to define your scanned area. Click Preview Window (4) to preview image placement as you change the values. • X Offset - the distance from the left edge of the document to the left edge of the scanned area. • Y Offset - the distance from the top edge of the document to the top edge of the scanned area. • Width - the width of the scanned area. • Length - the length of the scanned area. Unit allows you to define your preferred measurement system. Select Inches, Millimeters, or Pixels from the pop-up list. Reset values in this and all other Properties tabs to the original factory settings. Click to preview your image before final scan. This preview image lets you define your scan area. When you click Preview, scanning for the preview starts and the scanned image will appear in the Preview Window. Note that the scanned image is only for the preview and will not be saved. 25
-
 1
1 -
2
-
3
-
4
-
5
-
6
-
7
-
8
-
9
-
10
-
11
-
12
-
13
-
14
-
15
-
16
-
17
-
18
-
19
-
20
-
21
-
22
-
23
-
24
-
 25
25 -
 26
26 -
 27
27 -
 28
28 -
 29
29 -
 30
30 -
 31
31 -
 32
32 -
 33
33 -
 34
34 -
 35
35 -
36
-
37
-
38
-
39
-
40
-
41
-
42
-
43
-
44
-
45
-
46
-
47
-
48
-
49
-
50
-
51
-
52
-
53
-
54
-
55
-
56
-
57
-
58
 |
 |