Brother International HL-6180DW Network User's Guide - English - Page 18
Wireless configuration temporarily using a USB cable (Recommended for Windows®), Important - factory reset
 |
View all Brother International HL-6180DW manuals
Add to My Manuals
Save this manual to your list of manuals |
Page 18 highlights
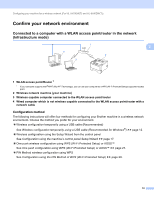
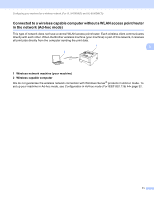
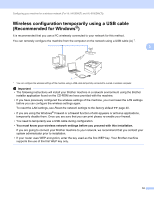
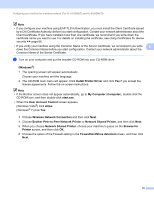
Configuring your machine for a wireless network (For HL-5470DW(T) and HL-6180DW(T)) Wireless configuration temporarily using a USB cable (Recommended for Windows®) It is recommended that you use a PC wirelessly connected to your network for this method. You can remotely configure the machine from the computer on the network using a USB cable (A) 1. 3 3 A 1 You can configure the wireless settings of the machine using a USB cable temporarily connected to a wired or wireless computer. Important • The following instructions will install your Brother machine in a network environment using the Brother installer application found on the CD-ROM we have provided with the machine. • If you have previously configured the wireless settings of the machine, you must reset the LAN settings before you can configure the wireless settings again. To reset the LAN settings, see Reset the network settings to the factory default uu page 40. • If you are using the Windows® Firewall or a firewall function of anti-spyware or antivirus applications, temporarily disable them. Once you are sure that you can print please re-enable your firewall. • You need to temporarily use a USB cable during configuration. • You must know your wireless network settings before you proceed with this installation. If you are going to connect your Brother machine to your network, we recommend that you contact your system administrator prior to installation. • If your router uses WEP encryption, enter the key used as the first WEP key. Your Brother machine supports the use of the first WEP key only. 12
-
 1
1 -
2
-
3
-
4
-
5
-
6
-
7
-
8
-
9
-
10
-
11
-
12
-
 13
13 -
 14
14 -
 15
15 -
 16
16 -
 17
17 -
 18
18 -
 19
19 -
 20
20 -
 21
21 -
 22
22 -
 23
23 -
24
-
25
-
26
-
27
-
28
-
29
-
30
-
31
-
32
-
33
-
34
-
35
-
36
-
37
-
38
-
39
-
40
-
41
-
42
-
43
-
44
-
45
-
46
-
47
-
48
-
49
-
50
-
51
-
52
-
53
-
54
-
55
-
56
-
57
-
58
-
59
-
60
-
61
-
62
-
63
-
64
-
65
-
66
-
67
-
68
-
69
-
70
-
71
-
72
-
73
-
74
-
75
-
76
-
77
-
78
-
79
-
80
-
81
-
82
-
83
-
84
-
85
-
86
-
87
-
88
-
89
-
90
-
91
-
92
-
93
-
94
-
95
-
96
-
97
-
98
-
99
-
100
-
101
-
102
-
103
-
104
-
105
-
106
-
107
-
108
-
109
-
110
-
111
-
112
-
113
-
114
-
115
-
116
-
117
-
118
-
119
-
120
 |
 |
