Brother International HL-6180DW Network User's Guide - English - Page 39
Using a New SSID
 |
View all Brother International HL-6180DW manuals
Add to My Manuals
Save this manual to your list of manuals |
Page 39 highlights
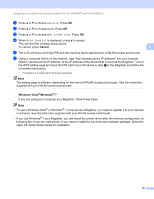
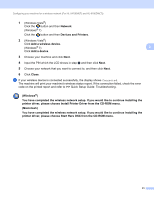
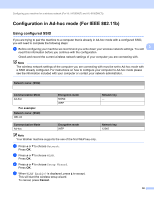
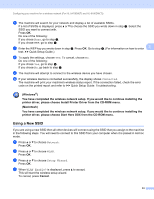
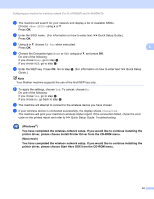
Configuring your machine for a wireless network (For HL-5470DW(T) and HL-6180DW(T)) f The machine will search for your network and display a list of available SSIDs. If a list of SSIDs is displayed, press a or b to choose the SSID you wrote down in step a. Select the SSID you want to connect with. Press OK. Do one of the following: If you chose None, go to step i. If you chose WEP, go to step g. g Enter the WEP key you wrote down in step a. Press OK. Go to step h. (For information on how to enter 3 text: uu Quick Setup Guide.) h To apply the settings, choose Yes. To cancel, choose No. Do one of the following: If you chose Yes, go to step i. If you chose No, go back to step f. i The machine will attempt to connect to the wireless device you have chosen. j If your wireless device is connected successfully, the display shows Connected. The machine will print your machine's wireless status report. If the connection failed, check the error code on the printed report and refer to uu Quick Setup Guide: Troubleshooting. (Windows®) You have completed the wireless network setup. If you would like to continue installing the printer driver, please choose Install Printer Driver from the CD-ROM menu. (Macintosh) You have completed the wireless network setup. If you would like to continue installing the printer driver, please choose Start Here OSX from the CD-ROM menu. Using a New SSID 3 If you are using a new SSID then all other devices will connect using the SSID that you assign to the machine in the following steps. You will need to connect to this SSID from your computer when it is placed in Ad-hoc mode. a Press a or b to choose Network. Press OK. b Press a or b to choose WLAN. Press OK. c Press a or b to choose Setup Wizard. Press OK. d When WLAN Enable? is displayed, press a to accept. This will start the wireless setup wizard. To cancel, press Cancel. 33
-
 1
1 -
2
-
3
-
4
-
5
-
6
-
7
-
8
-
9
-
10
-
11
-
12
-
13
-
14
-
15
-
16
-
17
-
18
-
19
-
20
-
21
-
22
-
23
-
24
-
25
-
26
-
27
-
28
-
29
-
30
-
31
-
32
-
33
-
 34
34 -
 35
35 -
 36
36 -
 37
37 -
 38
38 -
 39
39 -
 40
40 -
 41
41 -
 42
42 -
 43
43 -
 44
44 -
45
-
46
-
47
-
48
-
49
-
50
-
51
-
52
-
53
-
54
-
55
-
56
-
57
-
58
-
59
-
60
-
61
-
62
-
63
-
64
-
65
-
66
-
67
-
68
-
69
-
70
-
71
-
72
-
73
-
74
-
75
-
76
-
77
-
78
-
79
-
80
-
81
-
82
-
83
-
84
-
85
-
86
-
87
-
88
-
89
-
90
-
91
-
92
-
93
-
94
-
95
-
96
-
97
-
98
-
99
-
100
-
101
-
102
-
103
-
104
-
105
-
106
-
107
-
108
-
109
-
110
-
111
-
112
-
113
-
114
-
115
-
116
-
117
-
118
-
119
-
120
 |
 |