Canon CanoScan N1240U CanoScan N670U/N676U/N1240U Toolbox3.0 for Win/Mac Guide - Page 17
Copy Settings 5/5
 |
View all Canon CanoScan N1240U manuals
Add to My Manuals
Save this manual to your list of manuals |
Page 17 highlights
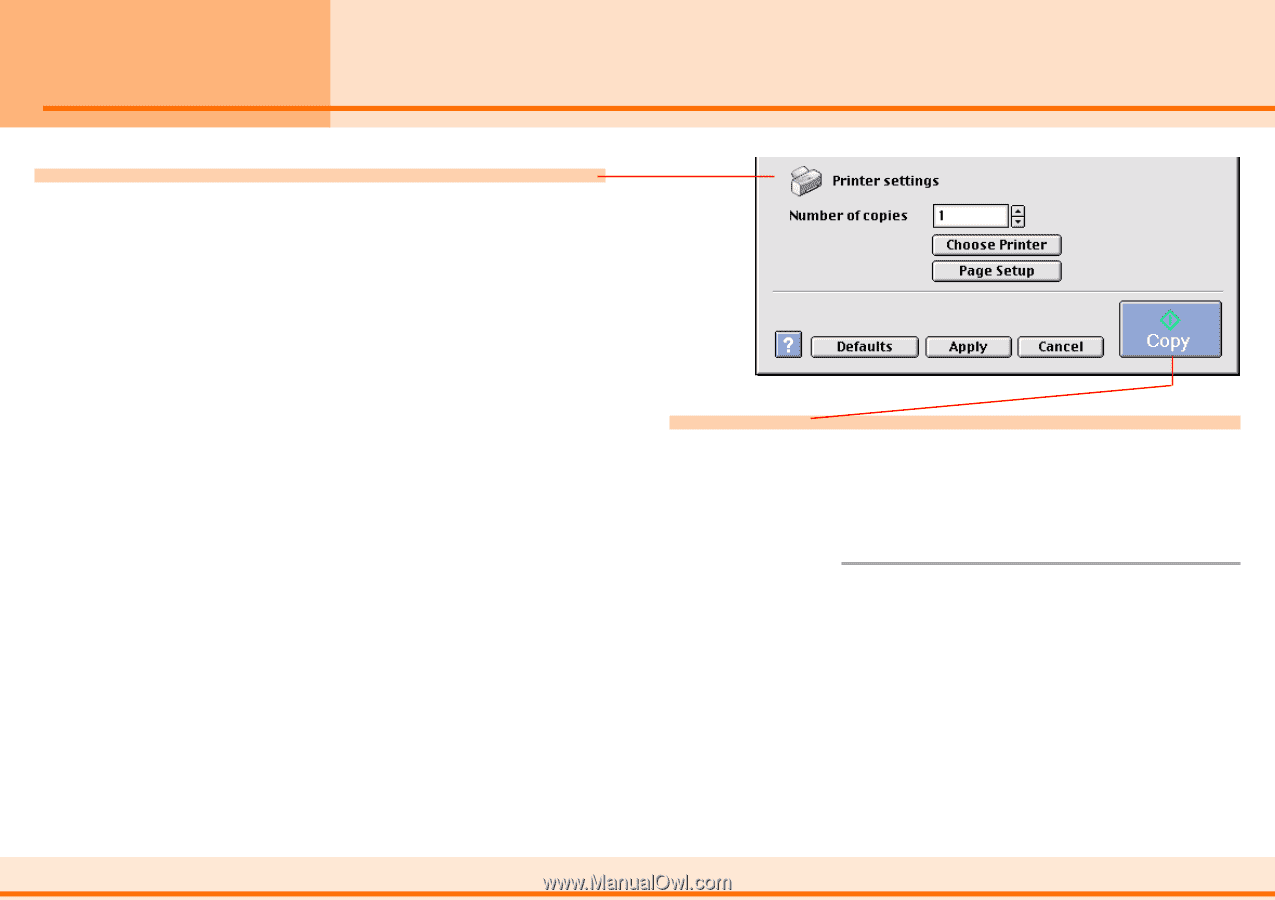
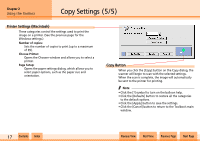
Chapter 2 Using the Toolbox Copy Settings (5/5) Printer Settings (Macintosh) These categories control the settings used to print the image on a printer. (See the previous page for the Windows settings.) Number of copies: Sets the number of copies to print (up to a maximum of 99). Choose Printer: Opens the Chooser window and allows you to select a printer. Page Setup: Opens the paper settings dialog, which allows you to select paper options, such as the paper size and orientation. Copy Button When you click the [Copy] button on the Copy dialog, the scanner will begin to scan with the selected settings. When the scan is complete, the image will automatically be sent to the printer for printing. f Note • Click the [?] symbol to turn on the balloon help. • Click the [Defaults] button to restore all the categories to the default options. • Click the [Apply] button to save the settings. • Click the [Cancel] button to return to the Toolbox's main window. w w 17 Contents Index Previous View Next View Previous Page Next Page
-
 1
1 -
2
-
3
-
4
-
5
-
6
-
7
-
8
-
9
-
10
-
11
-
 12
12 -
 13
13 -
 14
14 -
 15
15 -
 16
16 -
 17
17 -
 18
18 -
 19
19 -
 20
20 -
 21
21 -
 22
22 -
23
-
24
-
25
-
26
-
27
-
28
-
29
-
30
-
31
-
32
-
33
-
34
-
35
-
36
-
37
-
38
-
39
-
40
-
41
-
42
-
43
-
44
-
45
-
46
-
47
-
48
-
49
-
50
-
51
 |
 |