Canon CanoScan N1240U CanoScan N670U/N676U/N1240U Toolbox3.0 for Win/Mac Guide - Page 33
Save Settings 4/4
 |
View all Canon CanoScan N1240U manuals
Add to My Manuals
Save this manual to your list of manuals |
Page 33 highlights
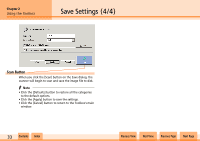
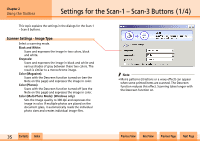
Chapter 2 Using the Toolbox Save Settings (4/4) Scan Button When you click the [Scan] button on the Save dialog, the scanner will begin to scan and save the image file to disk. f Note • Click the [Defaults] button to restore all the categories to the default options. • Click the [Apply] button to save the settings. • Click the [Cancel] button to return to the Toolbox's main window. w w 33 Contents Index Previous View Next View Previous Page Next Page
-
 1
1 -
2
-
3
-
4
-
5
-
6
-
7
-
8
-
9
-
10
-
11
-
12
-
13
-
14
-
15
-
16
-
17
-
18
-
19
-
20
-
21
-
22
-
23
-
24
-
25
-
26
-
27
-
 28
28 -
 29
29 -
 30
30 -
 31
31 -
 32
32 -
 33
33 -
 34
34 -
 35
35 -
 36
36 -
 37
37 -
 38
38 -
39
-
40
-
41
-
42
-
43
-
44
-
45
-
46
-
47
-
48
-
49
-
50
-
51
 |
 |

wwww
ww
Contents
Index
Previous View
Next View
Previous Page
Next Page
33
Chapter 2
Using the Toolbox
Save Settings (4/4)
Scan Button
When you click the [Scan] button on the Save dialog, the
scanner will begin to scan and save the image file to disk.
f
Note
• Click the [Defaults] button to restore all the categories
to the default options.
• Click the [Apply] button to save the settings.
• Click the [Cancel] button to return to the Toolbox’s main
window.