Canon CanoScan N1240U CanoScan N670U/N676U/N1240U Toolbox3.0 for Win/Mac Guide - Page 24
Mail Settings 6/6
 |
View all Canon CanoScan N1240U manuals
Add to My Manuals
Save this manual to your list of manuals |
Page 24 highlights
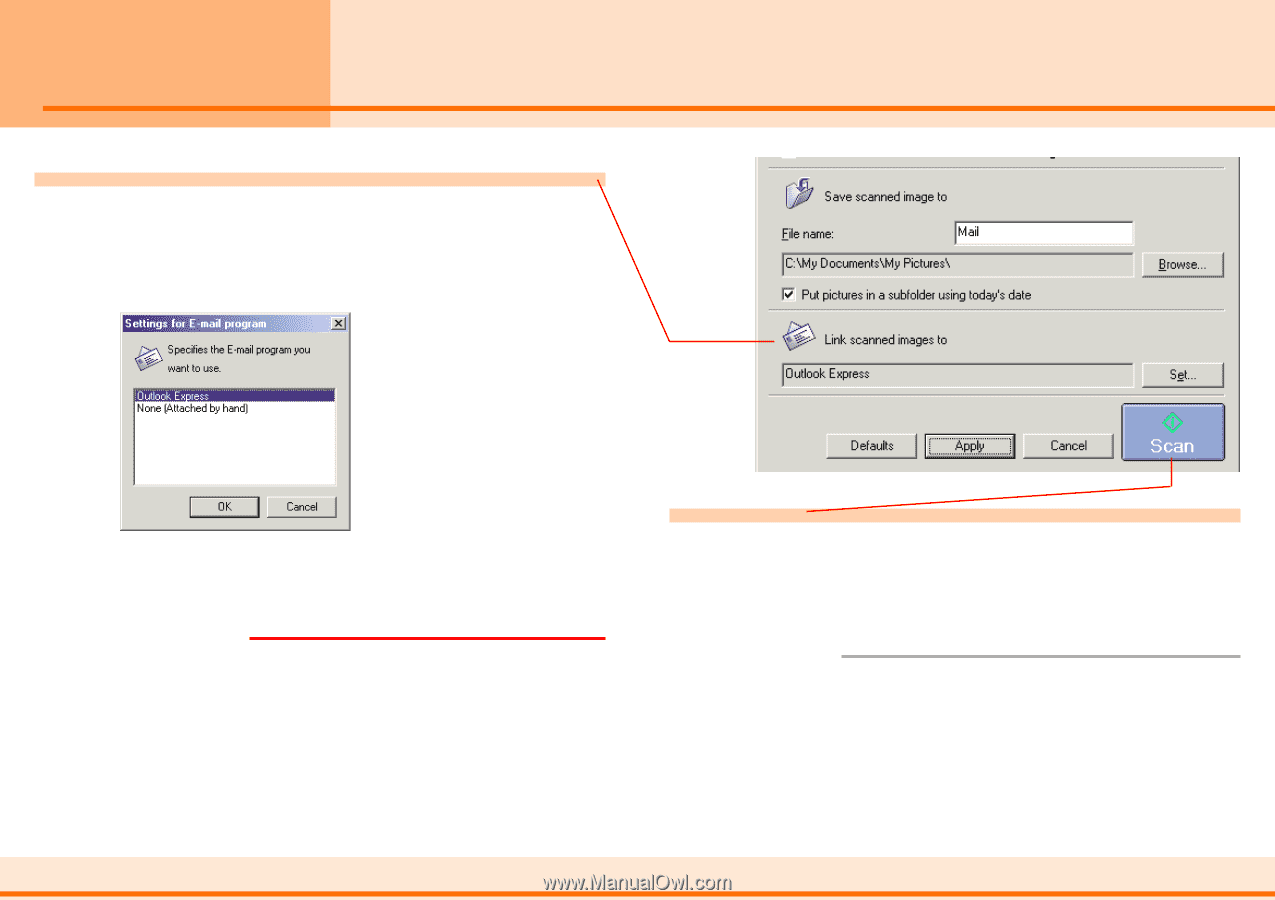
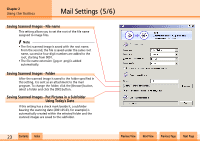
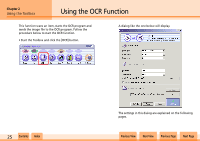
Chapter 2 Using the Toolbox Mail Settings (6/6) Link Scanned Images to This setting selects the mail program to which the image files are sent. The name of the mail program in use will appear in the box. If no mail program is displayed or you wish to select a different program, click the [Set...] button Select the mail program you wish to use from the dialog and click the [OK] button. If your mail program does not appear in the list, select the None (Attached by hand) option. With this option, you must follow the standard procedure for your mail program for attaching an image file to a message. e Important • With Windows, the mail programs that you link to the Toolbox must be MAPI-compliant. You can link widely distributed programs, such as Microsoft Outlook Express, Microsoft Outlook and Eudora. With some mail programs, you may also be required to enable the "MAPI" settings in the program itself. w w 24 Contents Index Scan Button When you click the [Scan] button on the Mail dialog, the scanner will begin to scan. When the scan is complete, the mail program will open automatically and display a new mail message with the image file attached. f Note • Click the [Defaults] button to restore all the categories to the default options. • Click the [Apply] button to save the settings. • Click the [Cancel] button to return to the Toolbox's main window. Previous View Next View Previous Page Next Page
-
 1
1 -
2
-
3
-
4
-
5
-
6
-
7
-
8
-
9
-
10
-
11
-
12
-
13
-
14
-
15
-
16
-
17
-
18
-
 19
19 -
 20
20 -
 21
21 -
 22
22 -
 23
23 -
 24
24 -
 25
25 -
 26
26 -
 27
27 -
 28
28 -
 29
29 -
30
-
31
-
32
-
33
-
34
-
35
-
36
-
37
-
38
-
39
-
40
-
41
-
42
-
43
-
44
-
45
-
46
-
47
-
48
-
49
-
50
-
51
 |
 |