Canon CanoScan N1240U CanoScan N670U/N676U/N1240U Toolbox3.0 for Win/Mac Guide - Page 38
Settings for the Scan-1 - Scan-3 Buttons 4/4
 |
View all Canon CanoScan N1240U manuals
Add to My Manuals
Save this manual to your list of manuals |
Page 38 highlights
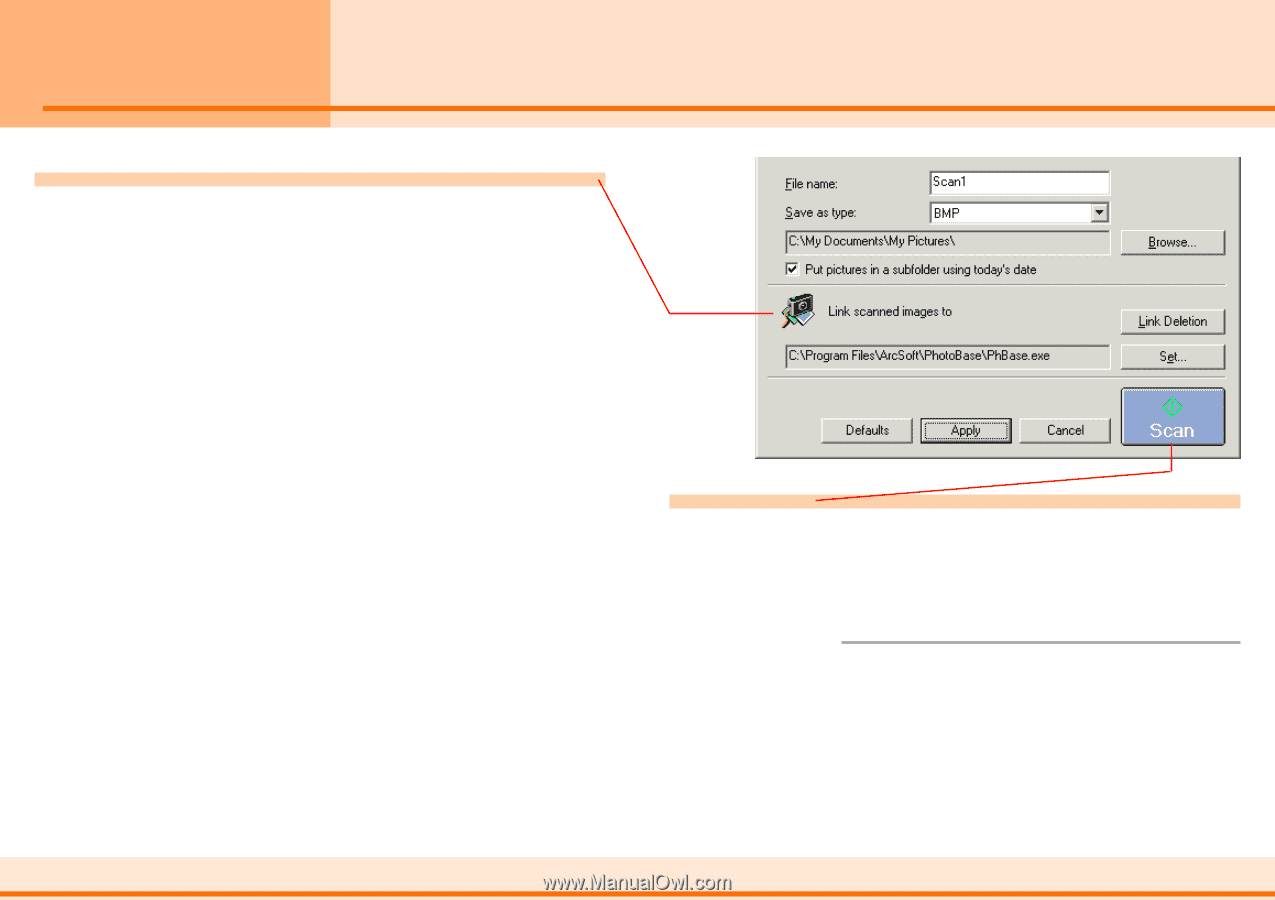
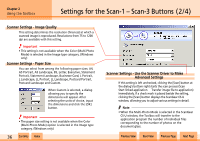
Chapter 2 Using the Toolbox Settings for the Scan-1 - Scan-3 Buttons (4/4) Link Scanned Images To This setting allows you to set the application program associated with the button. The name of the application program in use will appear in the box. If you wish to link a different program, click the [Set...] button. Select the application program and click the [OK] button. j For details, see the "Linking to Other Application Programs" topic in Chapter 4 . w w 38 Contents Index Scan Button When you click the [Scan] button on the dialog, the scanner will begin to scan. When the scan is complete, the application program will start automatically and open the image file. f Note • Click the [Defaults] button to restore all the categories to the default options. • Click the [Apply] button to save the settings. • Click the [Cancel] button to return to the Toolbox's main window. Previous View Next View Previous Page Next Page
-
 1
1 -
2
-
3
-
4
-
5
-
6
-
7
-
8
-
9
-
10
-
11
-
12
-
13
-
14
-
15
-
16
-
17
-
18
-
19
-
20
-
21
-
22
-
23
-
24
-
25
-
26
-
27
-
28
-
29
-
30
-
31
-
32
-
 33
33 -
 34
34 -
 35
35 -
 36
36 -
 37
37 -
 38
38 -
 39
39 -
 40
40 -
 41
41 -
 42
42 -
 43
43 -
44
-
45
-
46
-
47
-
48
-
49
-
50
-
51
 |
 |