Canon CanoScan N670U CanoScan N670U/N676U/N1240U ScanGear CS-U 6.2 for Win/Mac - Page 27
Resolution, Edit Image Type Button
 |
View all Canon CanoScan N670U manuals
Add to My Manuals
Save this manual to your list of manuals |
Page 27 highlights
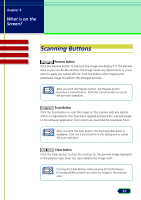
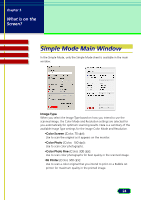
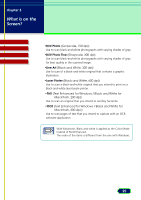
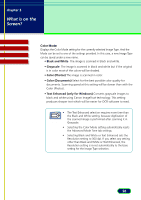
chapter 3 What is on the Screen? Contents Troubleshooting Glossary Index Resolution Displays the Resolution setting for the currently selected Image Type. And the Resolution can be set to one of the settings provided. In this case, a new Image Type can be saved under a new name. Edit Image Type Button Click the down-arrow for Image Type and select Custom (or select a previously saved custom selection) and click the Edit Image Type button to open the Image Type Settings dialog box. You can create and save up to 12 custom settings of your own. The Edit Image Type button is not enabled until you select Custom (or a custom setting previously saved) from the Image Note Type drop-down list. This button is also enabled after you select one of the pre-defined Image Types and change the Color Mode or the Resolution setting. 27
-
 1
1 -
2
-
3
-
4
-
5
-
6
-
7
-
8
-
9
-
10
-
11
-
12
-
13
-
14
-
15
-
16
-
17
-
18
-
19
-
20
-
21
-
 22
22 -
 23
23 -
 24
24 -
 25
25 -
 26
26 -
 27
27 -
 28
28 -
 29
29 -
 30
30 -
 31
31 -
 32
32 -
33
-
34
-
35
-
36
-
37
-
38
-
39
-
40
-
41
-
42
-
43
-
44
-
45
-
46
-
47
-
48
-
49
-
50
-
51
-
52
-
53
-
54
-
55
-
56
-
57
-
58
-
59
-
60
-
61
-
62
-
63
-
64
-
65
-
66
-
67
-
68
-
69
-
70
-
71
-
72
-
73
-
74
-
75
-
76
-
77
-
78
-
79
-
80
-
81
-
82
-
83
-
84
-
85
-
86
-
87
-
88
-
89
-
90
-
91
-
92
-
93
-
94
-
95
-
96
-
97
-
98
-
99
-
100
-
101
-
102
-
103
-
104
-
105
-
106
-
107
-
108
-
109
 |
 |
