Canon PIXMA iP6310D Direct Printing Guide
Canon PIXMA iP6310D Manual
 |
View all Canon PIXMA iP6310D manuals
Add to My Manuals
Save this manual to your list of manuals |
Canon PIXMA iP6310D manual content summary:
- Canon PIXMA iP6310D | Direct Printing Guide - Page 1
Photo Printer Series Direct Printing Guide - Canon PIXMA iP6310D | Direct Printing Guide - Page 2
Photo Printer Direct Printing Guide - Canon PIXMA iP6310D | Direct Printing Guide - Page 3
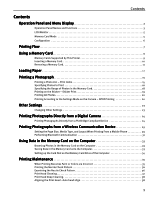
Using a Memory Card 9 Memory Cards Supported by This Printer 9 Inserting a Memory Card 10 Removing a Memory Card 11 Loading Paper 12 Printing a Photograph 15 Printing a Photo List - Print Index 15 Specifying Photos to Print 16 Specifying the Range of Photos in the Memory Card 18 Printing on - Canon PIXMA iP6310D | Direct Printing Guide - Page 4
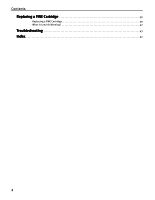
Contents Replacing a FINE Cartridge 39 Replacing a FINE Cartridge 39 What is Low Ink Warning 42 Troubleshooting 43 Index 52 2 - Canon PIXMA iP6310D | Direct Printing Guide - Page 5
10) (11) (12) (1) POWER Button Press to turn the printer on or off. POWER Lamp Off: the printer is turned off. Lighting: the printer is ready to print, is currently printing, or is currently initializing. Flashing: the printer is preparing to turn on or off. (2) Alarm Lamp Lighting: an error Photos - Canon PIXMA iP6310D | Direct Printing Guide - Page 6
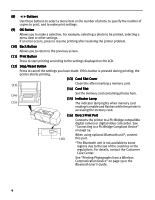
selection. For example, selecting a photo to be printed, selecting a menu item or other settings. If an error occurs, press to resume printing after resolving the printer problem. (10) Back Button Allows you to return a Wireless Communication Device" on page 29 or the Bluetooth User's Guide. 4 - Canon PIXMA iP6310D | Direct Printing Guide - Page 7
Mode screens appear on the LCD. By using button, you can select the following modes. INDEX See "Printing a Photo List - Print Index" on page 15. PRINT ALL PHOTOS See "Printing All Photos" on page 20. SELECT PHOTO See "Specifying Photos to Print" on page 16. SELECT RANGE See "Specifying the Range of - Canon PIXMA iP6310D | Direct Printing Guide - Page 8
MAINTENANCE QUIET MODE NOZZLE CHECK See "Other Settings" on page 23. See "Printing the Nozzle Check Pattern" on WIRELESS SETTINGS Auto head align" on page 38. ALIGN PRINT HEAD See "Adjusting the Print Head Manually" on page 44. HEAD ALIGN PRINT See "Aligning the Print Head - Auto head align - Canon PIXMA iP6310D | Direct Printing Guide - Page 9
Printing Flow This is the procedure for printing photos from the memory card inserted in the card slot of the printer. Print a Photo List of All Photos in the Memory Card Step 1 Turn on the Printer. Step 2 Load the paper. See "Loading Paper" on page 12. Step 3 Insert the memory card. See "Using a - Canon PIXMA iP6310D | Direct Printing Guide - Page 10
in the Memory Card" on page 18. STICKR You can print your favorite photo on the Canon Photo Stickers. See "Printing on the Sticker - Sticker Print" on page 19. DPOF Prints photos according to the DPOF settings set on the digital camera. See "Printing According to the Settings Made on the Camera - Canon PIXMA iP6310D | Direct Printing Guide - Page 11
and remove them. Memory Cards Supported by This Printer Supported memory cards are as follows: Photos stored in a memory card not supported by the digital camera may fail in loading or be damaged. For types of memory cards supported by the digital camera, refer to your digital camera user's manual - Canon PIXMA iP6310D | Direct Printing Guide - Page 12
, use the special adapter. Do not try to insert the memory card into the card slot any further than the position it stops; otherwise the printer or the memory card will be damaged - Canon PIXMA iP6310D | Direct Printing Guide - Page 13
stored in the memory card, be sure to print photos from the computer. Using the operation panel to print photos may result in improper printing. Removing a Memory Card If you use the printer connected to your computer, follow the instructions for removal of the memory card from the computer. For - Canon PIXMA iP6310D | Direct Printing Guide - Page 14
than 105 gsm or 28 lb) *non-Canon genuine paper •Picture postcards •Postcards with an affixed photos or stickers •Envelopes •Any type of paper In this example, description is provided using Photo Paper Plus Glossy 4" x 6"/101.6 x 152.4 mm in your printer. See "Media Types for Card Direct Printing - Canon PIXMA iP6310D | Direct Printing Guide - Page 15
paper. (1) Open the paper support and the extension. (3) Set direction of the photo. (2) Align the paper stack snug against the right side of the auto sheet feeder. (3) Pinch the paper guide and slide it ink dries. For specific drying times, refer to the instructions packaged with your media. 13 - Canon PIXMA iP6310D | Direct Printing Guide - Page 16
for Card Direct Printing You can use the following Canon genuine paper: Media Type Paper Support Load Limit PAGE SIZE MEDIA TYPE Plain Paper Photo Paper Pro*1 A4/Letter: up to 100 sheets [A4]/[8.5"x11"] [PLAIN PAPER] A4/Letter: up to 10 sheets 101.6 x 152.4 mm/4" x 6": up to 20 sheets [A4 - Canon PIXMA iP6310D | Direct Printing Guide - Page 17
Let's print a photo list of all photos in the memory card at first. Printing a Photo List - Print Index 1 Prepare to print. (1) Turn on the printer. (2) Load the paper. See "Loading Paper" on page 12. (3) Insert the memory card in the card slot. See "Inserting a Memory Card" on page 10. 2 Select the - Canon PIXMA iP6310D | Direct Printing Guide - Page 18
from the Memory Card Mode. (1) Press the Menu button. (2) Use the buttons to select SELECT PHOTO and then press the OK button. 3 Specify the photos to print. (1) Select the photo (the file number) from the printed photo list. (2) Use the buttons to select a file number and then press the OK button - Canon PIXMA iP6310D | Direct Printing Guide - Page 19
Check and then press the OK button. Selecting SET allows you to optimize photos with various functions. For details, see "Print Setting Items" on page 22 you save the settings, the saved settings are loaded when the printer is turned on. 1. Press the Configuration button repeatedly to select SAVE - Canon PIXMA iP6310D | Direct Printing Guide - Page 20
the earliest shooting date and then press the OK button. (2) Use the buttons to specify the latest shooting date and then press the OK button. 5 Check the print setting items. See "Specifying Photos to Print" on page 16. 6 Start printing. Press the Print button. 18 - Canon PIXMA iP6310D | Direct Printing Guide - Page 21
Printing on the Sticker - Sticker Print You can print your favorite photo on the Canon Photo Stickers. 1 Print a photo list. See "Printing a Photo List - Print Index" on page 15. 2 Select the STICKR from the Memory Card Mode. (1) Press the Menu button. (2) Use the buttons to select STICKR and - Canon PIXMA iP6310D | Direct Printing Guide - Page 22
ALL PHOTOS and then press the OK button. 3 Check the print setting items. See "Specifying Photos to the camera, photos are printed automatically according to those settings. This printer allows you to trimming/rotation, etc.) are not supported. Photos are automatically scaled according to the - Canon PIXMA iP6310D | Direct Printing Guide - Page 23
1 Prepare to print. See "Printing a Photo List - Print Index" on page 15. 2 Select the DPOF from the Memory Card Mode. (1) Press the Menu button. (2) Use the buttons to select DPOF and then press the OK button. 3 Check the print setting items. See "Specifying Photos to Print" on page 16. 4 Start - Canon PIXMA iP6310D | Direct Printing Guide - Page 24
This function reduces the noise on blue areas like the sky as well as on black areas. FACE BRIGHT This function brightens a darkened face on the photo taken against the light. OPTIMIZER Corrects the contours and smooths out the jaggedness. BRIGHTNESS Adjust brightness. -2, -1, 0, +1, +2 CONTRAST - Canon PIXMA iP6310D | Direct Printing Guide - Page 25
. If you are printing with your computer connected, specify the required settings in the printer driver. Date Display Format You can change the format for printing the date. (1) Press the Configuration button repeatedly to select OTHERS. (2) Use the buttons to select DATE/TIME SETUP and then press - Canon PIXMA iP6310D | Direct Printing Guide - Page 26
devices, or the Bluetooth unit (option) to the direct print port of the printer. If you do so, electric shock, fire, or damage to the device could result. When producing photos with the digital device connected to the printer, it is advisable to use the AC adapter supplied with the device. If you - Canon PIXMA iP6310D | Direct Printing Guide - Page 27
connecting the device. You may also have to turn on the device or select Play mode manually after connecting the device to the printer. Perform necessary operations according to the instruction manual supplied with your device. (1) Ensure that the device is turned off. (2) Connect the camera to the - Canon PIXMA iP6310D | Direct Printing Guide - Page 28
displayed on Canon PictBridge compliant devices are used in the description given below. Different names may be displayed on your device depending on the brand or model. For details, refer to your device's instruction manual. About Image Data Format for Printing This printer accepts images* taken - Canon PIXMA iP6310D | Direct Printing Guide - Page 29
Paper loaded in printer 10 x 15 cm/4" x 6" Photo Photo Paper Plus Glossy Fast Photo Photo Paper Pro Photo Photo Paper Plus Semi-Gloss 13 x 18 cm/5" x 7"*2 A4/8.5" x 11" (Letter)*3*4 Photo Photo Photo Photo Glossy Photo Paper Photo Stickers*1 Photo Paper Plus Glossy Photo Paper Plus Glossy - Canon PIXMA iP6310D | Direct Printing Guide - Page 30
and printer, follow the device instructions given in the Instruction manual. Controls of the digital camera cannot be used for the following: - Print quality setting - Printer maintenance For the device operation method and troubleshooting, refer to your device's manual. For print error messages - Canon PIXMA iP6310D | Direct Printing Guide - Page 31
printer, you can also print photos through Bluetooth communication. For details, refer to the Bluetooth User's Guide. The mobile phone supporting the OPP (Object Push Profile) or BIP (Basic Imaging Profile) can print photos. For details of profiles, refer to your product's instruction manual. When - Canon PIXMA iP6310D | Direct Printing Guide - Page 32
OK button. 4 Confirm or change the settings. (1) Use the buttons to select the item to set and then press the OK button. The photos in the mobile phone can . When printing on Canon Photo Stickers, make the settings as below. PAGE SIZE STICKER MEDIA TYPE PHOTO PAPER PLUS LAYOUT STICKR x16 30 - Canon PIXMA iP6310D | Direct Printing Guide - Page 33
to your mobile phone manual. 1 Prepare to print. (1) Confirm the printer is ON. (2) Load printer "Canon iP6310D-1". • If you are required to enter the passkey, enter the initial value "0000". You can change the device name of the printer or passkey in Bluetooth settings on the printer. See "Changing - Canon PIXMA iP6310D | Direct Printing Guide - Page 34
you want to change and then press the OK button. Setting Items • DEVICE NAME: • ACCESS REFUSAL: • SECURITY: • PASSKEY: Select the device name of this printer displayed on the screen of the Bluetooth devices. When you set iP6310D-2, the printer name on the Bluetooth device is "Canon iP6310D-2". The - Canon PIXMA iP6310D | Direct Printing Guide - Page 35
. You can print the photos from Easy-PhotoPrint. To use the Easy-PhotoPrint Startup button, connect the printer to the computer and install the printer driver, Memory Card Utility, and EasyPhotoPrint. For more information on installation, refer to the Easy Setup Instructions. 1 Ensure that both the - Canon PIXMA iP6310D | Direct Printing Guide - Page 36
Windows XP/Windows 2000/Windows Me: My Pictures folder Windows 98: My Documents folder Mac OS X v.10.2.8 or later: Pictures folder Setting up the Card Slot as the Memory Card Drive of the Computer The card slot of the printer can also be used as the memory card drive of the computer. To use the card - Canon PIXMA iP6310D | Direct Printing Guide - Page 37
it into place again. See "Replacing a FINE Cartridge" on page 39. Step 1 "Printing the Nozzle Check Pattern" on page 36 Step 2 "Print Head Cleaning" on page 37 After print head cleaning, print the nozzle check pattern. If the problem remains after performing print head cleaning twice. Step - Canon PIXMA iP6310D | Direct Printing Guide - Page 38
is discharged properly. Examine the nozzle check pattern output by the printer. If the ink level is low, the nozzle check pattern is not printed properly. Stop printing the nozzle check pattern, and replace the FINE Cartridge. See "Replacing a FINE Cartridge" on page 39. 1 Confirm the printed nozzle - Canon PIXMA iP6310D | Direct Printing Guide - Page 39
If white stripes are found in the printed nozzle check pattern, perform the print head cleaning to unclog the print head nozzles. Cleaning the print head consumes ink, so perform the print head cleaning only when necessary. 1 Ensure that the printer is on. 2 Start print head cleaning. (1) Press the - Canon PIXMA iP6310D | Direct Printing Guide - Page 40
. See "Printing the Nozzle Check Pattern" on page 36. If the problem persists, perform the print head deep cleaning again. If the problem remains, the printer may have run out of ink. See "Replacing a FINE Cartridge" on page 39. If the problem continues to exist, the printer may be damaged. Contact - Canon PIXMA iP6310D | Direct Printing Guide - Page 41
, check the model number very carefully. The printer will not print properly if a wrong FINE Cartridge is used, or installed wrong. Color: CL-41 Photo: CL-52 The High Yield Color FINE Cartridge (CL-51) can be installed as option. Replacing a FINE Cartridge When a FINE Cartridge runs out of ink - Canon PIXMA iP6310D | Direct Printing Guide - Page 42
print head nozzles on a FINE Cartridge. The printer may not print out properly if you touch it. Electrical contacts 5 Install the new FINE Cartridge. Print head nozzles The Color FINE Cartridge should be installed into the left slot (C) and the Photo FINE Cartridge should be into the right slot - Canon PIXMA iP6310D | Direct Printing Guide - Page 43
off. To maintain optimal print quality, FINE Cartridge should be installed until the "recommended date of replacement". And, use up all ink in the FINE Cartridge within six months from its first use (We recommend that you take note of the date when the FINE Cartridge is installed to the printer). 41 - Canon PIXMA iP6310D | Direct Printing Guide - Page 44
level of ink and tells you that FINE Cartridges are running out of ink before printing. The ink counter considers as ink is full when new FINE Cartridge is installed, and then starts counting a remaining level of ink. For this, if old FINE Cartridge is installed, a remaining level of ink cannot be - Canon PIXMA iP6310D | Direct Printing Guide - Page 45
Alignment. Some FINE Cartridges are not installed in place. Install the FINE Cartridges in the appropriate positions. The printer has a built-in ink absorber to hold the ink used during print head cleaning, for example. This error message indicates that the ink absorber is nearly full. Press the OK - Canon PIXMA iP6310D | Direct Printing Guide - Page 46
OK button to clear the error, and then perform manual print head alignment. For details on manual print head alignment, see "Adjusting the Print Head Manually" on page 44. The FINE Cartridge may not be the compatible with this printer. Install the appropriate FINE Cartridge. If lines are misaligned - Canon PIXMA iP6310D | Direct Printing Guide - Page 47
is installed. If the specified FINE Cartridge is not used, good printing color quality cannot be expected. See "Replacing a FINE Cartridge" on page 39. On the operation panel, confirm that the media type selected matches the paper loaded. Print the nozzle check pattern to check for uneven ink output - Canon PIXMA iP6310D | Direct Printing Guide - Page 48
inside of the printer. (1) Ensure that the printer is turned on and ejected. If protrusions inside the printer are stained, wipe ink off the protrusions using a printer is turned on. If the paper is loaded in the printer, is loaded in the printer will feed through the printer and be ejected. (8) - Canon PIXMA iP6310D | Direct Printing Guide - Page 49
is curled, the paper may become dirty or not feed properly through the printer. Use the paper after correcting paper curl as follows. (1) Place the the opposite direction as shown in the figure below. (1) (2) *1 (3) Check the printing paper if paper curl is corrected within approximately 2 to 5 - Canon PIXMA iP6310D | Direct Printing Guide - Page 50
and turn it back on. The paper will be ejected automatically. (2) Reload the paper into the printer and press the OK button. If you cannot remove the paper or if the paper tears inside the printer, or if the paper jam error continues after removing the paper, contact the Customer Care Center. 48 - Canon PIXMA iP6310D | Direct Printing Guide - Page 51
, check the error message displayed on the LCD of the printer, and then clear it. For details, see "An Error Message is Displayed on the LCD" on page 43. Error message on camera Printer in use No paper Paper jam Paper lever error Printer cover open No printhead Waste tank (ink absorber*2) full - Canon PIXMA iP6310D | Direct Printing Guide - Page 52
same problem occurs, contact the Customer Care Center. FINE Cartridge errors have occurred. Replace the FINE Cartridge. See "Replacing a FINE Cartridge" on page 39. *1 To resume printing, you can press the OK button on the printer instead of selecting Continue. *2 The ink absorber absorbs ink used - Canon PIXMA iP6310D | Direct Printing Guide - Page 53
after connecting the device to the printer. Perform necessary operations according to the instruction manual supplied with your device. The print head nozzles may be clogged if printing becomes faint or colors are incorrect. See "When Printing Becomes Faint or Colors are Incorrect" on page 35. If - Canon PIXMA iP6310D | Direct Printing Guide - Page 54
Manually 44 Alarm Lamp 3 ALIGN PRINT HEAD 6, 44 Aligning the Print Head 38 AUTO HEAD ALIGN 6, 38 Auto sheet feeder 12 B BLUETOOTH SET 6 BORDERLESS PRINT 22 BORDERLESS PRINT (PictBridge 6, 26 BOTTOM CLEANING 6, 46 BRIGHTNESS 22 C Card slot 10 Card slot cover 10 CL-41 39 CL-51 39 CL - Canon PIXMA iP6310D | Direct Printing Guide - Page 55
NOISE 22 RESTORE DEFAULT 6, 23 ROLLER CLEANING 6, 46 S Save Button 3, 33 SAVE CONFGURATION 6, 17 SELECT PHOTO 5, 16 SELECT RANGE 5, 18 Specifying Photos to Print 16 Specifying the Range of Photos in the Memory Card .....18 STICKR 5, 19 T Trimming (PictBridge 27 V VIVID 22 W White Streaks - Canon PIXMA iP6310D | Direct Printing Guide - Page 56
54 - Canon PIXMA iP6310D | Direct Printing Guide - Page 57
The following FINE Cartridges are compatible with this printer. The following FINE Cartridge (High Yield) is compatible with this printer as an option. For details on FINE Cartridge replacement, refer to "Replacing a FINE Cartridge" in this guide. QT5-0325-V01 XXXXXXXX ©CANON INC.2006 PRINTED
-
 1
1 -
 2
2 -
 3
3 -
 4
4 -
 5
5 -
 6
6 -
 7
7 -
8
-
9
-
10
-
11
-
12
-
13
-
14
-
15
-
16
-
17
-
18
-
19
-
20
-
21
-
22
-
23
-
24
-
25
-
26
-
27
-
28
-
29
-
30
-
31
-
32
-
33
-
34
-
35
-
36
-
37
-
38
-
39
-
40
-
41
-
42
-
43
-
44
-
45
-
46
-
47
-
48
-
49
-
50
-
51
-
52
-
53
-
54
-
55
-
56
-
57
 |
 |

Photo Printer
Series
Direct Printing Guide
Direct Printing Guide
Direct Printing Guide
Direct Printing Guide