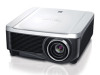
Canon REALiS WUX6000 D Pro AV User Manual - Page 118
Installation Procedure, Setting Up the Projector, Positioning the Projector in Front of the Screen
 |
View all Canon REALiS WUX6000 D Pro AV manuals
Add to My Manuals
Save this manual to your list of manuals |
Page 118 highlights
Installation Procedure Setting Up the Projector ■ Positioning the Projector in Front of the Screen Place the projector in front of the screen. • To avoid keystone distortion, install the projector so that it is at right angles to the screen. • The screen must not be exposed to direct sunlight or light from lighting equipment. In a bright room, it is recommended that lights be turned off, curtains be drawn, and other steps taken to make the screen easier to see. Screen Optical axis ■ Floor Installation To adjust the projection position when the projector is installed on the floor, use the lens shift function (P46, P129) to adjust up / down / left / right. You can also use the adjustable feet to incline the projector upward by up to 6°. For information about the relationship between screen size and projection distance, refer to page 125. Lens shift Adjustable feet ■ Installing the Projector in an Inclined Position To correct keystone distortion when the projector is tilted upward (using adjustable feet, for example), perform keystone correction (P144) or corner adjustment (P144). 118
-
 1
1 -
2
-
3
-
4
-
5
-
6
-
7
-
8
-
9
-
10
-
11
-
12
-
13
-
14
-
15
-
16
-
17
-
18
-
19
-
20
-
21
-
22
-
23
-
24
-
25
-
26
-
27
-
28
-
29
-
30
-
31
-
32
-
33
-
34
-
35
-
36
-
37
-
38
-
39
-
40
-
41
-
42
-
43
-
44
-
45
-
46
-
47
-
48
-
49
-
50
-
51
-
52
-
53
-
54
-
55
-
56
-
57
-
58
-
59
-
60
-
61
-
62
-
63
-
64
-
65
-
66
-
67
-
68
-
69
-
70
-
71
-
72
-
73
-
74
-
75
-
76
-
77
-
78
-
79
-
80
-
81
-
82
-
83
-
84
-
85
-
86
-
87
-
88
-
89
-
90
-
91
-
92
-
93
-
94
-
95
-
96
-
97
-
98
-
99
-
100
-
101
-
102
-
103
-
104
-
105
-
106
-
107
-
108
-
109
-
110
-
111
-
112
-
 113
113 -
 114
114 -
 115
115 -
 116
116 -
 117
117 -
 118
118 -
 119
119 -
 120
120 -
 121
121 -
 122
122 -
 123
123 -
124
-
125
-
126
-
127
-
128
-
129
-
130
-
131
-
132
-
133
-
134
-
135
-
136
-
137
-
138
-
139
-
140
-
141
-
142
-
143
-
144
-
145
-
146
-
147
-
148
-
149
-
150
-
151
-
152
-
153
-
154
-
155
-
156
-
157
-
158
-
159
-
160
-
161
-
162
-
163
-
164
-
165
-
166
-
167
-
168
-
169
-
170
-
171
-
172
-
173
-
174
-
175
-
176
-
177
-
178
-
179
-
180
-
181
-
182
-
183
-
184
-
185
-
186
-
187
-
188
-
189
-
190
-
191
-
192
-
193
-
194
-
195
-
196
-
197
-
198
-
199
-
200
-
201
-
202
-
203
-
204
-
205
-
206
-
207
-
208
-
209
-
210
-
211
-
212
-
213
-
214
-
215
-
216
-
217
-
218
-
219
-
220
-
221
-
222
-
223
-
224
-
225
-
226
-
227
-
228
-
229
-
230
-
231
-
232
-
233
-
234
-
235
-
236
 |
 |
