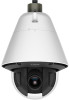
Canon VB-R12VE Camera Management Tool User Manual
Canon VB-R12VE Manual
 |
View all Canon VB-R12VE manuals
Add to My Manuals
Save this manual to your list of manuals |
Canon VB-R12VE manual content summary:
- Canon VB-R12VE | Camera Management Tool User Manual - Page 1
Network Camera Camera Management Tool User Manual This User Manual should be read before using the network camera. ENGLISH - Canon VB-R12VE | Camera Management Tool User Manual - Page 2
file in the LICENSE folder of the setup CD-ROM. * The cameras described in this manual may include models not available in your country and/or region. For the camera. • Limit access to the camera by network devices. For additional network security recommendations, please refer to the Canon website. - Canon VB-R12VE | Camera Management Tool User Manual - Page 3
using this tool, please read the user manuals included with the camera in addition to this manual. Notes 1. Any unauthorized reproduction of this manual is prohibited. 2. The contents of this manual are subject to change without any prior notice. 3. This manual has been prepared with the utmost - Canon VB-R12VE | Camera Management Tool User Manual - Page 4
to Use This Manual ...3 Chapter 1 Before Use Functions of the Camera Management Tool 8 Flow of Operation...8 Operating Environment 11 System Requirements ...11 Supported Cameras...11 Limitations ...11 Installation...13 Chapter 2 Detecting/Setting Cameras Launching Camera Management Tool 16 - Canon VB-R12VE | Camera Management Tool User Manual - Page 5
for Backup Files 63 Performing a Backup ...63 Restoring Settings ...65 Mounting/Unmounting Memory Cards 67 Restarting the Camera 68 Restoring the Camera to the Default Settings 69 Downloading Logs...70 Chapter 6 Troubleshooting Lists of Messages...72 Warning Messages ...72 Error Messages...75 - Canon VB-R12VE | Camera Management Tool User Manual - Page 6
6 - Canon VB-R12VE | Camera Management Tool User Manual - Page 7
Chapter Before Use This chapter provides an overview of the functions and an outline of actual operation of this tool and explains the operating environment, installation procedure, and other things you should know when using this tool. - Canon VB-R12VE | Camera Management Tool User Manual - Page 8
the initial setup and maintenance of Canon network cameras (hereafter referred to as "cameras"). It allows you to efficiently execute IP address settings and other basic settings required when installing cameras, and perform backup and restoration of camera settings after installation, and firmware - Canon VB-R12VE | Camera Management Tool User Manual - Page 9
to match the installation environment after installation is complete. Settings Page Display the Settings Page for each camera, and configure advanced settings (P. 36). You can load advanced camera settings with this tool and when necessary change settings and save them. The loaded advanced settings - Canon VB-R12VE | Camera Management Tool User Manual - Page 10
values (P. 65) • Operating the memory card (P. 67) • Restarting (P. 68) • Restoring the camera to the default settings (P. 69) • Downloading logs (P. 70) The information in the list of cameras for this tool can be saved as a camera specification file (P. 42). You can use this file to perform the - Canon VB-R12VE | Camera Management Tool User Manual - Page 11
. Supported Cameras Supported Cameras VB-S30VE, VB-S800VE, VB-S910F, VB-R13VE, VB-R13, VB-R12VE, VB-M50B, VB-H652LVE, VB-H651VE, VB-H651V, VB-H761LVE, VB-H760VE, VB-H751LE, VB-R11VE, VB-R11, VB-R10VE, VB-M641VE, VB-M641V, VB-M640VE, VB-M640V, VB-M741LE, VB-M740E, VB-H43, VB-H630VE, VB-H630D, VB - Canon VB-R12VE | Camera Management Tool User Manual - Page 12
• Before applying a service pack or updating the operating system, please refer to the Canon website for information on the latest operating environments. 12 - Canon VB-R12VE | Camera Management Tool User Manual - Page 13
Installation 1 Install this tool using the setup CD-ROM included with the camera. For details on installation, please refer to the camera's "Operation Guide". Before Use The icon of this tool appears on the desktop after installation. 13 - Canon VB-R12VE | Camera Management Tool User Manual - Page 14
14 - Canon VB-R12VE | Camera Management Tool User Manual - Page 15
Chapter Detecting/Setting Cameras This chapter explains the initial setup of cameras (from detection of the cameras connected to the network, through configuration of the basic settings). It also explains how to access the camera functions after the setup is complete. - Canon VB-R12VE | Camera Management Tool User Manual - Page 16
Management Tool Launch the tool and begin camera configuration. Be sure to connect the camera to the network ahead of time. Launching The [Camera Management Tool] icon is displayed on the desktop when this tool is installed. If you double-click the icon, this tool starts and the main - Canon VB-R12VE | Camera Management Tool User Manual - Page 17
in the camera and acquires information (P. 67). Basic Camera Settings Makes basic camera settings, such as network, administrator password, date and time, camera name, and video settings (P. 29). Advanced Camera Settings Specify advanced camera settings (P. 54). Camera Detection Notification - Canon VB-R12VE | Camera Management Tool User Manual - Page 18
as the computer in which this tool is installed, and add them to the camera list. Note Camera detection by this tool is only available for cameras in the same network segment. Cameras connected to different network segments need to be added manually (P. 50). 1 Click on the toolbar, or select - Canon VB-R12VE | Camera Management Tool User Manual - Page 19
not detected, even though it is connected to the same network, click again to perform detection. Adding Already Detected Cameras After executing [Search Cameras], cameras connected to the same network are automatically detected. When a camera is detected, on the toolbar is displayed in green. If - Canon VB-R12VE | Camera Management Tool User Manual - Page 20
message appears for confirming whether or not to add the detected camera. 2 Click [Yes]. All the cameras that were automatically detected are added to the camera list. If you try to add a new detected camera to the list, making the number of cameras on the list exceed the maximum of 256, an error - Canon VB-R12VE | Camera Management Tool User Manual - Page 21
administrator name/password). Connected to the network but an administrator account must be registered. [ Connectable] Double-click [ Connectable] in [Connection Status] or select [Camera List] > [Open Camera Error Information] after selecting the camera to display the error information dialog box - Canon VB-R12VE | Camera Management Tool User Manual - Page 22
refer to "Operation Guide" > "List of Log Messages". The error information dialog box is not displayed for some camera models. [Not connectable SSL communication (no problem with certificate) SSL communication (problem with certificate) Note If this tool is connected to the camera via SSL, the - Canon VB-R12VE | Camera Management Tool User Manual - Page 23
] displayed for [Connection Status]. Thumbnails cannot be displayed when the camera is creating a panorama image or setting the camera angle. 2 Detecting/Setting Cameras Searching in the Camera List Filters the cameras displayed in the camera list by a string such as the IP address or connection - Canon VB-R12VE | Camera Management Tool User Manual - Page 24
the right and left orders of the displayed items. Changing the Items to Display You can select items in the camera list, and change their order. 1 Select [Camera List] > [Display Items Settings]. The [Display Items Settings] dialog box appears. 2 Specify whether to display or hide the items. To - Canon VB-R12VE | Camera Management Tool User Manual - Page 25
press the Delete key. A message appears for confirming whether or not to remove the camera. 3 Click [Yes]. The camera is removed from the camera list. Right-Click Operations for the Camera List Right-click the camera list to carry out the following operations in the menu. Note Grayed out items - Canon VB-R12VE | Camera Management Tool User Manual - Page 26
Menu name Maintenance Description • Restarting the Camera (P. 68) • Restoring the Camera to the Default Settings (P. 69) • Downloading Logs (P. 70) • Mounting/Unmounting Memory Cards (P. 67) • Updating the Software (P. 60) • Backing Up Setting Values (P. 63) • Restoring Settings (P. 65) • - Canon VB-R12VE | Camera Management Tool User Manual - Page 27
] dialog box is displayed. 2 Enter the authentication information. Note The common authentication information setting is common to [Camera List] > [Search Cameras] > [Camera Common Authentication Information]. If you set one of them, it is reflected to the other. (1) (2) (3) (1) [Add], [Delete - Canon VB-R12VE | Camera Management Tool User Manual - Page 28
using SSL communication. If you select [Use SSL Communication], the self-signed certificate is checked. A message is displayed if you authenticate a camera that has a problem with its self-signed certificate and has not been connected before. (5) Port number input field Specify the HTTP port to be - Canon VB-R12VE | Camera Management Tool User Manual - Page 29
can be configured, including camera network settings (IP address), changing the administrator password, camera name, date and time, and video settings for detected cameras. Because basic settings are common to all models, you can apply the same settings to multiple cameras in a batch. Note • Because - Canon VB-R12VE | Camera Management Tool User Manual - Page 30
(7) (8) Important You may become unable to access a camera if the network settings are incorrect. In this case, restore the camera to the default settings (including network settings) (P. 69) or refer to "Operation Guide" for the camera to restore the camera to the factory default settings and then - Canon VB-R12VE | Camera Management Tool User Manual - Page 31
(3) [Subnet Mask] When [IPv4 Address Settings Method] is [Manual], enter the subnet mask value designated for the corresponding network. (4) [IPv4 Default Gateway Address] When [IPv4 Address Settings Method] is [Manual] and the camera will connect to a different subnet than the computer, select the - Canon VB-R12VE | Camera Management Tool User Manual - Page 32
the password after changing it. • If you forget the administrator password, restore the camera to the default settings (including network settings) (P. 69) or refer to the camera's "Operation Guide" to restore the camera to the factory default settings. Since this causes all the settings to return - Canon VB-R12VE | Camera Management Tool User Manual - Page 33
manually] is selected Set the desired date and time. Set the time in 24-hour format in order. When [Set manually with them. The camera's NTP broadcast mode does not support IPv6. (3) camera Settings page. For details about the Settings page, refer to the camera's "Operation Guide - Canon VB-R12VE | Camera Management Tool User Manual - Page 34
time are not changed. • The NTP server query interval is 300 seconds. The query interval can be set on the camera settings page for some camera models. If the time of camera and that of NTP server are substantially different, it takes time to complete synchronization. (4) [NTP Server] If you select - Canon VB-R12VE | Camera Management Tool User Manual - Page 35
264(2)] Configure on each tab the settings for the H.264(1) and H.264(2) video to be transmitted from the camera to the Viewer. (4) [Video Size] Select the size for video transmitted from the camera. (5) [Bit Rate Control] Set the bit rate for video. When [Use bit rate control] is selected, also set - Canon VB-R12VE | Camera Management Tool User Manual - Page 36
[Settings Page]. Internet Explorer launches and the [Windows Security] dialog box appears. 3 Enter the administrator name and administrator password for the camera and click [OK]. The Settings Page for the camera appears. For Settings Page details, please refer to the camera's "Operation Guide". 36 - Canon VB-R12VE | Camera Management Tool User Manual - Page 37
opening Viewer. 2 Click [Viewer]. Alternatively, you can select [Tools] > [Viewer]. Viewer appears. For details on how to operate the Viewer, please refer to the camera's "Operation Guide". Note It may be necessary to enter the authentication information (user name and password), depending on the - Canon VB-R12VE | Camera Management Tool User Manual - Page 38
to [High] in Internet Explorer, it is necessary to add the IP address of the camera to the list of trusted sites (P. 36). Note The tools in the [Tools] menu that are not supported by the selected camera will appear grayed out. The tools may be included in a Settings Page or as software - Canon VB-R12VE | Camera Management Tool User Manual - Page 39
Important To ensure security, exit Internet Explorer after completing the settings with Admin Tools. 2 Detecting/Setting Cameras 39 - Canon VB-R12VE | Camera Management Tool User Manual - Page 40
40 - Canon VB-R12VE | Camera Management Tool User Manual - Page 41
Chapter Camera Specification File Use The information displayed in the camera list of this tool can be saved and edited as a camera specification file. You can load camera specification files when the tool is launched, and use them to manage more than 256 cameras. - Canon VB-R12VE | Camera Management Tool User Manual - Page 42
If you select [Save password.] checkbox, the administrator password specified in the common authentication information is also saved in the camera specification file. 3 Click [Yes] to save the camera specification file. The [Save As] dialog box appears. If you click [No], the tool will be shut down - Canon VB-R12VE | Camera Management Tool User Manual - Page 43
File Use Note If you select the [Save password.] checkbox, the administrator password set in the common authentication information is also saved in the camera specification file. 3 Click [Yes]. The [Save As] dialog box appears. 4 Specify the folder and file name to save under, and click [Save - Canon VB-R12VE | Camera Management Tool User Manual - Page 44
a camera with the same address exists in the same network. Take care that an IP address is not a duplicate of that of an already set camera. Camera Specification File -dddddddddddd,,"Camera004",1,,,, [dddd::ddd:dddd:dddd:dddd],VB-XXX,1.0.0,333333333333,33:33:33:33:33:33,,80,0,, 4820,,57, - Canon VB-R12VE | Camera Management Tool User Manual - Page 45
address (AutoIP) IPv6Address IPv6 address Link local address only (An address that was set manually or set automatically using RA or DHCPv6 is not exported.) Model Model name of the camera FirmVer Firmware version Serial Serial number MACAddress MAC address Described in uppercase. Word - Canon VB-R12VE | Camera Management Tool User Manual - Page 46
). Blank when the IPv4 address set in the camera is the same. Camera HTTP/HTTPS port number (when adding manually) The port number specified when adding a camera via [Camera List] > [Add Camera] (P. 50), or adding a camera by loading a camera specification file (P. 52). Blank when the port number - Canon VB-R12VE | Camera Management Tool User Manual - Page 47
following conditions, it can be loaded by the [Common Authentication Information Settings] dialog box of this tool. - No cameras are displayed in the camera list before loading. - The [Common Authentication Information Settings] dialog box is at default settings. Automatically Importing When This - Canon VB-R12VE | Camera Management Tool User Manual - Page 48
the list to those described in the camera specification file. If you select this, you cannot add cameras to the camera list by detection, or manually add or delete cameras. If you load a different camera specification file, the current camera list and common authentication information are discarded - Canon VB-R12VE | Camera Management Tool User Manual - Page 49
Chapter Camera Detection/Configuration Techniques This chapter covers the procedure for assigning IP addresses using a camera specification file. It also explains how to load the settings of a camera and then copy them to another camera, or save them to a file and then apply them to multiple cameras - Canon VB-R12VE | Camera Management Tool User Manual - Page 50
cameras from the camera list (P. 25). Detecting a Single Camera Specify an IPv4 address to manually detect a camera connected to a different network segment. 1 Select [Camera List] > [Add Camera]. The [Add Camera displayed if you authenticate a camera that has a problem with its self-signed - Canon VB-R12VE | Camera Management Tool User Manual - Page 51
in the third and the lower lines except the IPv4 address parts. First line Second line Enter the IPv4 address of the cameras to be added to the camera list. Camera Detection/Configuration Techniques Note You can specify SSL and the port number as a set along with the IPv4 address. 3 Save the - Canon VB-R12VE | Camera Management Tool User Manual - Page 52
(MAC address) is required for the settings file. • If the [DefaultGateway] (default gateway) column is left blank, an empty value is set for the camera. If you do not want to set this value, delete the [DefaultGateway] (default gateway) column. 3 Save the settings file. Save the edited settings file - Canon VB-R12VE | Camera Management Tool User Manual - Page 53
in the settings file edited in the "Creating a Settings File" section above, and apply the values of the settings file to the camera that matched. 1 Select [Camera Settings] > [Set from file], and specify the edited settings file. Enter the folder in which the settings file is saved and the - Canon VB-R12VE | Camera Management Tool User Manual - Page 54
Connectable] Note You can sort the data by clicking a header such as [Camera Name]. 3 Select the camera to load advanced settings from, and click [Load from camera]. Loading of the setting information from the selected camera begins. It takes a while for loading to finish. When loading is finished - Canon VB-R12VE | Camera Management Tool User Manual - Page 55
click [Save]. The [Save As] dialog box closes and the [Advanced Camera Settings] dialog box is redisplayed. 4 Click [Close] in the [Advanced Camera Settings] dialog box. The [Advanced Camera Settings] dialog box closes. Note Advanced camera settings are saved in XML format. Note that if you change - Canon VB-R12VE | Camera Management Tool User Manual - Page 56
as that which can be set on the [Settings Page] for a camera. Advanced camera settings can be edited in the [Advanced Camera Settings] dialog box. Note • For Setting Item details, please refer to the camera's "Operation Guide". • The setting items of the [Settings Page] that need to be configured - Canon VB-R12VE | Camera Management Tool User Manual - Page 57
the text in the input field and click [View], the search results are cleared. (3) [Reboot] If you change an item with an orange symbol, the camera restarts. (4) [Select all], [Clear all] Selects or clears all of the checkboxes in the setting item list at the same time. (5) Setting item list Displays - Canon VB-R12VE | Camera Management Tool User Manual - Page 58
58 - Canon VB-R12VE | Camera Management Tool User Manual - Page 59
Chapter Camera Maintenance This chapter explains how to perform various maintenance work for cameras such as updating the firmware, backing up and restoring the settings, and mounting and unmounting memory cards. - Canon VB-R12VE | Camera Management Tool User Manual - Page 60
specify the firmware file and set to restore the camera settings to the factory default settings. Important • Do not disconnect a network cable or turn off the power of a camera during the firmware update process. Doing so may cause a camera to malfunction. • If there is a power failure during the - Canon VB-R12VE | Camera Management Tool User Manual - Page 61
(30 - 36,000 seconds). Enter the time to wait for a response from the camera before transferring the firmware. The firmware is not updated for cameras that do not respond within the time entered here due to a slow network speed, etc. In this case, specify a longer waiting time and then execute the - Canon VB-R12VE | Camera Management Tool User Manual - Page 62
displayed in the [Message] field. Note • You can click [Stop] to cancel the Mobile Camera Viewer update. However, the update cannot be canceled if the camera is already restarting. • For details on how to use the Mobile Camera Viewer, please refer to the "Mobile Camera Viewer Operation Guide". 62 - Canon VB-R12VE | Camera Management Tool User Manual - Page 63
, VB-M641VE, VB-M641V, VB-M640VE, VB-M640V, VB-M741LE, VB-M740E - All versions VB-H43, VB-H630VE, VB-H630D, VB-H730F, VB-M42, VB-M620VE, VB-M620D, VB-M720F, VB-S30D, VB-S31D, VB-S800D, VB-S900F, VB-S805D, VB-S905F, VB-H41, VB-H610VE, VB-H610D, VB-H710F, VB-M40, VB-M600VE, VB-M600D, VB-M700F Camera - Canon VB-R12VE | Camera Management Tool User Manual - Page 64
(file extension: .dat). If you choose not to specify a file name, the camera's MAC address will be used. • If the save location for backup files is • [Encryption Password] can be set when backing up/restoring for some camera models. Only alphanumeric characters, symbols, and spaces can be used for - Canon VB-R12VE | Camera Management Tool User Manual - Page 65
to the point in time a backup was made, or migrate settings to other cameras. Important • Do not disconnect a network cable or turn off the power of a camera during the restore process. Doing so may cause a camera to malfunction. • Do not launch this tool on multiple computers and then perform - Canon VB-R12VE | Camera Management Tool User Manual - Page 66
] from the [Restore all information.] pull-down list. [Restore all information.] cannot be set for some camera models. Important If you have selected [Restore all information.], IP addresses, network settings, and SSL/IPsec secure communication information will also be restored. This may result in - Canon VB-R12VE | Camera Management Tool User Manual - Page 67
Mounts the memory cards of the selected cameras. [Unmount] Unmounts the memory cards of the selected cameras. Note If you click [Unmount] when recording types ([Recording-Mode Stream], [Upload], [Event], [Timer], [Manual], [ONVIF]) indicates whether or not the regulation number of recordable images - Canon VB-R12VE | Camera Management Tool User Manual - Page 68
Restarting the Camera You can batch restart multiple cameras. 1 In the camera list, select the cameras to restart. 2 Select [Maintenance] > [Restart Camera]. A dialog box appears for confirming whether to restart the selected cameras. 3 Click [Yes]. The cameras restart. Note Even after a camera is - Canon VB-R12VE | Camera Management Tool User Manual - Page 69
disabled because the administrator account is erased as well. Use this tool to configure the default settings. Note [Default Settings (including Network Settings)] cannot be selected for some camera models. A dialog box confirming whether you want to restore to the default settings of the selected - Canon VB-R12VE | Camera Management Tool User Manual - Page 70
selected. log\YYYYMMDDHHMMSS The downloaded file is saved with the following file name. MAC address (XX-XX-XX-XX-XX-XX)_category_serial number.txt Category B:Camera Internal Memory C:Memory Card Note The memory card log is not retrieved if the memory card is unmounted. 70 - Canon VB-R12VE | Camera Management Tool User Manual - Page 71
Chapter Troubleshooting This chapter covers message lists and troubleshooting. - Canon VB-R12VE | Camera Management Tool User Manual - Page 72
cannot be connected to was selected, and an operation that communicates with the camera was performed. Check the connection with the camera. • The time specified in [Network Timeout] on the [Update Firmware] screen elapsed. In this case, specify a longer waiting time and then execute the operation - Canon VB-R12VE | Camera Management Tool User Manual - Page 73
backup file name is specified for multiple cameras. Please specify a different file name. Operation failed camera(s) exist. Please recheck your recent operations. Changed settings could not be applied to some cameras. Please recheck [Recent Operations] in the camera list. Troubleshooting 6 73 - Canon VB-R12VE | Camera Management Tool User Manual - Page 74
may take a long time to configure the settings because the IPv4 Address range specified for [IPv4 Address] in [Basic Camera Settings] > [Network] exceeds 256 addresses. The camera(s) with the following IP address has already been added to the trusted sites. When executing [Maintenance - Canon VB-R12VE | Camera Management Tool User Manual - Page 75
even after the time displayed in the message has passed, check whether the camera is connected to the network properly, and then contact the customer support center. Failed to save the camera specification file. The length of the specified folder and file exceeds 260 characters. Make sure the - Canon VB-R12VE | Camera Management Tool User Manual - Page 76
interval to 1.5 seconds or less. Automatic setting of the NTP server is enabled in [Date and Time]. Either DHCP or DHCPv6 is not enabled in [Network]. Select [Camera] and change the Day/Night mode to "Day Mode" or "Night Mode". "Day/Night" cannot be set to "Auto", because "Switch Day/Night" is - Canon VB-R12VE | Camera Management Tool User Manual - Page 77
Before contacting the dealer or customer support center, check the following troubleshooting items. If a message is displayed, check the details of the message and corresponding countermeasure in "Lists of Messages" on page 72. Problem Solution Camera Management Tool cannot be launched. • The - Canon VB-R12VE | Camera Management Tool User Manual - Page 78
Up Setting Values 63 Basic Camera Settings Admin Account 32 Camera 34 Date and Time 33 Network 30 Video 35 Basic Settings 29 C Camera 34 Add 19 Basic Settings 29 Checking Status 21 Detect a Single Camera 50 Detect Multiple Cameras 51 Remove from a Camera List 25 Restart 68 Restore - Canon VB-R12VE | Camera Management Tool User Manual - Page 79
36 Specify Range 31 Specify Wildcard 31 SSL/Port Number 22 Supported Cameras 11 System Requirements 11 T Toolbar 16 Tools 38 Trusted Site 36 6 U Troubleshooting Unmount 67 Update the Firmware 60 Update the Mobile Camera Viewer 62 Update the Software 60 V Video 35 Viewer 37 79 - Canon VB-R12VE | Camera Management Tool User Manual - Page 80
BIE-7050-006 © CANON INC. 2017
-
 1
1 -
 2
2 -
 3
3 -
 4
4 -
 5
5 -
 6
6 -
 7
7 -
8
-
9
-
10
-
11
-
12
-
13
-
14
-
15
-
16
-
17
-
18
-
19
-
20
-
21
-
22
-
23
-
24
-
25
-
26
-
27
-
28
-
29
-
30
-
31
-
32
-
33
-
34
-
35
-
36
-
37
-
38
-
39
-
40
-
41
-
42
-
43
-
44
-
45
-
46
-
47
-
48
-
49
-
50
-
51
-
52
-
53
-
54
-
55
-
56
-
57
-
58
-
59
-
60
-
61
-
62
-
63
-
64
-
65
-
66
-
67
-
68
-
69
-
70
-
71
-
72
-
73
-
74
-
75
-
76
-
77
-
78
-
79
-
80
 |
 |

This User Manual should be read before using the network camera.
ENGLISH
Network Camera
Camera Management Tool User Manual