Canon XA50 XA50 XA55 Instruction Manual - Page 30
FUNC Menu, Touch [FUNC] on
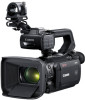 |
View all Canon XA50 manuals
Add to My Manuals
Save this manual to your list of manuals |
Page 30 highlights
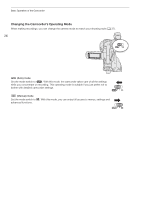
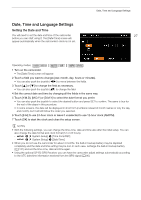
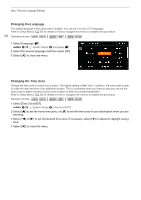
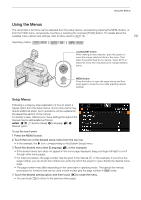
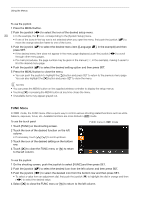
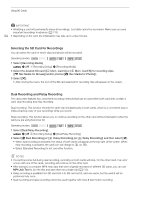
Using the Menus To use the joystick 1 Press the MENU button. 2 Push the joystick (Þ) to select the icon of the desired setup menu. 30 • In the example, the B icon, corresponding to the [System Setup] menu. • If one of the icons in the top row is not selected when you open the menu, first push the joystick (Ý) to move the orange selection frame to one of the icons. 3 Push the joystick (Ý) to select the desired menu item ([Language H], in the example) and then press SET. • If the desired menu item does not appear in the menu page displayed, push the joystick (Þ) to scroll through other menu pages. • For main procedures, the page number may be given in the manual (!, in the example), making it easier to find the desired menu page. 4 Push the joystick (Ý) to select the desired setting option and then press SET. 5 Press the MENU button to close the menu. • You can push the joystick to highlight the [L] button and press SET to return to the previous menu page. You can also highlight the [X] button and press SET to close the menu. NOTES • You can press the MENU button on the supplied wireless controller to display the setup menus. • Touching [X] or pressing the MENU button at any time closes the menu. • Unavailable items may appear grayed out. FUNC Menu In mode, the FUNC menu offers a quick way to control various shooting related functions such as white balance, exposure, focus, etc. Available functions are more limited in mode. To use the touch panel 1 Touch [FUNC] on the shooting screen. 2 Touch the icon of the desired function on the left column. • If necessary, touch [ ]/[ ] to scroll up/down. 3 Touch the icon of the desired setting on the bottom row. 4 Touch [X] to close the FUNC menu or [L] to return to the left column. FUNC menu in mode To use the joystick 1 On the shooting screen, push the joystick to select [FUNC] and then press SET. 2 Push the joystick (Ý) to select the desired icon from the left column and then press SET. 3 Push the joystick (Þ) to select the desired icon from the bottom row and then press SET. • To select a value from an adjustment dial, first push the joystick (Î) to highlight the dial in orange and then (Þ) to select the desired value. 4 Select [X] to close the FUNC menu or [L] to return to the left column.
-
 1
1 -
2
-
3
-
4
-
5
-
6
-
7
-
8
-
9
-
10
-
11
-
12
-
13
-
14
-
15
-
16
-
17
-
18
-
19
-
20
-
21
-
22
-
23
-
24
-
 25
25 -
 26
26 -
 27
27 -
 28
28 -
 29
29 -
 30
30 -
 31
31 -
 32
32 -
 33
33 -
 34
34 -
 35
35 -
36
-
37
-
38
-
39
-
40
-
41
-
42
-
43
-
44
-
45
-
46
-
47
-
48
-
49
-
50
-
51
-
52
-
53
-
54
-
55
-
56
-
57
-
58
-
59
-
60
-
61
-
62
-
63
-
64
-
65
-
66
-
67
-
68
-
69
-
70
-
71
-
72
-
73
-
74
-
75
-
76
-
77
-
78
-
79
-
80
-
81
-
82
-
83
-
84
-
85
-
86
-
87
-
88
-
89
-
90
-
91
-
92
-
93
-
94
-
95
-
96
-
97
-
98
-
99
-
100
-
101
-
102
-
103
-
104
-
105
-
106
-
107
-
108
-
109
-
110
-
111
-
112
-
113
-
114
-
115
-
116
-
117
-
118
-
119
-
120
-
121
-
122
-
123
-
124
-
125
-
126
-
127
-
128
-
129
-
130
-
131
-
132
-
133
-
134
-
135
-
136
-
137
-
138
-
139
-
140
-
141
-
142
-
143
-
144
-
145
-
146
-
147
 |
 |
