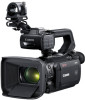
Canon XA50 XA50 XA55 Instruction Manual - Page 82
Manual Audio Level Adjustment for CH1 or CH2, Audio Level Adjustment Using the FUNC Menu
 |
View all Canon XA50 manuals
Add to My Manuals
Save this manual to your list of manuals |
Page 82 highlights
Recording Audio Manual Audio Level Adjustment for CH1 or CH2 When the handle unit is attached to the camcorder, adjust the audio level using the controls on the handle unit. If the handle unit is not attached, adjust the audio levels using the FUNC menu (A 82). 82 CH1/CH2 audio level dials CH1/CH2 audio level switches 1 Set the audio level switch of the desired channel to M (manual). 2 Turn the corresponding audio level dial. • For reference, 0 corresponds to - , 5 corresponds to 0 dB, and 10 corresponds to +18 dB. • As a guideline, adjust the audio recording level so that the audio level meter on the screen will go to the right of the -18 dB mark (one mark right of the -20 dB mark) only occasionally. 3 Close the protective cover to prevent the audio controls from being changed inadvertently. Audio Level Adjustment Using the FUNC Menu When the audio format is LPCM (4-channel audio recording), use the audio screen in the FUNC menu to adjust the audio recording levels for CH3 and CH4. If the handle unit is not attached to the camcorder, you must use the audio screen to adjust the audio recording levels for CH1 and CH2 as well. 1 Open the audio screen. [FUNC] > [C Audio] 2 Select the channel or pair of channels to adjust. 3 Select [ Automatic] or [ö Manual]. • If you selected automatic adjustment, skip to step 5. If you selected manual adjustment, continue the procedure to adjust the audio recording level. 4 Touch and hold [Ï] or [Ð] to adjust the recording level as necessary. • As a guideline, adjust the audio recording level so that the audio level meter on the screen will go to the right of the -18 dB mark (one mark right of the -20 dB mark) only occasionally. 5 Select [X]. NOTES • When the audio level meter reaches the red point (0 dB), the sound may be distorted. • If the audio level display is normal but the sound is distorted, activate the microphone's attenuator (A 83, 84). • We recommend using headphones to check the sound level while adjusting the audio recording level or when the microphone attenuator is activated.
-
 1
1 -
2
-
3
-
4
-
5
-
6
-
7
-
8
-
9
-
10
-
11
-
12
-
13
-
14
-
15
-
16
-
17
-
18
-
19
-
20
-
21
-
22
-
23
-
24
-
25
-
26
-
27
-
28
-
29
-
30
-
31
-
32
-
33
-
34
-
35
-
36
-
37
-
38
-
39
-
40
-
41
-
42
-
43
-
44
-
45
-
46
-
47
-
48
-
49
-
50
-
51
-
52
-
53
-
54
-
55
-
56
-
57
-
58
-
59
-
60
-
61
-
62
-
63
-
64
-
65
-
66
-
67
-
68
-
69
-
70
-
71
-
72
-
73
-
74
-
75
-
76
-
 77
77 -
 78
78 -
 79
79 -
 80
80 -
 81
81 -
 82
82 -
 83
83 -
 84
84 -
 85
85 -
 86
86 -
 87
87 -
88
-
89
-
90
-
91
-
92
-
93
-
94
-
95
-
96
-
97
-
98
-
99
-
100
-
101
-
102
-
103
-
104
-
105
-
106
-
107
-
108
-
109
-
110
-
111
-
112
-
113
-
114
-
115
-
116
-
117
-
118
-
119
-
120
-
121
-
122
-
123
-
124
-
125
-
126
-
127
-
128
-
129
-
130
-
131
-
132
-
133
-
134
-
135
-
136
-
137
-
138
-
139
-
140
-
141
-
142
-
143
-
144
-
145
-
146
-
147
 |
 |
