Canon imageFORMULA DR-C125 Document Scanner Operating Guide - Page 56
Scan Batch to SharePoint (Sends scanned images to SharePoint server)
 |
View all Canon imageFORMULA DR-C125 Document Scanner manuals
Add to My Manuals
Save this manual to your list of manuals |
Page 56 highlights
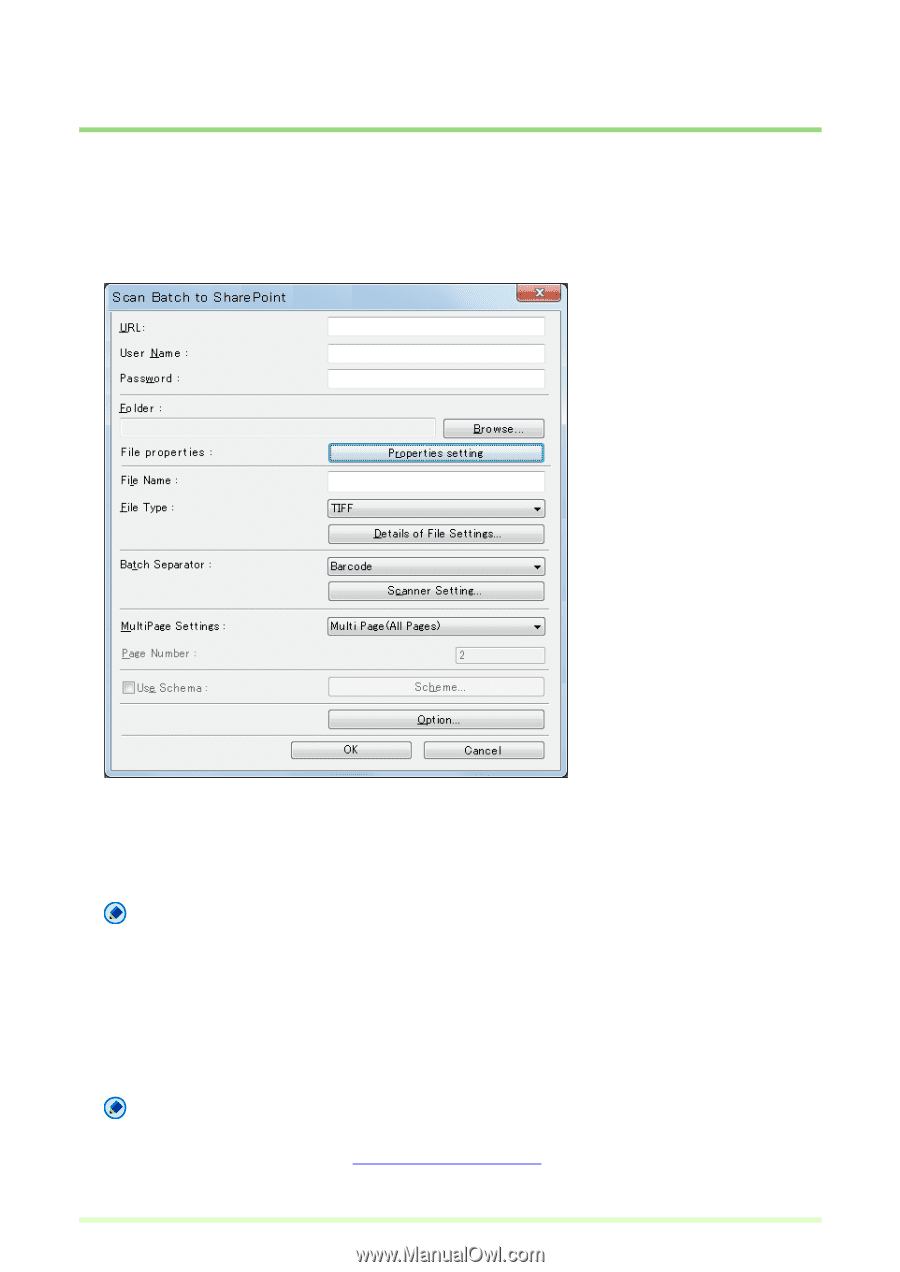
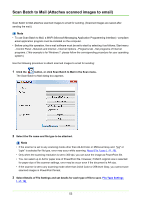
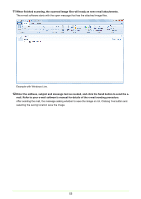
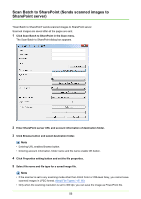
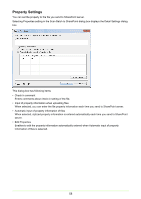
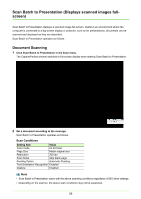
Scan Batch to SharePoint (Sends scanned images to SharePoint server) "Scan Batch to SharePoint" sends scanned images to SharePoint server. Scanned images are saved after all the pages are sent. 1 Click Scan Batch to SharePoint in the Scan menu. The Scan Batch to SharePoint dialog box appears. 2 Enter SharePoint server URL and account information of destination folder. 3 Click Browse button and select destination folder. Note • Entering URL enables Browse button. • Entering account information, folder name and file name enable OK button. 4 Click Properties setting button and set the file properties. 5 Select file name and file type for a saved image file. Note • If the scanner is set to any scanning mode other than 24-bit Color or 256-level Gray, you cannot save scanned images in JPEG format. About File Types (→P. 16) • Only when the scanning resolution is set to 300 dpi, you can save the image as PowerPoint file. 56
-
 1
1 -
2
-
3
-
4
-
5
-
6
-
7
-
8
-
9
-
10
-
11
-
12
-
13
-
14
-
15
-
16
-
17
-
18
-
19
-
20
-
21
-
22
-
23
-
24
-
25
-
26
-
27
-
28
-
29
-
30
-
31
-
32
-
33
-
34
-
35
-
36
-
37
-
38
-
39
-
40
-
41
-
42
-
43
-
44
-
45
-
46
-
47
-
48
-
49
-
50
-
 51
51 -
 52
52 -
 53
53 -
 54
54 -
 55
55 -
 56
56 -
 57
57 -
 58
58 -
 59
59 -
 60
60 -
 61
61 -
62
-
63
-
64
-
65
-
66
-
67
-
68
-
69
-
70
-
71
-
72
-
73
-
74
-
75
-
76
-
77
-
78
-
79
-
80
-
81
-
82
-
83
-
84
-
85
 |
 |