Canon imageFORMULA DR-C125 Document Scanner Operating Guide - Page 64
The Details of File Settings button appears in the Scan Batch to File, Scan Batch to Mail, and Scan
 |
View all Canon imageFORMULA DR-C125 Document Scanner manuals
Add to My Manuals
Save this manual to your list of manuals |
Page 64 highlights
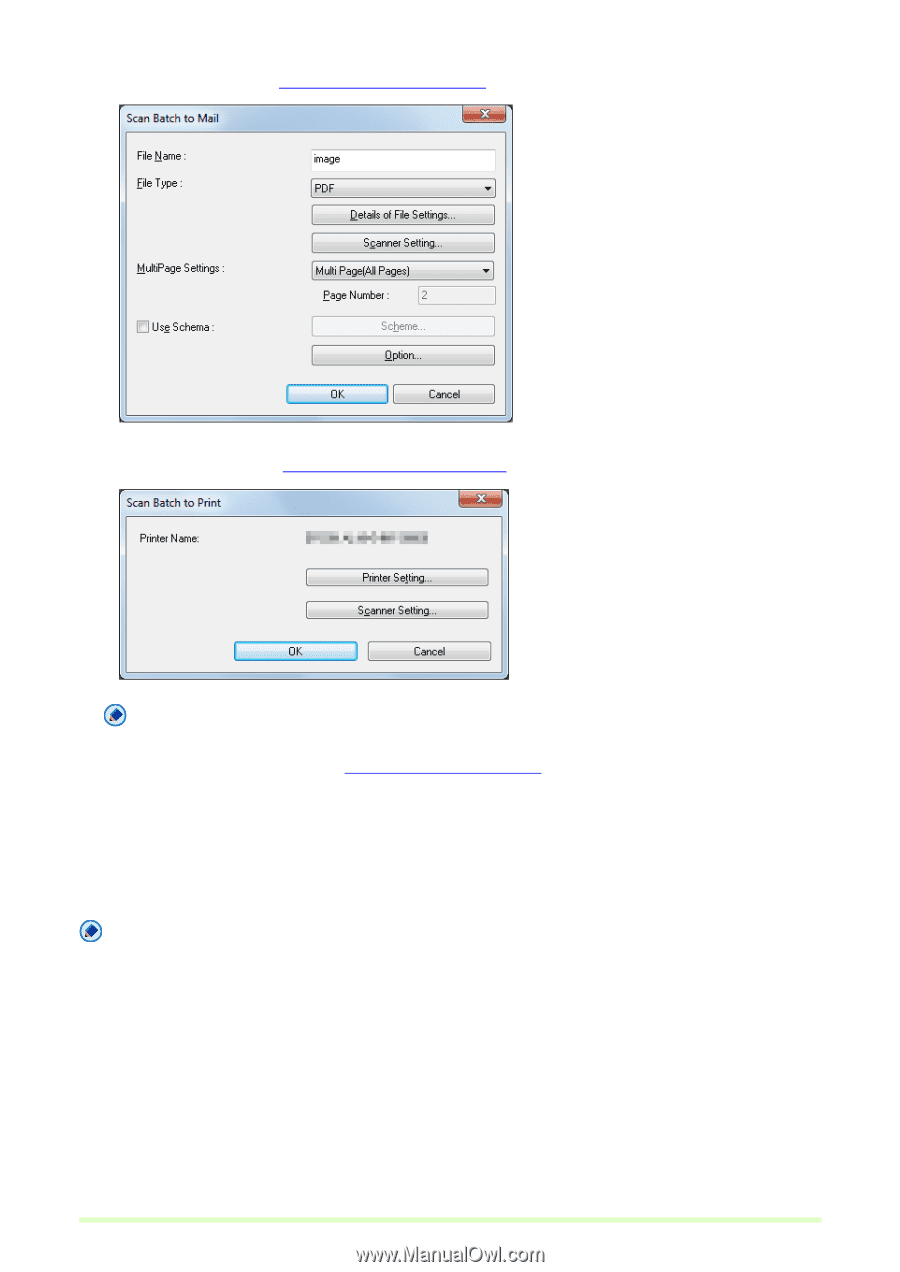
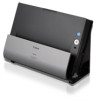
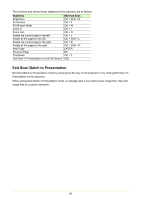
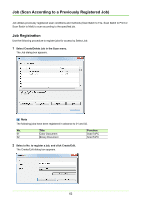
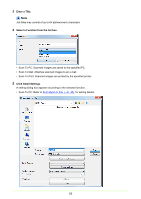
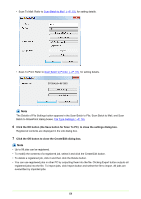
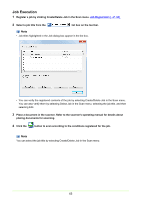
• Scan To Mail: Refer to Scan Batch to Mail (→P. 53) for setting details. • Scan To Print: Refer to Scan Batch to Printer (→P. 51) for setting details. Note The Details of File Settings button appears in the Scan Batch to File, Scan Batch to Mail, and Scan Batch to SharePoint dialog boxes. File Type Settings (→P. 16) 6 Click the OK button (the Save button for Scan To PC) to close the settings dialog box. Registered contents are displayed in the Job dialog box. 7 Click the OK button to close the Create/Edit dialog box. Note • Up to 99 jobs can be registered. • To modify the contents of a registered job, select it and click the Create/Edit button. • To delete a registered job, click it and then click the Delete button. • You can use registered jobs in other PC by outputting them into the file. Clicking Export button outputs all registered jobs into the file. To import jobs, click Import button and select the file to import. All jobs are overwritten by imported jobs. 64
-
 1
1 -
2
-
3
-
4
-
5
-
6
-
7
-
8
-
9
-
10
-
11
-
12
-
13
-
14
-
15
-
16
-
17
-
18
-
19
-
20
-
21
-
22
-
23
-
24
-
25
-
26
-
27
-
28
-
29
-
30
-
31
-
32
-
33
-
34
-
35
-
36
-
37
-
38
-
39
-
40
-
41
-
42
-
43
-
44
-
45
-
46
-
47
-
48
-
49
-
50
-
51
-
52
-
53
-
54
-
55
-
56
-
57
-
58
-
 59
59 -
 60
60 -
 61
61 -
 62
62 -
 63
63 -
 64
64 -
 65
65 -
 66
66 -
 67
67 -
 68
68 -
 69
69 -
70
-
71
-
72
-
73
-
74
-
75
-
76
-
77
-
78
-
79
-
80
-
81
-
82
-
83
-
84
-
85
 |
 |