Canon imageFORMULA DR-C125 Document Scanner Operating Guide - Page 71
When saving a multi- image file, set the range to be saved., Click the Save button.
 |
View all Canon imageFORMULA DR-C125 Document Scanner manuals
Add to My Manuals
Save this manual to your list of manuals |
Page 71 highlights
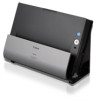
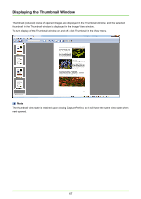
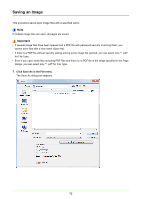
2 Make the following settings: • Save in Select the folder in which to save the file. • File name Enter the file name for the image. • Save as type Select a file type from TIFF File (*.tif), BMP File (*.bmp), JPEG File (*.jpg) or PDF File (*.pdf). The types of files that can be saved depend on the scanning mode specified before scanning. Refer to About Saving Image Files (→P. 16) for details. Note When scanned, the compression ratio set in the Details of File Settings dialog box is applied. Refer to File Type Settings (→P. 16) for details. Important If you select JPEG File (*.jpg) when a black and white image file is open, it is saved as a Grayscale Image. Original image (Black & White) Image saved as a JPEG (Grayscale) 3 When saving a multi-page image file, set the page range to be saved. Note For a PDF file with password security, the Current Page and Goto Page options are disabled. 4 When saving a multi-page image file as a single image file, select the Multi-page file check box. Note • When the Multi-page file check box is not selected, the image file is divided by page, and a four-digit sequential number is appended to each new saved file. However, if the saved image file is only one page, the four-digit sequential number is not appended to the file name. • Only when the saved file type is TIFF or PDF, Multi Page (All pages) check box is available. 5 Click the Save button. The Save As dialog box closes and the image is saved. 71
-
 1
1 -
2
-
3
-
4
-
5
-
6
-
7
-
8
-
9
-
10
-
11
-
12
-
13
-
14
-
15
-
16
-
17
-
18
-
19
-
20
-
21
-
22
-
23
-
24
-
25
-
26
-
27
-
28
-
29
-
30
-
31
-
32
-
33
-
34
-
35
-
36
-
37
-
38
-
39
-
40
-
41
-
42
-
43
-
44
-
45
-
46
-
47
-
48
-
49
-
50
-
51
-
52
-
53
-
54
-
55
-
56
-
57
-
58
-
59
-
60
-
61
-
62
-
63
-
64
-
65
-
 66
66 -
 67
67 -
 68
68 -
 69
69 -
 70
70 -
 71
71 -
 72
72 -
 73
73 -
 74
74 -
 75
75 -
 76
76 -
77
-
78
-
79
-
80
-
81
-
82
-
83
-
84
-
85
 |
 |