Craftsman #10402 Operation Manual - Page 34
Nstalung, Blade, Guard
 |
View all Craftsman #10402 manuals
Add to My Manuals
Save this manual to your list of manuals |
Page 34 highlights
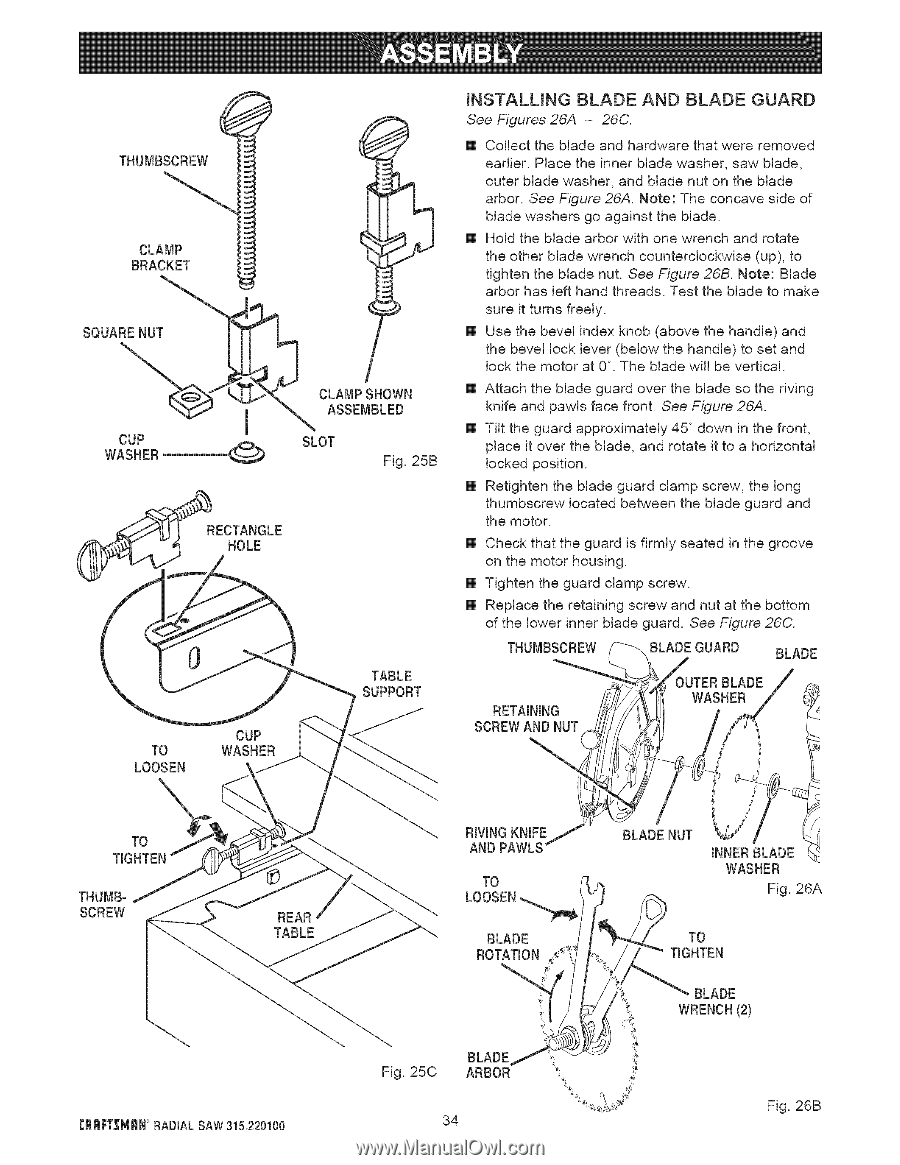
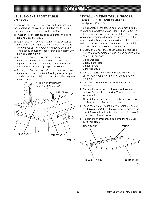
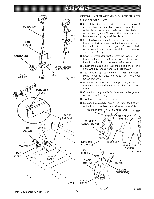
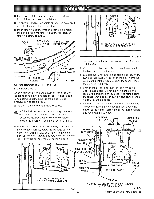
THUMBSCREW CLAMP BRACKET SQUARENUT CUP WASHER CLAMPSHOWN 1 ASSEMBLED SLOT Fig. 25B RECTANGLE HOLE TO LOOSEN CUP WASHER TABLE SUPPORT _NSTALUNG BLADE AND BLADE GUARD See Figures 26A - 26C. [] Collect the blade and hardware that were removed earlier. Place the inner blade washer, saw blade, outer blade washer, and blade nut on the blade arbor. See Figure 26A. Note: The concave side of blade washers go against the blade. [] Hold the blade arbor with one wrench and rotate the other blade wrench counterclockwise (up), to tighten the blade nut. See Figure 26B. Note: Blade arbor has left hand threads. Test the blade to make sure it turns freely. [] Use the bevel index knob (above the handle) and the bevel lock lever (below the handle) to set and lock the motor at 0°. The blade will be vertical. [] Attach the blade guard over the blade so the riving knife and pawls face front. See Figure 26A. [] Tilt the guard approximately 45 down in the front, place it over the blade, and rotate it to a horizontal locked position. [] Retighten the blade guard clamp screw, the long thumbscrew located between the blade guard and the motor. [] Check that the guard is firmly seated in the groove on the motor housing. [] Tighten the guard clamp screw. [] Replace the retaining screw and nut at the bottom of the lower inner blade guard. See Figure 26C. THUMBSCREW BLADE GUARD BLADE RETAINING SCREWAND NUT TO TIGHTEN CRRF_',_MRRNADIALSAW315,220100 RIVINGKNIFE AND PAWLS TO LOOSEN_ BLADE ROTATION BLADE Fig. 25C ARBOR %' 34 BLADE NUT iNNERBLADE WASHER Fig. 26A TO TIGHTEN BLADE WRENCH(2) Fig. 26B
-
 1
1 -
2
-
3
-
4
-
5
-
6
-
7
-
8
-
9
-
10
-
11
-
12
-
13
-
14
-
15
-
16
-
17
-
18
-
19
-
20
-
21
-
22
-
23
-
24
-
25
-
26
-
27
-
28
-
 29
29 -
 30
30 -
 31
31 -
 32
32 -
 33
33 -
 34
34 -
 35
35 -
 36
36 -
 37
37 -
 38
38 -
 39
39 -
40
-
41
-
42
-
43
-
44
-
45
-
46
-
47
-
48
-
49
-
50
-
51
-
52
-
53
-
54
-
55
-
56
-
57
-
58
-
59
-
60
-
61
-
62
-
63
-
64
-
65
-
66
-
67
-
68
-
69
-
70
-
71
-
72
-
73
-
74
-
75
-
76
-
77
-
78
-
79
-
80
-
81
-
82
-
83
-
84
-
85
-
86
 |
 |