Dell 1600n Multifunction Mono Laser Printer Dell Laser Multi-Function Printer - Page 106
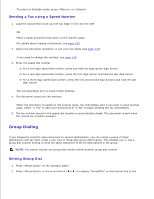
Sending a Fax Manually, Confirming Transmissions, Press <Send Fax>.
 |
View all Dell 1600n Multifunction Mono Laser Printer manuals
Add to My Manuals
Save this manual to your list of manuals |
Page 106 highlights
3. You can use one, two or three-digit speed or group dial numbers. For details, see "Automatic Dialing" on page 128. 4. Press . 5. When the document is loaded from the scanner glass, the display shows "Another Page?" on the top line after the document is scanned into the memory. If you have additional pages, remove the scanned page and load the next page from the glass and select "1:Yes". Repeat as necessary. After all of the pages are scanned, select "2:No" when the display shows "Another Page?" 6. The number is dialed and then the multi-function printer begins sending the fax when the remote fax machine is ready. NOTE: Press to cancel the fax job at any time while sending the fax. Sending a Fax Manually 1. Load the document(s) face up with top edge in first into the ADF. OR Place a single document face down on the scanner glass. For details about loading a document, see page 120. 2. Adjust the document resolution to suit your fax needs (see page 122). If you need to change the contrast, see page 118. 3. Press . You hear a dial tone. 4. Enter the remote fax machine's fax number using the number keypad. 5. When you hear a high-pitched fax tones from the remote fax machine, press . NOTE: Press to cancel the fax job at any time while sending the fax. Confirming Transmissions When the last page of your document has been sent successfully, the multi-function printer beeps and returns to Standby mode. If something goes wrong while sending your fax, an error message appears on the display. For a listing of error messages and their meanings, see page 171.
-
 1
1 -
2
-
3
-
4
-
5
-
6
-
7
-
8
-
9
-
10
-
11
-
12
-
13
-
14
-
15
-
16
-
17
-
18
-
19
-
20
-
21
-
22
-
23
-
24
-
25
-
26
-
27
-
28
-
29
-
30
-
31
-
32
-
33
-
34
-
35
-
36
-
37
-
38
-
39
-
40
-
41
-
42
-
43
-
44
-
45
-
46
-
47
-
48
-
49
-
50
-
51
-
52
-
53
-
54
-
55
-
56
-
57
-
58
-
59
-
60
-
61
-
62
-
63
-
64
-
65
-
66
-
67
-
68
-
69
-
70
-
71
-
72
-
73
-
74
-
75
-
76
-
77
-
78
-
79
-
80
-
81
-
82
-
83
-
84
-
85
-
86
-
87
-
88
-
89
-
90
-
91
-
92
-
93
-
94
-
95
-
96
-
97
-
98
-
99
-
100
-
 101
101 -
 102
102 -
 103
103 -
 104
104 -
 105
105 -
 106
106 -
 107
107 -
 108
108 -
 109
109 -
 110
110 -
 111
111 -
112
-
113
-
114
-
115
-
116
-
117
-
118
-
119
-
120
-
121
-
122
-
123
-
124
-
125
-
126
-
127
-
128
-
129
-
130
-
131
-
132
-
133
-
134
-
135
-
136
-
137
-
138
-
139
-
140
-
141
-
142
-
143
-
144
-
145
-
146
-
147
-
148
-
149
-
150
-
151
-
152
-
153
-
154
-
155
-
156
-
157
-
158
-
159
-
160
-
161
-
162
-
163
-
164
-
165
-
166
-
167
-
168
-
169
-
170
-
171
-
172
-
173
-
174
-
175
-
176
-
177
-
178
-
179
-
180
-
181
-
182
-
183
-
184
-
185
-
186
-
187
-
188
 |
 |
