Dell 1600n Multifunction Mono Laser Printer Dell Laser Multi-Function Printer - Page 120

Printing Reports, Phonebook List, Sent Fax Report, Received Fax Report, System Data List
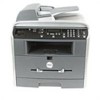
Page 120 highlights

1. 2. Press the scroll button ( or ) to display "Print" on the bottom line and press . 3. Enter the four-digit passcode and press . The faxes stored in memory are printed. To turn the secure receiving mode off: 1. Access the Secure Receive menu by following steps 1 and 2 in "To turn the secure receiving mode on:" on page 138. 2. Press the scroll button ( or ) to display "Off" on the bottom line and press . 3. Enter the four-digit passcode and press . The mode is deactivated and the multi-function printer prints all of the faxes stored in memory. 4. To return to Standby mode, press . Printing Reports The following reports are available: Phonebook List This list shows all of the numbers currently stored in the printer's memory as speed dial and group dial numbers. You can print this Phonebook list using the button on the operator panel; see page 133. Sent Fax Report This report shows information about the faxes you recently sent. Received Fax Report This report shows information about the faxes you recently received. System Data List This list shows the status of the user-selectable options. You may print this list to confirm your changes after

  • 1
  • 2
  • 3
  • 4
  • 5
  • 6
  • 7
  • 8
  • 9
  • 10
  • 11
  • 12
  • 13
  • 14
  • 15
  • 16
  • 17
  • 18
  • 19
  • 20
  • 21
  • 22
  • 23
  • 24
  • 25
  • 26
  • 27
  • 28
  • 29
  • 30
  • 31
  • 32
  • 33
  • 34
  • 35
  • 36
  • 37
  • 38
  • 39
  • 40
  • 41
  • 42
  • 43
  • 44
  • 45
  • 46
  • 47
  • 48
  • 49
  • 50
  • 51
  • 52
  • 53
  • 54
  • 55
  • 56
  • 57
  • 58
  • 59
  • 60
  • 61
  • 62
  • 63
  • 64
  • 65
  • 66
  • 67
  • 68
  • 69
  • 70
  • 71
  • 72
  • 73
  • 74
  • 75
  • 76
  • 77
  • 78
  • 79
  • 80
  • 81
  • 82
  • 83
  • 84
  • 85
  • 86
  • 87
  • 88
  • 89
  • 90
  • 91
  • 92
  • 93
  • 94
  • 95
  • 96
  • 97
  • 98
  • 99
  • 100
  • 101
  • 102
  • 103
  • 104
  • 105
  • 106
  • 107
  • 108
  • 109
  • 110
  • 111
  • 112
  • 113
  • 114
  • 115
  • 116
  • 117
  • 118
  • 119
  • 120
  • 121
  • 122
  • 123
  • 124
  • 125
  • 126
  • 127
  • 128
  • 129
  • 130
  • 131
  • 132
  • 133
  • 134
  • 135
  • 136
  • 137
  • 138
  • 139
  • 140
  • 141
  • 142
  • 143
  • 144
  • 145
  • 146
  • 147
  • 148
  • 149
  • 150
  • 151
  • 152
  • 153
  • 154
  • 155
  • 156
  • 157
  • 158
  • 159
  • 160
  • 161
  • 162
  • 163
  • 164
  • 165
  • 166
  • 167
  • 168
  • 169
  • 170
  • 171
  • 172
  • 173
  • 174
  • 175
  • 176
  • 177
  • 178
  • 179
  • 180
  • 181
  • 182
  • 183
  • 184
  • 185
  • 186
  • 187
  • 188

Press the scroll button (
or
) to display "Print" on the bottom line and press <Select>.
2.
Enter the four-digit passcode and press <Select>.
3.
The faxes stored in memory are printed.
To turn the secure receiving mode off:
Access the Secure Receive menu by following steps 1 and 2 in
"To turn the secure receiving mode on:"
on page 138
.
1.
Press the scroll button (
or
) to display "Off" on the bottom line and press <Select>.
2.
Enter the four-digit passcode and press <Select>.
3.
The mode is deactivated and the multi-function printer prints all of the faxes stored in memory.
To return to Standby mode, press <Return>.
4.
Printing Reports
The following reports are available:
Phonebook List
This list shows all of the numbers currently stored in the printer's memory as speed dial and group dial
numbers.
You can print this Phonebook list using the <Phone Book> button on the operator panel; see
page 133
.
Sent Fax Report
This report shows information about the faxes you recently sent.
Received Fax Report
This report shows information about the faxes you recently received.
System Data List
This list shows the status of the user-selectable options. You may print this list to confirm your changes after