Dell 962 All In One Photo Printer User's Guide - Page 31

Copying, Printing Other Projects, Copying Documents Using the Operator Panel
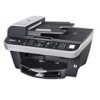
Page 31 highlights

6. 7. Click OK. 8. Click OK. NOTE: Once the printer begins printing, wait until you can see the leading edge of the banner exiting the printer, and then carefully unfold the paper down to the floor in front of the printer. Printing Other Projects The I Want To menu provides wizards for creating projects. You may want to print on an envelope, create a booklet, or print a greeting card. 1. With your document open, click File Print. 2. To customize print settings, click Preferences, Properties, Options, or Setup (depending on the program or operating system). The Printing Preferences screen displays along with the I Want To menu. 3. Select one of the available projects or click See more printing ideas. 4. Follow the instructions on the screen to complete your project. Copying To make copies, you can use the printer operator panel or your computer. For easy one-touch color or black and white copies, press Color or Black on the operator panel. Copying Documents Using the Operator Panel 1. Turn on your printer. 2. Load paper in the paper support. For more information, see Loading Paper. 3. Load your original document. For help, see Load an Original Document Into the ADF or Placing Your Original Document on the Scanner Glass. 4. On the operator panel, press the Mode button repeatedly until Copy is selected. 5. To make more than one copy, press the numbers on the keypad that correspond with the number of copies you want to make. 6. From the Start area on the operator panel, press the Color button to create a color copy of a color image, or press the Black button to create a black and white copy. For more information, see Operator Panel Menus.

  • 1
  • 2
  • 3
  • 4
  • 5
  • 6
  • 7
  • 8
  • 9
  • 10
  • 11
  • 12
  • 13
  • 14
  • 15
  • 16
  • 17
  • 18
  • 19
  • 20
  • 21
  • 22
  • 23
  • 24
  • 25
  • 26
  • 27
  • 28
  • 29
  • 30
  • 31
  • 32
  • 33
  • 34
  • 35
  • 36
  • 37
  • 38
  • 39
  • 40
  • 41
  • 42
  • 43
  • 44
  • 45
  • 46
  • 47
  • 48
  • 49
  • 50
  • 51
  • 52
  • 53
  • 54
  • 55
  • 56
  • 57
  • 58
  • 59
  • 60
  • 61
  • 62
  • 63
  • 64
  • 65
  • 66
  • 67
  • 68
  • 69
  • 70
  • 71
  • 72
  • 73
  • 74
  • 75
  • 76
  • 77
  • 78
  • 79
  • 80
  • 81
  • 82
  • 83
  • 84
  • 85
  • 86
  • 87
  • 88
  • 89
  • 90
  • 91
  • 92

Click
OK
.
7.
Click
OK
.
8.
NOTE:
Once the printer begins printing, wait until you can see the leading edge of the banner exiting
the printer, and then carefully unfold the paper down to the floor in front of the printer.
Printing Other Projects
The
I Want To
menu provides wizards for creating projects. You may want to print on an envelope, create a
booklet, or print a greeting card.
With your document open, click
File
Print
.
1.
To customize print settings, click
Preferences
,
Properties
,
Options
, or
Setup
(depending on the
program or operating system).
2.
The
Printing Preferences
screen displays along with the
I Want To
menu.
Select one of the available projects or click
See more printing ideas
.
3.
Follow the instructions on the screen to complete your project.
4.
Copying
To make copies, you can use the printer operator panel or your computer. For easy one-touch color or black
and white copies, press
Color
or
Black
on the operator panel.
Copying Documents Using the Operator Panel
Turn on your printer.
1.
Load paper in the paper support. For more information, see
Loading Paper
.
2.
Load your original document. For help, see
Load an Original Document Into the ADF
or
Placing Your
Original Document on the Scanner Glass
.
3.
On the operator panel, press the
Mode
button repeatedly until
Copy
is selected.
4.
To make more than one copy, press the numbers on the keypad that correspond with the number of
copies you want to make.
5.
From the
Start
area on the operator panel, press the
Color
button to create a color copy of a color
image, or press the
Black
button to create a black and white copy. For more information, see
Operator
Panel Menus
.
6.