Dell 962 All In One Photo Printer User's Guide - Page 40
Faxing, Setting Up the Printer With Equipment
 |
View all Dell 962 All In One Photo Printer manuals
Add to My Manuals
Save this manual to your list of manuals |
Page 40 highlights
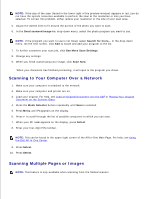
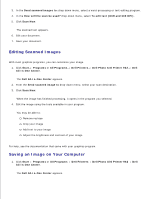
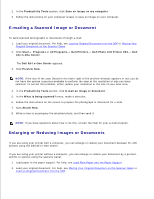
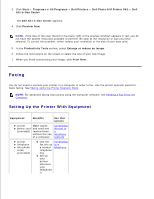
2. 3. Click Start Programs or All Programs Dell Printers Dell Photo AIO Printer 962 Dell All-In-One Center. The Dell All-In-One Center appears. 4. Click Preview Now. NOTE: If the size of the scan (found in the lower right of the preview window) appears in red, you do not have the system resources available to perform the scan at the resolution or size you have selected. To correct this problem, either reduce your resolution or the size of your scan area. 5. In the Productivity Tools section, select Enlarge or reduce an image. 6. Follow the instructions on the screen to select the size of your new image. 7. When you finish customizing your image, click Print Now. Faxing You do not need to connect your printer to a computer in order to fax. Use the printer operator panel for basic faxing. See Faxing Using the Printer Operator Panel. NOTE: For advanced faxing instructions using the computer software, see Sending a Fax From the Computer. Setting Up the Printer With Equipment Equipment Benefits See this section printer Make copies phone cord and send and (provided) receive faxes without the use of a computer. Connecting directly to a telephone wall jack printer telephone two phone cords (provided) Use the Connecting fax line as to a a normal telephone telephone line. Set up your printer wherever your telephone is.
-
 1
1 -
2
-
3
-
4
-
5
-
6
-
7
-
8
-
9
-
10
-
11
-
12
-
13
-
14
-
15
-
16
-
17
-
18
-
19
-
20
-
21
-
22
-
23
-
24
-
25
-
26
-
27
-
28
-
29
-
30
-
31
-
32
-
33
-
34
-
 35
35 -
 36
36 -
 37
37 -
 38
38 -
 39
39 -
 40
40 -
 41
41 -
 42
42 -
 43
43 -
 44
44 -
 45
45 -
46
-
47
-
48
-
49
-
50
-
51
-
52
-
53
-
54
-
55
-
56
-
57
-
58
-
59
-
60
-
61
-
62
-
63
-
64
-
65
-
66
-
67
-
68
-
69
-
70
-
71
-
72
-
73
-
74
-
75
-
76
-
77
-
78
-
79
-
80
-
81
-
82
-
83
-
84
-
85
-
86
-
87
-
88
-
89
-
90
-
91
-
92
 |
 |