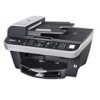
Dell 962 All In One Photo Printer User's Guide - Page 69
Check for a paper jam, Near the ADF, Near the paper input tray
 |
View all Dell 962 All In One Photo Printer manuals
Add to My Manuals
Save this manual to your list of manuals |
Page 69 highlights
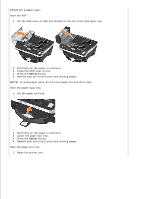
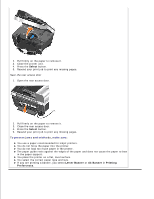
Check for a paper jam Near the ADF 1. Lift the ADF cover or ADF unit located to the left of the ADF input tray. 2. Pull firmly on the paper to remove it. 3. Close the ADF cover or unit. 4. Press the Select button. 5. Resend your print job to print any missing pages. NOTE: To avoid paper jams, do not force paper into the All-In-One. Near the paper input tray 1. Lift the paper exit tray. 2. Pull firmly on the paper to remove it. 3. Lower the paper exit tray. 4. Press the Select button. 5. Resend your print job to print any missing pages. Near the paper exit tray 1. Raise the printer unit.
-
 1
1 -
2
-
3
-
4
-
5
-
6
-
7
-
8
-
9
-
10
-
11
-
12
-
13
-
14
-
15
-
16
-
17
-
18
-
19
-
20
-
21
-
22
-
23
-
24
-
25
-
26
-
27
-
28
-
29
-
30
-
31
-
32
-
33
-
34
-
35
-
36
-
37
-
38
-
39
-
40
-
41
-
42
-
43
-
44
-
45
-
46
-
47
-
48
-
49
-
50
-
51
-
52
-
53
-
54
-
55
-
56
-
57
-
58
-
59
-
60
-
61
-
62
-
63
-
 64
64 -
 65
65 -
 66
66 -
 67
67 -
 68
68 -
 69
69 -
 70
70 -
 71
71 -
 72
72 -
 73
73 -
 74
74 -
75
-
76
-
77
-
78
-
79
-
80
-
81
-
82
-
83
-
84
-
85
-
86
-
87
-
88
-
89
-
90
-
91
-
92
 |
 |
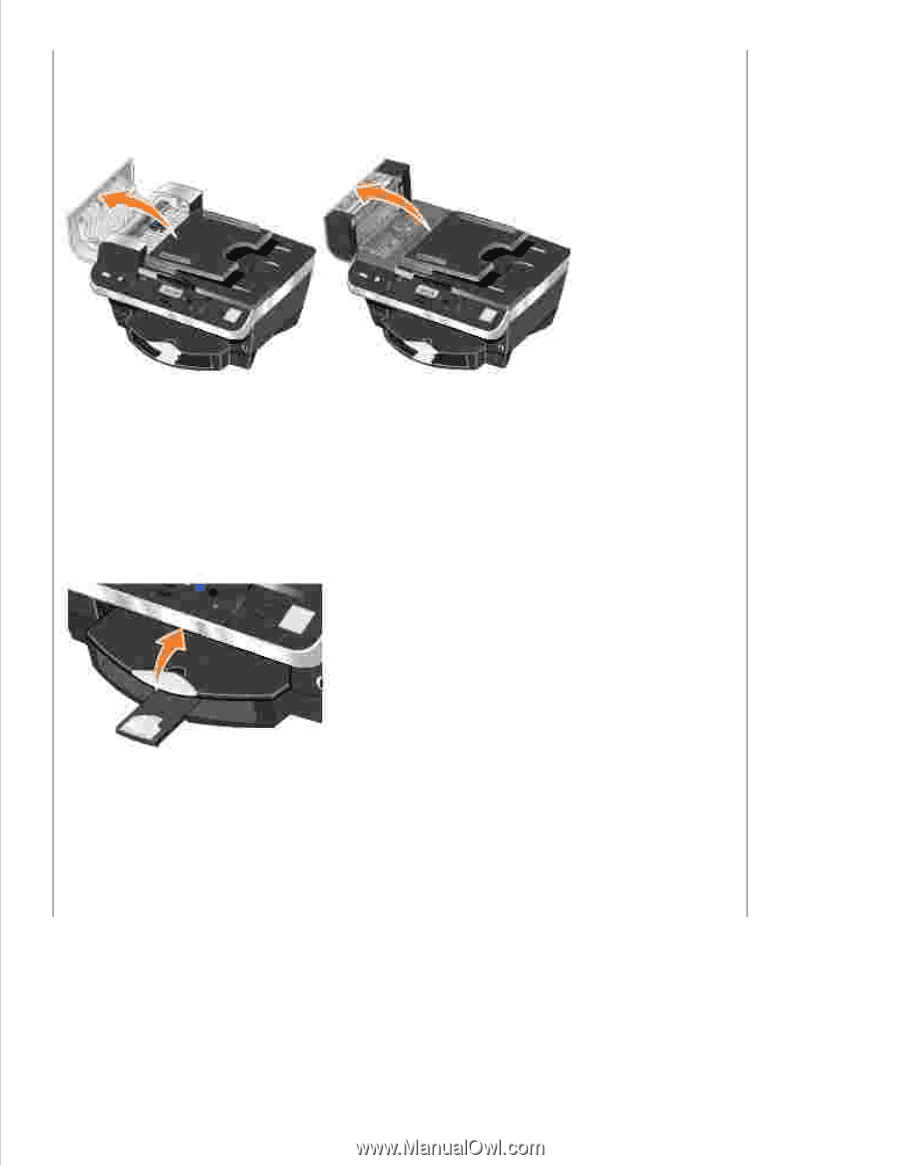
Check for a paper jam -
Near the ADF
Lift the ADF cover or ADF unit located to the left of the ADF input tray.
1.
Pull firmly on the paper to remove it.
2.
Close the ADF cover or unit.
3.
Press the
Select
button.
4.
Resend your print job to print any missing pages.
5.
NOTE:
To avoid paper jams, do not force paper into the All-In-One.
Near the paper input tray
Lift the paper exit tray.
1.
Pull firmly on the paper to remove it.
2.
Lower the paper exit tray.
3.
Press the
Select
button.
4.
Resend your print job to print any missing pages.
5.
Near the paper exit tray
Raise the printer unit.
1.