Dell E515dn Dell Multifunction Printer Users Guide - Page 52
Print a Document (Windows®), Dell MFP EXXXX, Paper Size, Orientation, Portrait, Landscape, Copies - driver windows 10
 |
View all Dell E515dn manuals
Add to My Manuals
Save this manual to your list of manuals |
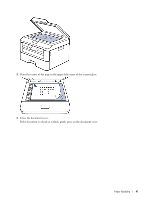
Page 52 highlights
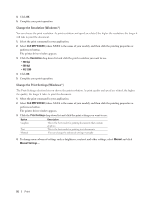
The Print Settings selection lets you choose the print resolution. As print quality and speed are related, the higher the quality, the longer it takes to print the document. • Improve Gray Printing (Windows®) You can improve the image quality of a shaded area. • Improve Pattern Printing (Windows®) You can improve the pattern printing if printed fills and patterns are different from the fills and patterns you see on your computer screen. • Improve Thin Line (Windows®) Use this option to improve the image quality of thin lines. • Print More Than One Page on a Single Sheet of Paper (N in 1) (Windows®) • Print as a Poster (Windows®) Enlarge your print size and print the document in poster mode. • Print on Both Sides of the Paper (Windows®) • Print as a Booklet (Windows®) Use this option to print a document in booklet format using 2-sided printing. The document's pages will be arranged according to the correct page number and will allow you to fold the print output at the center and read the booklet pages numerically, without having to change the order of the printed pages. • Change the Paper Source (Windows®) Select a paper source setting that matches your print conditions or purpose. Print a Document (Windows®) 1. Select the print command in your application. 2. Select Dell MFP EXXXX (where XXXX is the name of your model), and then click the printing properties or preferences button. The printer driver window appears. 3. Make sure you have loaded the correct size paper in the paper tray. 4. Click the Paper Size drop-down list, and then select your paper size. 5. In the Orientation field, select either Portrait or Landscape option to set the orientation of your printout. NOTE: If your application software contains a similar layout feature, we recommend using the one in the application. 6. Type the number of copies (1-999) you want in the Copies field. 7. Click the Media Type drop-down list, and then select the type of paper you are using. 8. To print multiple pages on a single sheet of paper or print one page of your document on multiple sheets, click the Multiple Page drop-down list, and then select your options. 9. Change other printer settings if needed. 10. Click OK. 11. Complete your print operation. 52 Print
-
 1
1 -
2
-
3
-
4
-
5
-
6
-
7
-
8
-
9
-
10
-
11
-
12
-
13
-
14
-
15
-
16
-
17
-
18
-
19
-
20
-
21
-
22
-
23
-
24
-
25
-
26
-
27
-
28
-
29
-
30
-
31
-
32
-
33
-
34
-
35
-
36
-
37
-
38
-
39
-
40
-
41
-
42
-
43
-
44
-
45
-
46
-
 47
47 -
 48
48 -
 49
49 -
 50
50 -
 51
51 -
 52
52 -
 53
53 -
 54
54 -
 55
55 -
 56
56 -
 57
57 -
58
-
59
-
60
-
61
-
62
-
63
-
64
-
65
-
66
-
67
-
68
-
69
-
70
-
71
-
72
-
73
-
74
-
75
-
76
-
77
-
78
-
79
-
80
-
81
-
82
-
83
-
84
-
85
-
86
-
87
-
88
-
89
-
90
-
91
-
92
-
93
-
94
-
95
-
96
-
97
-
98
-
99
-
100
-
101
-
102
-
103
-
104
-
105
-
106
-
107
-
108
-
109
-
110
-
111
-
112
-
113
-
114
-
115
-
116
-
117
-
118
-
119
-
120
-
121
-
122
-
123
-
124
-
125
-
126
-
127
-
128
-
129
-
130
-
131
-
132
-
133
-
134
-
135
-
136
-
137
-
138
-
139
-
140
-
141
-
142
-
143
-
144
-
145
-
146
-
147
-
148
-
149
-
150
-
151
-
152
-
153
-
154
-
155
-
156
-
157
-
158
-
159
-
160
-
161
-
162
-
163
-
164
-
165
-
166
-
167
-
168
-
169
-
170
-
171
-
172
-
173
-
174
-
175
-
176
-
177
-
178
-
179
-
180
-
181
-
182
-
183
-
184
-
185
-
186
-
187
-
188
-
189
-
190
-
191
-
192
-
193
-
194
-
195
-
196
-
197
-
198
-
199
-
200
-
201
-
202
-
203
-
204
-
205
-
206
-
207
-
208
-
209
-
210
-
211
-
212
-
213
-
214
-
215
-
216
-
217
-
218
-
219
-
220
-
221
-
222
-
223
-
224
-
225
-
226
-
227
-
228
-
229
-
230
-
231
-
232
-
233
-
234
-
235
-
236
-
237
-
238
-
239
-
240
-
241
-
242
-
243
-
244
-
245
-
246
-
247
-
248
-
249
-
250
-
251
-
252
-
253
-
254
-
255
-
256
-
257
-
258
-
259
-
260
-
261
-
262
-
263
-
264
-
265
-
266
-
267
-
268
-
269
-
270
-
271
-
272
-
273
-
274
-
275
-
276
-
277
-
278
-
279
-
280
-
281
-
282
-
283
-
284
-
285
-
286
-
287
-
288
-
289
-
290
-
291
-
292
-
293
-
294
-
295
-
296
-
297
-
298
-
299
-
300
-
301
-
302
-
303
-
304
-
305
-
306
-
307
-
308
-
309
-
310
-
311
-
312
-
313
-
314
-
315
-
316
-
317
-
318
-
319
-
320
-
321
-
322
-
323
-
324
-
325
-
326
-
327
-
328
-
329
-
330
-
331
-
332
-
333
-
334
-
335
-
336
-
337
-
338
-
339
-
340
-
341
-
342
-
343
-
344
-
345
-
346
-
347
-
348
-
349
-
350
-
351
-
352
-
353
-
354
-
355
-
356
-
357
-
358
-
359
-
360
-
361
-
362
-
363
-
364
-
365
-
366
-
367
-
368
-
369
-
370
-
371
-
372
-
373
-
374
-
375
-
376
-
377
-
378
-
379
-
380
-
381
-
382
-
383
-
384
-
385
-
386
 |
 |