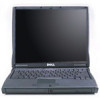
Dell Latitude C600 Service Manual
Dell Latitude C600 Manual
 |
View all Dell Latitude C600 manuals
Add to My Manuals
Save this manual to your list of manuals |
Dell Latitude C600 manual content summary:
- Dell Latitude C600 | Service Manual - Page 1
Dell™ Latitude™ C600/C500 Series SERVICE MANUAL www.dell.com support.dell.com - Dell Latitude C600 | Service Manual - Page 2
- Dell Latitude C600 | Service Manual - Page 3
Dell™ Latitude™ C600/C500 Series SERVICE MANUAL www.dell.com support.dell.com - Dell Latitude C600 | Service Manual - Page 4
to hardware or loss of data and tells you how to avoid the problem. CAUTION: A CAUTION indicates a potentially hazardous situation which, if not Dell, the DELL logo, and DellWare are trademarks of Dell Computer Corporation; Intel is a registered trademark of Intel Corporation; Microsoft and Windows - Dell Latitude C600 | Service Manual - Page 5
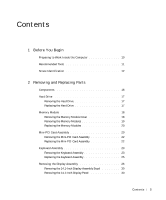
10 Recommended Tools 11 Screw Identification 12 2 Removing and Replacing Parts Components 16 Hard Drive 17 Removing the Hard Drive 17 Replacing the Hard Drive 17 Memory Module 18 Removing the Memory Module Cover 18 Removing the Memory Modules 19 Replacing the Memory Modules 20 Mini-PCI - Dell Latitude C600 | Service Manual - Page 6
Latch 37 Hinge Covers 39 Removing the Hinge Covers 39 Replacing the Hinge Covers 40 Palmrest Assembly 41 Removing the Palmrest Assembly 41 Microprocessor Thermal Cooling Assembly 44 Removing the Microprocessor Thermal Cooling Assembly . . . . 44 Hybrid Cooling Fan 45 Removing the Hybrid - Dell Latitude C600 | Service Manual - Page 7
Battery and Modular Bay Latch Assemblies 57 Removing the Battery and Modular Bay Latch Assemblies . . . . 57 Index 59 Contents 7 - Dell Latitude C600 | Service Manual - Page 8
8 Contents - Dell Latitude C600 | Service Manual - Page 9
SECTION 1 Before You Begin Preparing to Work Inside the Computer Recommended Tools Screw Identification www.dell.com | support.dell.com - Dell Latitude C600 | Service Manual - Page 10
the system board, you must remove the main battery and secondary battery (if present) before you service the computer. 10 Remove the primary battery from the battery bay and the secondary battery from the modular bay, if a secondary battery is in use. 11 Remove any installed device in the modular - Dell Latitude C600 | Service Manual - Page 11
in this manual require the following tools: • #1 magnetized Phillips screwdriver • Small flat-blade screwdriver • Small plastic scribe • Microprocessor extractor • Flash BIOS update program diskette or CD (required only when upgrading the microprocessor or replacing the reserve battery) System - Dell Latitude C600 | Service Manual - Page 12
www.dell.com | support.dell.com Screw Identification When you are removing and replacing components, photocopy the placemat as a tool to lay out and keep track of the component screws. The placemat provides the number of screws and the sizes. Screw Identification NOTICE: When reinstalling a screw, - Dell Latitude C600 | Service Manual - Page 13
Display Assembly Hinge Bracket to Bottom Case Assembly: (5 each) Rubber Screw Covers (6 each) Display Assembly and Flex Cable Retention Bracket to Top Cover: (5 each) Display Assembly EMI Shield Bracket: (2 each) Palmrest to Bottom Case Assembly: (5 each) (3 each) Hybrid Cooling Fan: (2 each - Dell Latitude C600 | Service Manual - Page 14
www.dell.com | support.dell.com Screw Placement System Board to Bottom Case Assembly: (10 each) Display Panel to Support Bracket: (12.1-inch display panel only) (4 each) Display Assembly Latch: (2 each for 14.1-inch XGA display panels) 14 Be fo r e Yo u Be g in - Dell Latitude C600 | Service Manual - Page 15
2 Removing and Replacing Parts Components Hard Drive Memory Module Mini-PCI Card Assembly Keyboard Assembly Removing the Display Assembly Display Assembly Latch Hinge Covers Palmrest Assembly Microprocessor Thermal Cooling Assembly Hybrid Cooling Fan Microprocessor Module Reserve Battery Speaker - Dell Latitude C600 | Service Manual - Page 16
www.dell.com | support.dell.com Components Exploded View display-assembly top cover keyboard palmrest assembly center control cover left speaker/antenna assembly hard drive main battery thermal cooling assembly hybrid cooling fan system board right speaker/antenna assembly modem and NIC - Dell Latitude C600 | Service Manual - Page 17
squeeze the top of the hard drive case), and avoid dropping it. Hard Drive bottom of computer M3 x 5-mm screw hard drive door Removing the Hard Drive NOTICE: Disconnect the computer and any attached devices from electrical outlets, and remove any installed batteries. NOTICE: To avoid ESD, ground - Dell Latitude C600 | Service Manual - Page 18
.dell.com | support.dell.com 2 Push down on the drive door until it snaps into place. 3 Replace the M3 x 5-mm screw in the hard drive door. Memory Module Memory Module Cover Removing the Memory Module Cover NOTICE: Disconnect the computer and any attached devices from electrical outlets, and remove - Dell Latitude C600 | Service Manual - Page 19
the keyboard assembly and does not secure the memory module cover. Memory Modules JDIM 1 JDIM 2 inner tabs (2 per socket) memory module sockets (2) Removing the Memory Modules NOTICE: Disconnect the computer and any attached devices from electrical outlets, and remove any installed batteries - Dell Latitude C600 | Service Manual - Page 20
www.dell.com | support.dell.com NOTICE: Read "Preparing to Work Inside the Computer" before performing the following procedure. 1 Remove the memory module cover. 2 To release a memory module from its socket, spread apart the inner tabs of the memory module socket just far enough for the memory - Dell Latitude C600 | Service Manual - Page 21
Mini-PCI Card Assembly Using Interface Cables socket modem connector NIC connector Mini PCI Wireless NIC Assembly Using Antenna Cable connection to internal antenna mini-coax antenna cable Removing and Repl aci ng Part s 21 - Dell Latitude C600 | Service Manual - Page 22
dell.com | support.dell.com Removing the Mini-PCI Card Assembly NOTICE: Disconnect the computer and any attached devices from electrical outlets, and remove any installed batteries mini-PCI card to the internal antenna. 3 Lower the Replace the memory module cover. 22 Removi ng and Replacing Parts - Dell Latitude C600 | Service Manual - Page 23
1 Remove the hard drive. 2 Turn the computer over, and remove the five M2.5 x 12-mm screws from the holes labeled "circle K." 3 Turn the computer over and open the display. NOTICE: The key caps on the keyboard are fragile, easily dislodged, and time-consuming to replace. Be careful when removing and - Dell Latitude C600 | Service Manual - Page 24
www.dell.com | support.dell.com 4 To release the keyboard from the palmrest assembly, use a small, flatblade screwdriver or plastic scribe to pull up on the scalloped edge of the blank key on the keyboard. NOTE: Removing the center control cover provides more room to free the keyboard. Keyboard - Dell Latitude C600 | Service Manual - Page 25
on the system board assembly by pulling up on the connector. NOTICE: Do not pull on the keyboard flex cable. 9 Remove the keyboard assembly from the bottom case assembly. Replacing the Keyboard Assembly 1 Place the keyboard on the palmrest at the front of the computer with the keys face down and the - Dell Latitude C600 | Service Manual - Page 26
M2.5 x 12-mm screws in the holes labeled "circle K." Removing the Display Assembly NOTICE: You must remove the display assembly before you remove the palmrest assembly; the display assembly hinges pass through the back of the palmrest assembly. NOTE: Always remove and replace the display panel as - Dell Latitude C600 | Service Manual - Page 27
display-assembly top cover (14.1-inch display assembly shown) center control cover M2.5 x 5-mm screws (5) bottom case assembly 1 Remove the hard drive. 2 Remove the center control cover. a Use a scribe to lift the right edge of the center control cover and pry it loose from the bottom case assembly - Dell Latitude C600 | Service Manual - Page 28
dell.com | support.dell.com 4 From the back of the computer, remove the five M2.5 x 5-mm screws labeled with the "circle D." There are two screws on the right hinge and three screws on the left hinge. 5 Open the display assembly approximately 180 degrees and support 28 Removi ng and Replacing Parts - Dell Latitude C600 | Service Manual - Page 29
14.1-Inch Display Assembly Bezel and Panel rubber screw covers (6) M2.5 x 5-mm screws (6) display assembly bezel display panel flex cable retention bracket display-feed flex cable display-assembly top cover M2 x 4-mm screws (5) Removing and Repl aci ng Part s 29 - Dell Latitude C600 | Service Manual - Page 30
batteries. NOTICE: To avoid ESD, ground yourself by using a wrist grounding strap or by touching an unpainted metal surface on the computer. 1 Remove the hard drive. 2 Remove the display assembly. 3 Remove the display assembly bezel. 4 Remove the hinge covers. 5 Remove the two M2 x 4-mm screws - Dell Latitude C600 | Service Manual - Page 31
and rotate the top of the display panel out of the display-assembly top cover. Replacing the 14.1-Inch Display Panel 1 Place the bottom edge of the display panel in Reinstall the five M2 x 4-mm screws that secure the display panel to the display-assembly top cover. Removing and Repl aci ng Part s 31 - Dell Latitude C600 | Service Manual - Page 32
procedure. 1 Remove the hard drive. 2 Remove the display assembly. 3 Remove the display assembly bezel. 4 Remove the tape that covers the display panel connector. 5 Pull the top flex cable connector down and away to remove it from the display panel connector. 32 Removi ng and Replacing Parts - Dell Latitude C600 | Service Manual - Page 33
Display Assembly Bezel and Panel rubber screw covers (6) M3 x 3-mm screws (4) M2.5 x 5-mm screws (6) display assembly bezel display panel flex cable retention bracket display-feed flex cable display-assembly top cover support bracket M2 x 4-mm screws (5) Removing and Repl aci ng Part s 33 - Dell Latitude C600 | Service Manual - Page 34
the computer. 1 Remove the hard drive. 2 Remove the display assembly. 3 Remove the display assembly bezel. 4 Remove the hinge covers. 5 Remove the four M3 x 3-mm screws on the front of the display panel that secure the display panel to the support bracket. 6 Remove the M2 x 4-mm screw that secures - Dell Latitude C600 | Service Manual - Page 35
, and pull the panel out of the display-assembly top cover at an angle. Replacing the Display-Assembly Top Cover If you are replacing the display-assembly top cover, remove the support bracket. 1 Remove the two M2 x 4-mm screws on the left side of the display-assembly top cover and the two M2 x 4-mm - Dell Latitude C600 | Service Manual - Page 36
Work Inside the Computer" before performing the following procedure. 1 Remove the hard drive. 2 Remove the display assembly. 3 Remove the display assembly bezel. 4 Remove the four M3 x 3-mm screws that secure the display panel to the support bracket (see "12.1-Inch Display Assembly Bezel and Panel - Dell Latitude C600 | Service Manual - Page 37
metal surface on the computer. Display Assembly Latch for 14.1-Inch XGA Display Panels display assembly latch M2.5 x 5-mm screws (2) Removing the Display Assembly Latch 1 Remove the hard drive. 2 Remove the display assembly. 3 Remove the display assembly bezel. Removing and Repl aci ng Part s 37 - Dell Latitude C600 | Service Manual - Page 38
www.dell.com | support.dell.com 4 Remove the display assembly latch by removing the two M2.5 x 5-mm screws that secure it to the display-assembly top cover. Display Assembly Latch for 14.1-Inch SXGA+ and 12.1Inch Display Panels display assembly latch NOTICE: Do not remove the display assembly latch - Dell Latitude C600 | Service Manual - Page 39
Hinge Covers Removing the Hinge Covers Removing the Hinge Covers 1 Remove the display assembly. 2 Rotate the hinges forward at an angle of approximately 90 degrees to the front of the display assembly. 3 To remove the hinge covers, slide them off of the hinges. Removing and Repl aci ng Part s 39 - Dell Latitude C600 | Service Manual - Page 40
www.dell.com | support.dell.com Replacing the Hinge Covers Hinge Covers right rhiginhgtehcinogveercover left hinge cover 1 Attach the display assembly to the bottom case assembly. 40 Removi ng and Replacing Parts - Dell Latitude C600 | Service Manual - Page 41
of the computer. Palmrest Assembly Removing the Palmrest Assembly Screws M2.5 x 12-mm screws (3) M2 x 3-mm screws (2) Removing the Palmrest Assembly NOTICE: Disconnect the computer and any attached devices from electrical outlets, and remove any installed batteries. NOTICE: To avoid ESD, ground - Dell Latitude C600 | Service Manual - Page 42
www.dell.com | support.dell.com NOTICE: Read "Preparing to Work Inside the Computer" before performing the following procedure. 1 Remove the hard drive. 2 Remove the keyboard. NOTICE: You must remove the display assembly before you remove the palmrest assembly; the display assembly hinges pass - Dell Latitude C600 | Service Manual - Page 43
Palmrest Assembly M2 x 3-mm screws (3) palmrest assembly palmrest flex cable bottom case assembly touch pad connector 8 Using the plastic scribe along the edge of the plastic, remove the palmrest assembly from the bottom case assembly. Removing and Repl aci ng Part s 43 - Dell Latitude C600 | Service Manual - Page 44
dell.com | support.dell.com Microprocessor Thermal Cooling Assembly Microprocessor Thermal Cooling Assembly captive screws (4) microprocessor thermal cooling assembly Removing performing the following procedure. 1 Remove the hard drive. 2 Remove the keyboard screws. 44 Removi ng and Replacing Parts - Dell Latitude C600 | Service Manual - Page 45
from the system board assembly. NOTICE: When reattaching the microprocessor thermal cooling assembly, tighten the captive screws in consecutive order, from 1 to 4. Hybrid Cooling Fan Hybrid Cooling Fan M2.5 x 5-mm screws (2) M2 x 3-mm screw (1) hybrid cooling fan Removing and Repl aci ng Part s 45 - Dell Latitude C600 | Service Manual - Page 46
www.dell.com | support.dell.com Removing the Hybrid Cooling Fan 1 Remove the hard drive. 2 Remove the keyboard assembly. 3 Remove the display assembly. 4 Remove the palmrest assembly. 5 Remove the thermal cooling assembly. 6 Remove the two M2.5 x 5-mm screws and one M2 x 3-mm screw that secure the - Dell Latitude C600 | Service Manual - Page 47
batteries. NOTICE: To avoid ESD, ground yourself by using a wrist grounding strap or by touching an unpainted metal surface on the computer. NOTICE: Read "Preparing to Work Inside the Computer" before performing the following procedure. 1 Remove the hard drive. 2 Remove the keyboard assembly - Dell Latitude C600 | Service Manual - Page 48
Take note of the arrow on the ZIF socket cam screw (see "Microprocessor Modules"). NOTE: Your system has a type I or type II ZIF socket. b Use a microprocessor extraction tool to remove the microprocessor module. Replacing the Microprocessor Module NOTICE: Seating the microprocessor module properly - Dell Latitude C600 | Service Manual - Page 49
Update the BIOS using a flash BIOS update program diskette or CD. NOTE: For instructions to update or flash the BIOS, see the Dell Portable Computer BIOS Update Guide. Reserve Battery NOTICE: The reserve battery provides power to the computer's RTC and NVRAM when the computer is turned off. Removing - Dell Latitude C600 | Service Manual - Page 50
. 2 Position the reserve battery on the EMI shield next to the connector to minimize slack in the cable. 3 Update the BIOS using a flash BIOS update program diskette or CD. NOTE: For instructions to update or flash the BIOS, see the Dell Portable Computer BIOS Update Guide. Speaker Assemblies The - Dell Latitude C600 | Service Manual - Page 51
Disconnect the computer and any attached devices from electrical outlets, and remove any installed batteries. NOTICE: To avoid ESD, ground yourself by touching an unpainted and antenna wire routing so you can replace them properly under their routing clips. Removing and Repl aci ng Part s 51 - Dell Latitude C600 | Service Manual - Page 52
www.dell.com | support.dell.com Speaker Assemblies antenna cable in-line connector left speaker mounting ring left speaker holder antenna cable right speaker holder right speaker mounting ring 52 Removi ng and Replacing Parts - Dell Latitude C600 | Service Manual - Page 53
speaker wire properly between the battery bay and hard drive area. 2 Slide the speaker assembly down in to the bottom case assembly. NOTE: Speakers face out in the bottom case assembly holders. System Board Assembly The system board's BIOS chip contains the system's service tag number, which is also - Dell Latitude C600 | Service Manual - Page 54
1 Remove the hard drive. 2 Remove the keyboard assembly. 3 Remove the display assembly. 4 Remove the palmrest assembly. 5 Remove the thermal cooling assembly. 6 Remove the microprocessor. 7 Verify that all PC Cards or plastic blanks are removed from the PC Card slot. 54 Removi ng and Replacing Parts - Dell Latitude C600 | Service Manual - Page 55
case assembly over and remove the M2.5 x 5-mm screw, which is identified by a white "circle B" and arrow on a red label attached to the top of the battery connector on the front center of the system board. 12 Remove the speakers from the bottom case assembly. Removing and Repl aci ng Part s 55 - Dell Latitude C600 | Service Manual - Page 56
, the keyboard assembly, and the hard drive. 6 Replace the modular bay devices and any PC Cards or plastic blanks in the PC Card slot. 7 Insert the diskette or CD that accompanied the replacement system board assembly into the appropriate drive, and turn on the computer. Follow the instructions on - Dell Latitude C600 | Service Manual - Page 57
Latch Assemblies NOTICE: Disconnect the computer and any attached devices from electrical outlets, and remove any installed batteries. NOTICE: To avoid ESD, ground yourself by using a wrist grounding strap or by touching an unpainted metal surface on the computer. Removing and Repl aci ng Part s 57 - Dell Latitude C600 | Service Manual - Page 58
www.dell.com | support.dell.com NOTICE: Read "Preparing to Work Inside the Computer" before performing the following procedure. 1 Remove the hard drive. 2 Remove the keyboard assembly. 3 Remove the display assembly. 4 Remove the palmrest assembly. 5 Remove the system board. 6 Remove the battery - Dell Latitude C600 | Service Manual - Page 59
-feed flex cable H hard drive, 17 removing, 17 replacing, 17 hinge covers removing, 39 replacing, 40 hybrid cooling fan removing, 46 K keyboard, 23 removing, 23 replacing, 25 M memory module, 18 removing, 19 replacing, 20 microprocessor module removing, 47 replacing, 48 microprocessor thermal - Dell Latitude C600 | Service Manual - Page 60
system board removing, 54 replacing, 56 system board assembly removing, 47 system components, 16 T thermal cooling assembly removing, 44 60 Index - Dell Latitude C600 | Service Manual - Page 61
- Dell Latitude C600 | Service Manual - Page 62
082EWX A01 P/N 82EWX Rev. A01 Printed in the U.S.A. www.dell.com support.dell.com
-
 1
1 -
 2
2 -
 3
3 -
 4
4 -
 5
5 -
 6
6 -
 7
7 -
8
-
9
-
10
-
11
-
12
-
13
-
14
-
15
-
16
-
17
-
18
-
19
-
20
-
21
-
22
-
23
-
24
-
25
-
26
-
27
-
28
-
29
-
30
-
31
-
32
-
33
-
34
-
35
-
36
-
37
-
38
-
39
-
40
-
41
-
42
-
43
-
44
-
45
-
46
-
47
-
48
-
49
-
50
-
51
-
52
-
53
-
54
-
55
-
56
-
57
-
58
-
59
-
60
-
61
-
62
 |
 |

www.dell.com
support.dell.com
Dell™ Latitude™ C600/C500
Series
SERVICE MANUAL