Dell Latitude C600 Service Manual - Page 17
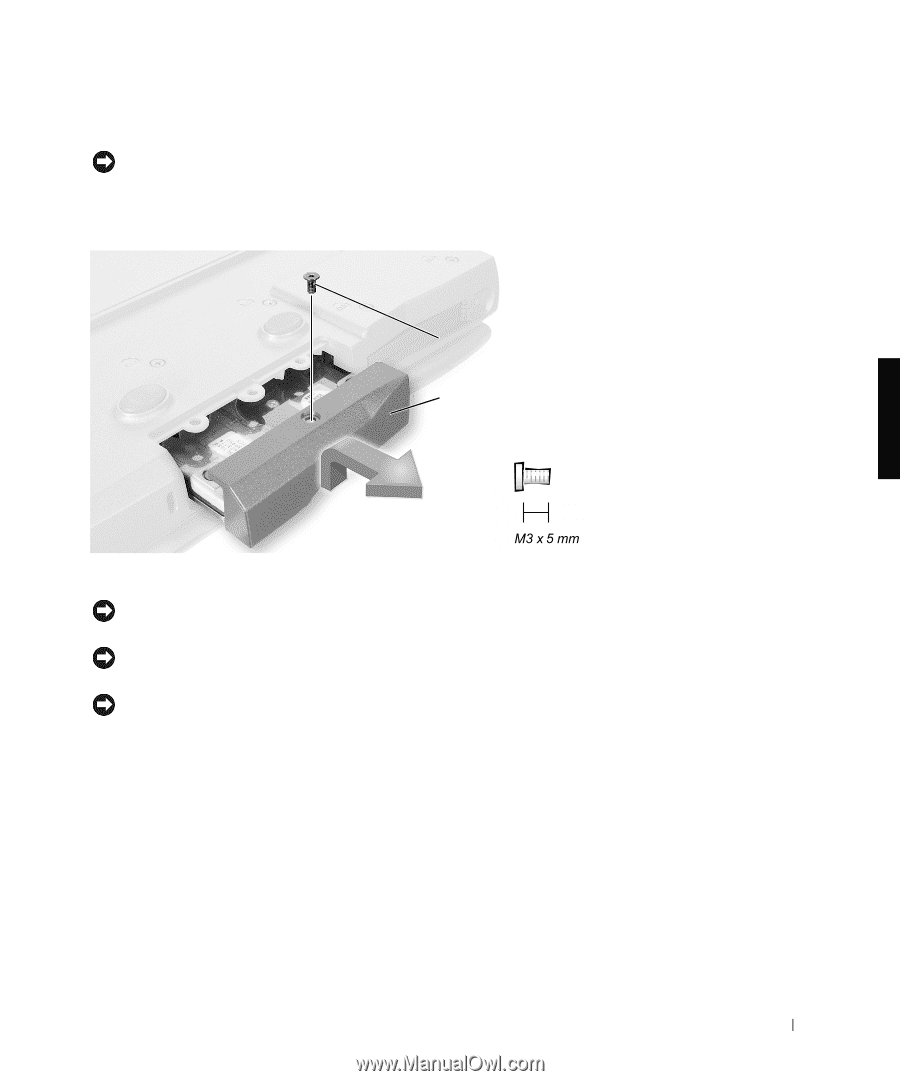
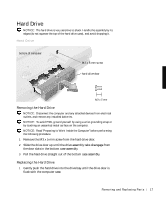
Hard Drive, Removing the Hard Drive, Remove the M3 x 5-mm screw from the hard drive door. - hard drive replacement
 |
View all Dell Latitude C600 manuals
Add to My Manuals
Save this manual to your list of manuals |
Page 17 highlights
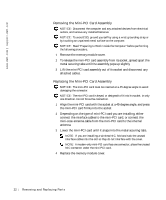
Hard Drive NOTICE: The hard drive is very sensitive to shock. Handle the assembly by its edges (do not squeeze the top of the hard drive case), and avoid dropping it. Hard Drive bottom of computer M3 x 5-mm screw hard drive door Removing the Hard Drive NOTICE: Disconnect the computer and any attached devices from electrical outlets, and remove any installed batteries. NOTICE: To avoid ESD, ground yourself by using a wrist grounding strap or by touching an unpainted metal surface on the computer. NOTICE: Read "Preparing to Work Inside the Computer" before performing the following procedure. 1 Remove the M3 x 5-mm screw from the hard drive door. 2 Slide the drive door up until the drive assembly tabs disengage from the door slots in the bottom case assembly. 3 Pull the hard drive straight out of the bottom case assembly. Replacing the Hard Drive 1 Gently push the hard drive into the drive bay until the drive door is flush with the computer case. Removing and Repl aci ng Part s 17
-
 1
1 -
2
-
3
-
4
-
5
-
6
-
7
-
8
-
9
-
10
-
11
-
 12
12 -
 13
13 -
 14
14 -
 15
15 -
 16
16 -
 17
17 -
 18
18 -
 19
19 -
 20
20 -
 21
21 -
 22
22 -
23
-
24
-
25
-
26
-
27
-
28
-
29
-
30
-
31
-
32
-
33
-
34
-
35
-
36
-
37
-
38
-
39
-
40
-
41
-
42
-
43
-
44
-
45
-
46
-
47
-
48
-
49
-
50
-
51
-
52
-
53
-
54
-
55
-
56
-
57
-
58
-
59
-
60
-
61
-
62
 |
 |