Dell PowerEdge T340 EMC Installation and Service Manual - Page 90
Power supply unit, Removing the power supply unit blank
 |
View all Dell PowerEdge T340 manuals
Add to My Manuals
Save this manual to your list of manuals |
Page 90 highlights
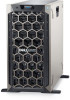
Figure 69. Installing the heat sink Next steps 1. Replace the air shroud. 2. Follow the procedure listed in After working inside your system. 3. While booting, press F2 to enter System Setup and verify that the processor information matches the new system configuration. 4. Run the system diagnostics to verify that the new processor operates correctly. Power supply unit NOTE: For more information, see the Technical specifications section. Removing the power supply unit blank Prerequisites 1. Follow the safety guidelines listed in Safety instructions. Steps Remove the PSU blank in the bay by pulling the blank outward. CAUTION: To ensure proper system cooling, the PSU blank must be installed in the second PSU bay in a non-redundant configuration. Remove the PSU blank only if you are installing a second PSU. 90 Installing and removing system components
-
 1
1 -
2
-
3
-
4
-
5
-
6
-
7
-
8
-
9
-
10
-
11
-
12
-
13
-
14
-
15
-
16
-
17
-
18
-
19
-
20
-
21
-
22
-
23
-
24
-
25
-
26
-
27
-
28
-
29
-
30
-
31
-
32
-
33
-
34
-
35
-
36
-
37
-
38
-
39
-
40
-
41
-
42
-
43
-
44
-
45
-
46
-
47
-
48
-
49
-
50
-
51
-
52
-
53
-
54
-
55
-
56
-
57
-
58
-
59
-
60
-
61
-
62
-
63
-
64
-
65
-
66
-
67
-
68
-
69
-
70
-
71
-
72
-
73
-
74
-
75
-
76
-
77
-
78
-
79
-
80
-
81
-
82
-
83
-
84
-
 85
85 -
 86
86 -
 87
87 -
 88
88 -
 89
89 -
 90
90 -
 91
91 -
 92
92 -
 93
93 -
 94
94 -
 95
95 -
96
-
97
-
98
-
99
-
100
-
101
-
102
-
103
-
104
-
105
-
106
-
107
-
108
-
109
-
110
-
111
-
112
-
113
-
114
-
115
-
116
-
117
-
118
-
119
-
120
-
121
-
122
-
123
-
124
-
125
-
126
 |
 |
