Dell PowerEdge T440 EMC Installation and Service Manual - Page 89
Installing a cabled drive
 |
View all Dell PowerEdge T440 manuals
Add to My Manuals
Save this manual to your list of manuals |
Page 89 highlights
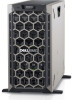
Figure 44. Removing a cabled drive Next steps 1. Follow the procedure listed in After working inside your system. 2. Install the internal drive bay into the chassis. 3. If disconnected, reconnect the power and data cable(s) to the remaining drive(s) in the internal drive bay. Installing a cabled drive Prerequisites 1. Follow the safety guidelines listed in Safety instructions on page 61. 2. Follow the procedure listed in Before working inside your system on page 62. 3. Remove the internal drive bay. Steps 1. Insert the drive into the internal drive bay with the drive connector facing outward. 2. Secure the drive to the internal drive bay using the four screws. NOTE: When installing new drives into the internal drive bay, use the spare drive screws attached to the drive bay. Installing and removing system components 89
-
 1
1 -
2
-
3
-
4
-
5
-
6
-
7
-
8
-
9
-
10
-
11
-
12
-
13
-
14
-
15
-
16
-
17
-
18
-
19
-
20
-
21
-
22
-
23
-
24
-
25
-
26
-
27
-
28
-
29
-
30
-
31
-
32
-
33
-
34
-
35
-
36
-
37
-
38
-
39
-
40
-
41
-
42
-
43
-
44
-
45
-
46
-
47
-
48
-
49
-
50
-
51
-
52
-
53
-
54
-
55
-
56
-
57
-
58
-
59
-
60
-
61
-
62
-
63
-
64
-
65
-
66
-
67
-
68
-
69
-
70
-
71
-
72
-
73
-
74
-
75
-
76
-
77
-
78
-
79
-
80
-
81
-
82
-
83
-
 84
84 -
 85
85 -
 86
86 -
 87
87 -
 88
88 -
 89
89 -
 90
90 -
 91
91 -
 92
92 -
 93
93 -
 94
94 -
95
-
96
-
97
-
98
-
99
-
100
-
101
-
102
-
103
-
104
-
105
-
106
-
107
-
108
-
109
-
110
-
111
-
112
-
113
-
114
-
115
-
116
-
117
-
118
-
119
-
120
-
121
-
122
-
123
-
124
-
125
-
126
-
127
-
128
-
129
-
130
-
131
-
132
-
133
-
134
-
135
-
136
-
137
-
138
-
139
-
140
-
141
-
142
-
143
-
144
-
145
-
146
-
147
 |
 |
