Epson 585Wi Installation Guide - Ultra-Short Throw Wall Mount (ELPMB43) - Page 61
Store the markers and attach labels, Attach cover
 |
View all Epson 585Wi manuals
Add to My Manuals
Save this manual to your list of manuals |
Page 61 highlights
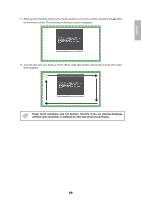
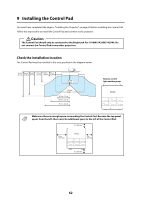
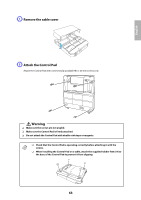
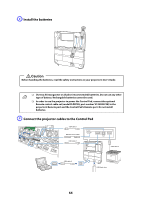
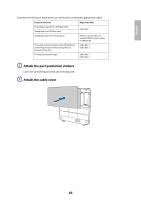
English 14. Perform touch calibration by pressing Menu on the remote control. On the Extended menu, select Easy Interactive Function, then Touch Unit Setup. Select Touch Calibration and follow the instructions. H Store the markers and attach labels 1. Store the markers inside the Touch Unit. 2. Attach the labels to the tabs on either side of the Touch Unit. Match the centers of the labels with the tabs on the Touch Unit. If the Touch Unit moves out of position, use the position of the labels to determine where to reposition the Touch Unit. I Attach cover Attach the dial cover. Make sure to tighten the screw at the bottom of the cover. 61
-
 1
1 -
2
-
3
-
4
-
5
-
6
-
7
-
8
-
9
-
10
-
11
-
12
-
13
-
14
-
15
-
16
-
17
-
18
-
19
-
20
-
21
-
22
-
23
-
24
-
25
-
26
-
27
-
28
-
29
-
30
-
31
-
32
-
33
-
34
-
35
-
36
-
37
-
38
-
39
-
40
-
41
-
42
-
43
-
44
-
45
-
46
-
47
-
48
-
49
-
50
-
51
-
52
-
53
-
54
-
55
-
 56
56 -
 57
57 -
 58
58 -
 59
59 -
 60
60 -
 61
61 -
 62
62 -
 63
63 -
 64
64 -
 65
65 -
 66
66 -
67
-
68
-
69
-
70
-
71
-
72
-
73
-
74
-
75
-
76
-
77
-
78
-
79
-
80
-
81
-
82
-
83
-
84
-
85
-
86
-
87
-
88
-
89
-
90
-
91
-
92
-
93
-
94
-
95
-
96
-
97
-
98
-
99
-
100
-
101
-
102
-
103
-
104
-
105
-
106
-
107
-
108
-
109
-
110
-
111
-
112
-
113
-
114
-
115
-
116
-
117
-
118
-
119
-
120
-
121
-
122
-
123
-
124
-
125
-
126
-
127
-
128
-
129
-
130
-
131
-
132
-
133
-
134
-
135
-
136
-
137
-
138
-
139
-
140
 |
 |
61
English
14.
Perform touch calibration by pressing
Menu
on the remote control. On the
Extended
menu, select
Easy Interactive Function
, then
Touch Unit Setup
. Select
Touch Calibration
and follow the
instructions.
H
Store the markers and attach labels
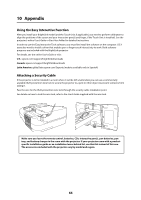
1.
Store the markers inside the Touch Unit.
2.
Attach the labels to the tabs on either side of the Touch Unit. Match the centers of the labels with the
tabs on the Touch Unit.
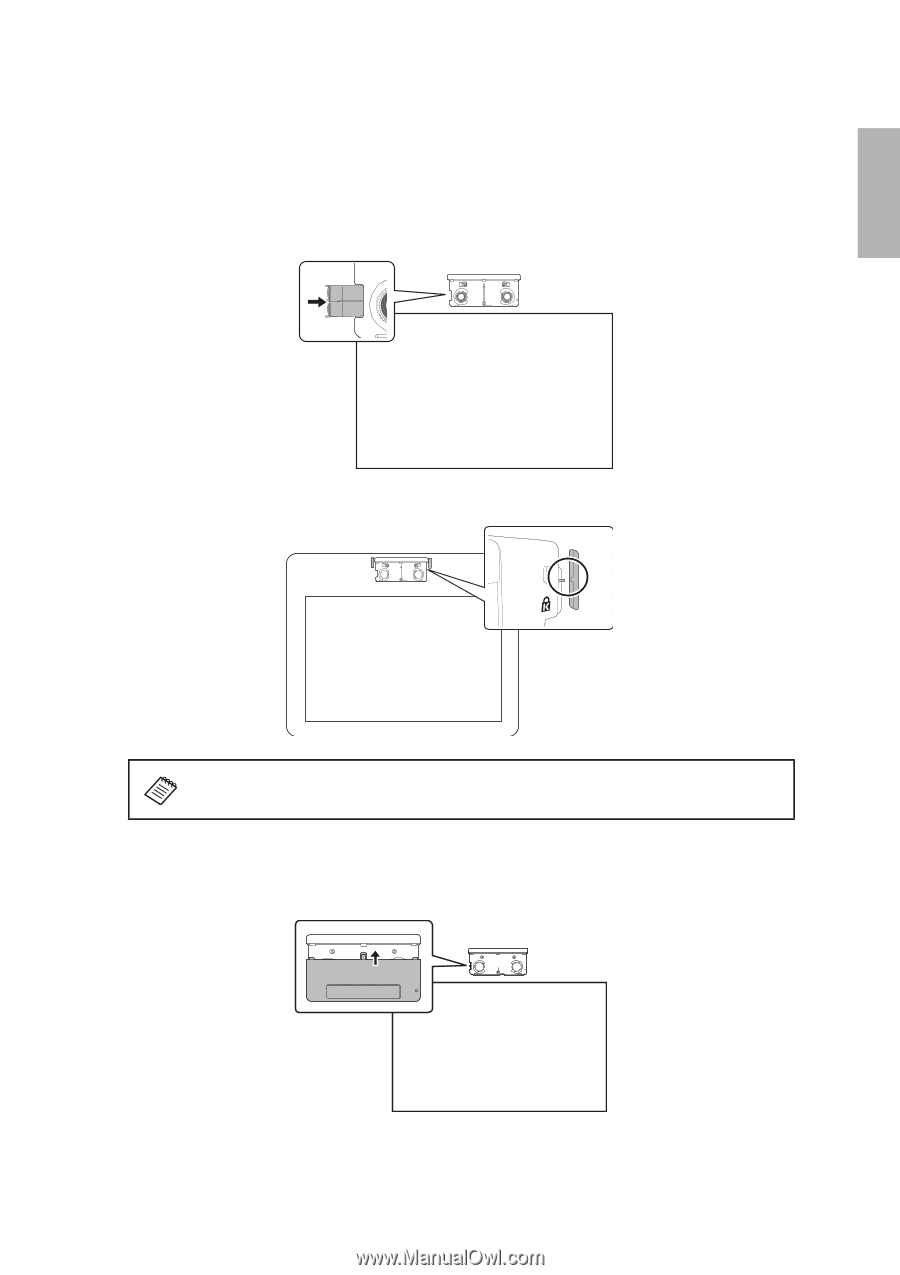
I
Attach cover
Attach the dial cover. Make sure to tighten the screw at the bottom of the cover.
If the Touch Unit moves out of position, use the position of the labels to determine
where to reposition the Touch Unit.