Epson 585Wi Installation Guide - Ultra-Short Throw Wall Mount (ELPMB43) - Page 9
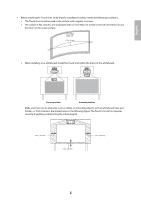
Touch Unit, Control Pad, When installing the Control Pad on a wall
 |
View all Epson 585Wi manuals
Add to My Manuals
Save this manual to your list of manuals |
Page 9 highlights
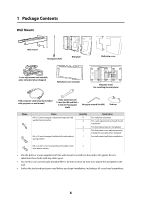
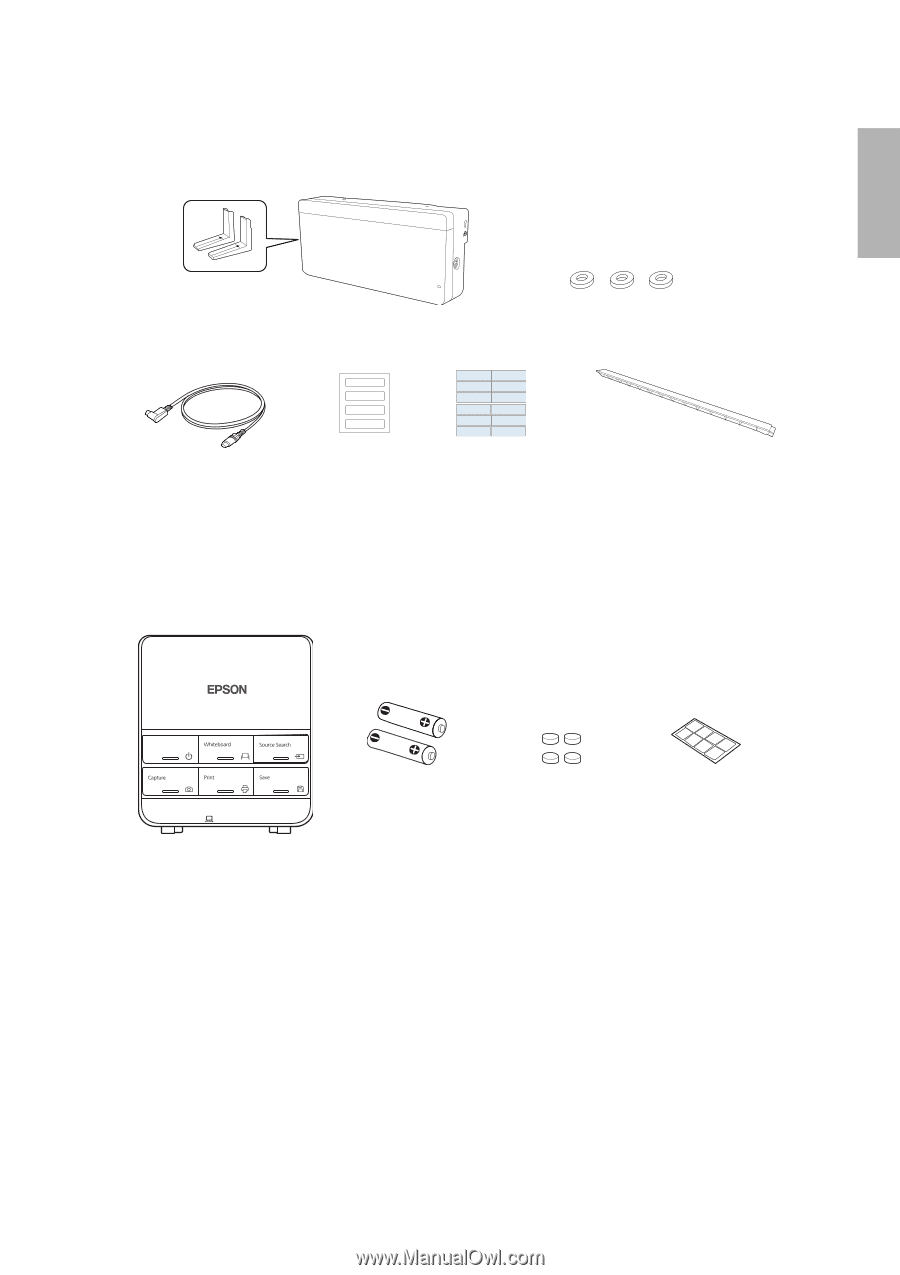
English Touch Unit The following parts are packaged with your projector and are necessary when attaching the Touch Unit. When installing the Touch Unit on a non-magnetic surface, you will also need three M4 screws. Touch Unit and markers (markers are inside the unit) Spacer for screw hole (×3) Touch Unit connection cable Label (×4) Tape (approx. 2.4 inches [6 cm]) for securing the markers (×12) Infrared deflector (approx. 11.2 inches [28.5 cm]) (×8) Control Pad The following parts are packaged with your projector and are necessary when attaching the Control Pad. When installing the Control Pad on a wall, you will also need four M4 × 20 mm screws. Control Pad AA size batteries (× 2) Rubber feet Port protection stickers 9
-
 1
1 -
2
-
3
-
 4
4 -
 5
5 -
 6
6 -
 7
7 -
 8
8 -
 9
9 -
 10
10 -
 11
11 -
 12
12 -
 13
13 -
 14
14 -
15
-
16
-
17
-
18
-
19
-
20
-
21
-
22
-
23
-
24
-
25
-
26
-
27
-
28
-
29
-
30
-
31
-
32
-
33
-
34
-
35
-
36
-
37
-
38
-
39
-
40
-
41
-
42
-
43
-
44
-
45
-
46
-
47
-
48
-
49
-
50
-
51
-
52
-
53
-
54
-
55
-
56
-
57
-
58
-
59
-
60
-
61
-
62
-
63
-
64
-
65
-
66
-
67
-
68
-
69
-
70
-
71
-
72
-
73
-
74
-
75
-
76
-
77
-
78
-
79
-
80
-
81
-
82
-
83
-
84
-
85
-
86
-
87
-
88
-
89
-
90
-
91
-
92
-
93
-
94
-
95
-
96
-
97
-
98
-
99
-
100
-
101
-
102
-
103
-
104
-
105
-
106
-
107
-
108
-
109
-
110
-
111
-
112
-
113
-
114
-
115
-
116
-
117
-
118
-
119
-
120
-
121
-
122
-
123
-
124
-
125
-
126
-
127
-
128
-
129
-
130
-
131
-
132
-
133
-
134
-
135
-
136
-
137
-
138
-
139
-
140
 |
 |
9
English
Touch Unit
The following parts are packaged with your projector and are necessary when attaching the Touch Unit. When
installing the Touch Unit on a non-magnetic surface, you will also need three M4 screws.
Control Pad
The following parts are packaged with your projector and are necessary when attaching the Control Pad.
When installing the Control Pad on a wall, you will also need four M4 × 20 mm screws.
Tape (approx. 2.4 inches
[6 cm]) for securing the
markers (×12)
Label (×4)
Touch Unit and markers
(markers are inside the unit)
Touch Unit connection cable
Infrared deflector (approx.
11.2 inches [28.5 cm]) (×8)
Spacer for screw hole (×3)
AA size batteries (× 2)
Port protection
stickers
Control Pad
Rubber feet