Epson 7900p User Manual - Page 97
Setting a Password, Creating the E-Mail Settings, is not already running, open it
 |
UPC - 010343852464
View all Epson 7900p manuals
Add to My Manuals
Save this manual to your list of manuals |
Page 97 highlights
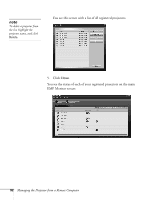
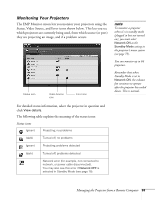
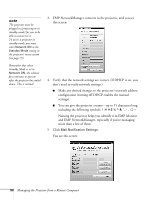
3. Enter the projector's IP address and click Add. The projector's icon is added to the EMP NetworkManager screen. 4. Click Connect to connect the projector to the network. Setting a Password You can set a password to restrict access to each projector from EMP NetworkManager: 1. Right-click the icon of the projector whose password you want to set, then select Change Password. 2. Enter a password up to 14 characters in length. Creating the E-Mail Settings 1. If EMP NetworkManager is not already running, open it from the Start menu. You see your registered projectors displayed as shown: 2. Double-click the icon for the projector whose e-mail settings you want to create. Enter your password, if you created one (see above). Managing the Projector from a Remote Computer 97
-
 1
1 -
2
-
3
-
4
-
5
-
6
-
7
-
8
-
9
-
10
-
11
-
12
-
13
-
14
-
15
-
16
-
17
-
18
-
19
-
20
-
21
-
22
-
23
-
24
-
25
-
26
-
27
-
28
-
29
-
30
-
31
-
32
-
33
-
34
-
35
-
36
-
37
-
38
-
39
-
40
-
41
-
42
-
43
-
44
-
45
-
46
-
47
-
48
-
49
-
50
-
51
-
52
-
53
-
54
-
55
-
56
-
57
-
58
-
59
-
60
-
61
-
62
-
63
-
64
-
65
-
66
-
67
-
68
-
69
-
70
-
71
-
72
-
73
-
74
-
75
-
76
-
77
-
78
-
79
-
80
-
81
-
82
-
83
-
84
-
85
-
86
-
87
-
88
-
89
-
90
-
91
-
 92
92 -
 93
93 -
 94
94 -
 95
95 -
 96
96 -
 97
97 -
 98
98 -
 99
99 -
 100
100 -
 101
101 -
 102
102 -
103
-
104
-
105
-
106
-
107
-
108
-
109
-
110
-
111
-
112
-
113
-
114
-
115
-
116
-
117
-
118
-
119
-
120
-
121
-
122
-
123
-
124
-
125
-
126
-
127
-
128
-
129
-
130
-
131
-
132
-
133
-
134
-
135
-
136
-
137
-
138
-
139
-
140
-
141
-
142
-
143
-
144
-
145
-
146
 |
 |
