Epson 8300NL User Manual - Page 116
Installing the Rear Cable Cover, Installing Multiple Projectors
 |
UPC - 010343846029
View all Epson 8300NL manuals
Add to My Manuals
Save this manual to your list of manuals |
Page 116 highlights
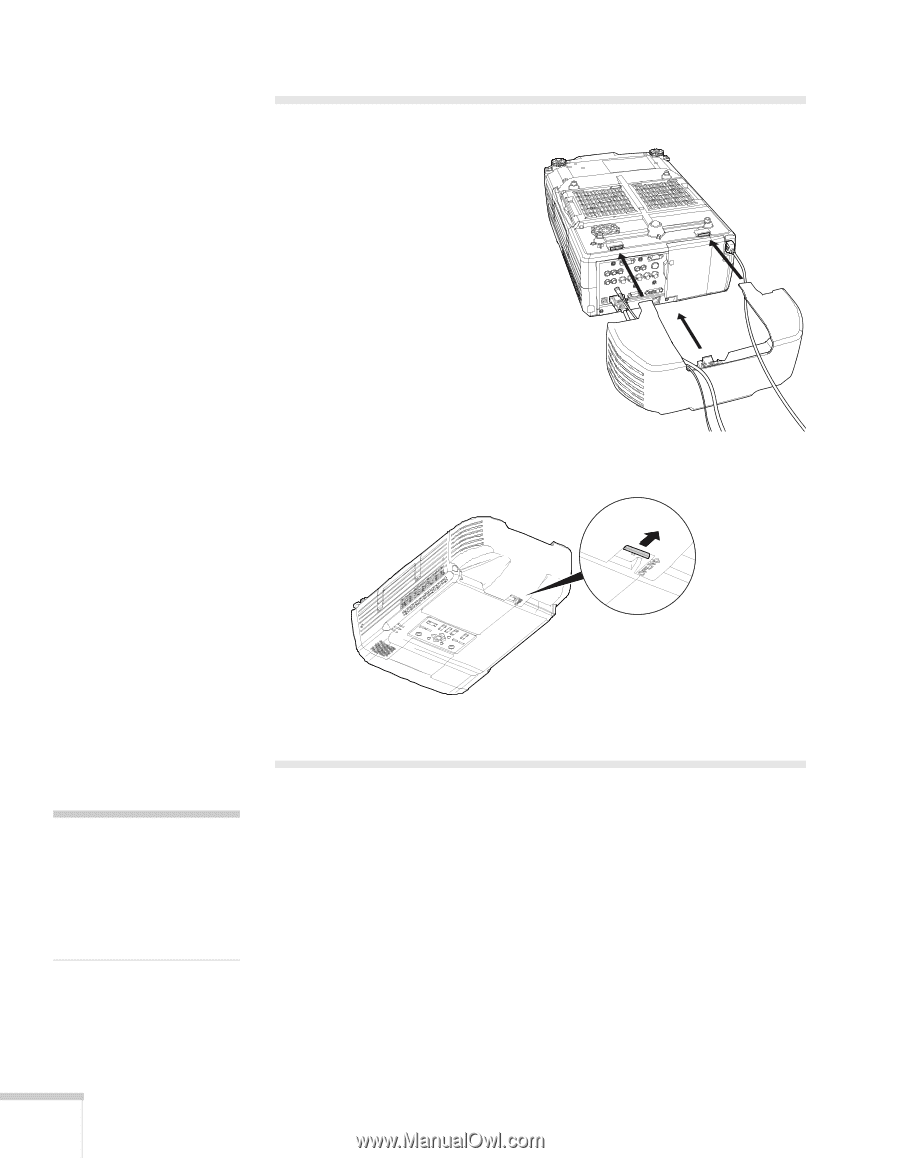
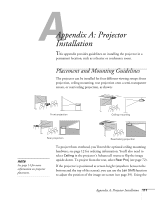
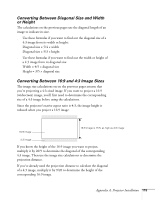
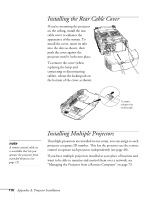
Installing the Rear Cable Cover If you're mounting the projector on the ceiling, install the rear cable cover to enhance the appearance of the system. To install the cover, insert its tabs into the slots as shown, then push the cover against the projector until it locks into place. To remove the cover (when replacing the lamp and connecting or disconnecting cables), release the locking tab on the bottom of the cover as shown: To open, release the locking tab note A remote control cable set is available that lets you operate the projector from extended distances (see page 12). Installing Multiple Projectors If multiple projectors are installed in one room, you can assign to each projector a separate ID number. This lets the presenter use the remote control to operate each projector independently (see page 48). If you have multiple projectors installed at your place of business and want to be able to monitor and control them over a network, see "Managing the Projector from a Remote Computer" on page 73. 116 Appendix A: Projector Installation
-
 1
1 -
2
-
3
-
4
-
5
-
6
-
7
-
8
-
9
-
10
-
11
-
12
-
13
-
14
-
15
-
16
-
17
-
18
-
19
-
20
-
21
-
22
-
23
-
24
-
25
-
26
-
27
-
28
-
29
-
30
-
31
-
32
-
33
-
34
-
35
-
36
-
37
-
38
-
39
-
40
-
41
-
42
-
43
-
44
-
45
-
46
-
47
-
48
-
49
-
50
-
51
-
52
-
53
-
54
-
55
-
56
-
57
-
58
-
59
-
60
-
61
-
62
-
63
-
64
-
65
-
66
-
67
-
68
-
69
-
70
-
71
-
72
-
73
-
74
-
75
-
76
-
77
-
78
-
79
-
80
-
81
-
82
-
83
-
84
-
85
-
86
-
87
-
88
-
89
-
90
-
91
-
92
-
93
-
94
-
95
-
96
-
97
-
98
-
99
-
100
-
101
-
102
-
103
-
104
-
105
-
106
-
107
-
108
-
109
-
110
-
 111
111 -
 112
112 -
 113
113 -
 114
114 -
 115
115 -
 116
116 -
 117
117 -
 118
118 -
 119
119 -
 120
120 -
 121
121 -
122
-
123
-
124
-
125
-
126
-
127
-
128
-
129
-
130
-
131
-
132
-
133
-
134
-
135
-
136
-
137
-
138
 |
 |