Epson 8300NL User Manual - Page 66
From the Video menu, select, Select a number 1 to 10.
 |
UPC - 010343846029
View all Epson 8300NL manuals
Add to My Manuals
Save this manual to your list of manuals |
Page 66 highlights
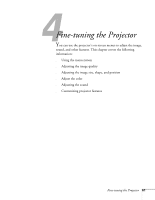
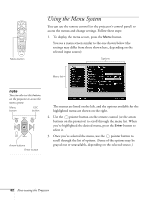
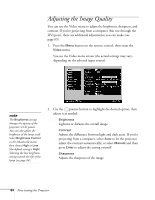
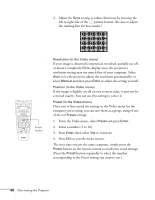
4. Adjust the Sync setting to reduce blurriness by pressing the left or right side of the pointer button. (Be sure to adjust the tracking first for best results.) Preset button ■ Resolution (in the Video menu) If your image is distorted (compressed, stretched, partially cut off, or doesn't completely fill the display area), the projector's resolution setting may not match that of your computer. Select Auto to let the projector adjust the resolution automatically; or select Manual and then press Enter to adjust the setting yourself. ■ Position (in the Video menu) If the image is slightly cut off on one or more sides, it may not be centered exactly. You can use this setting to center it. ■ Preset (in the Video menu) Once you've fine-tuned the settings in the Video menu for the computer you're using, you can save them as a group, using of one of the ten Preset settings: 1. From the Video menu, select Preset and press Enter. 2. Select a number (1 to 10). 3. Press Enter, then select Yes to overwrite. 4. Press ESC to exit the menu system. The next time you use the same computer, simply press the Preset button on the remote control to recall your saved settings. (Press the Preset button repeatedly to select the number corresponding to the Preset setting you want to use.) 66 Fine-tuning the Projector
-
 1
1 -
2
-
3
-
4
-
5
-
6
-
7
-
8
-
9
-
10
-
11
-
12
-
13
-
14
-
15
-
16
-
17
-
18
-
19
-
20
-
21
-
22
-
23
-
24
-
25
-
26
-
27
-
28
-
29
-
30
-
31
-
32
-
33
-
34
-
35
-
36
-
37
-
38
-
39
-
40
-
41
-
42
-
43
-
44
-
45
-
46
-
47
-
48
-
49
-
50
-
51
-
52
-
53
-
54
-
55
-
56
-
57
-
58
-
59
-
60
-
 61
61 -
 62
62 -
 63
63 -
 64
64 -
 65
65 -
 66
66 -
 67
67 -
 68
68 -
 69
69 -
 70
70 -
 71
71 -
72
-
73
-
74
-
75
-
76
-
77
-
78
-
79
-
80
-
81
-
82
-
83
-
84
-
85
-
86
-
87
-
88
-
89
-
90
-
91
-
92
-
93
-
94
-
95
-
96
-
97
-
98
-
99
-
100
-
101
-
102
-
103
-
104
-
105
-
106
-
107
-
108
-
109
-
110
-
111
-
112
-
113
-
114
-
115
-
116
-
117
-
118
-
119
-
120
-
121
-
122
-
123
-
124
-
125
-
126
-
127
-
128
-
129
-
130
-
131
-
132
-
133
-
134
-
135
-
136
-
137
-
138
 |
 |