Epson 8300NL User Manual - Page 14
Positioning the Projector
 |
UPC - 010343846029
View all Epson 8300NL manuals
Add to My Manuals
Save this manual to your list of manuals |
Page 14 highlights
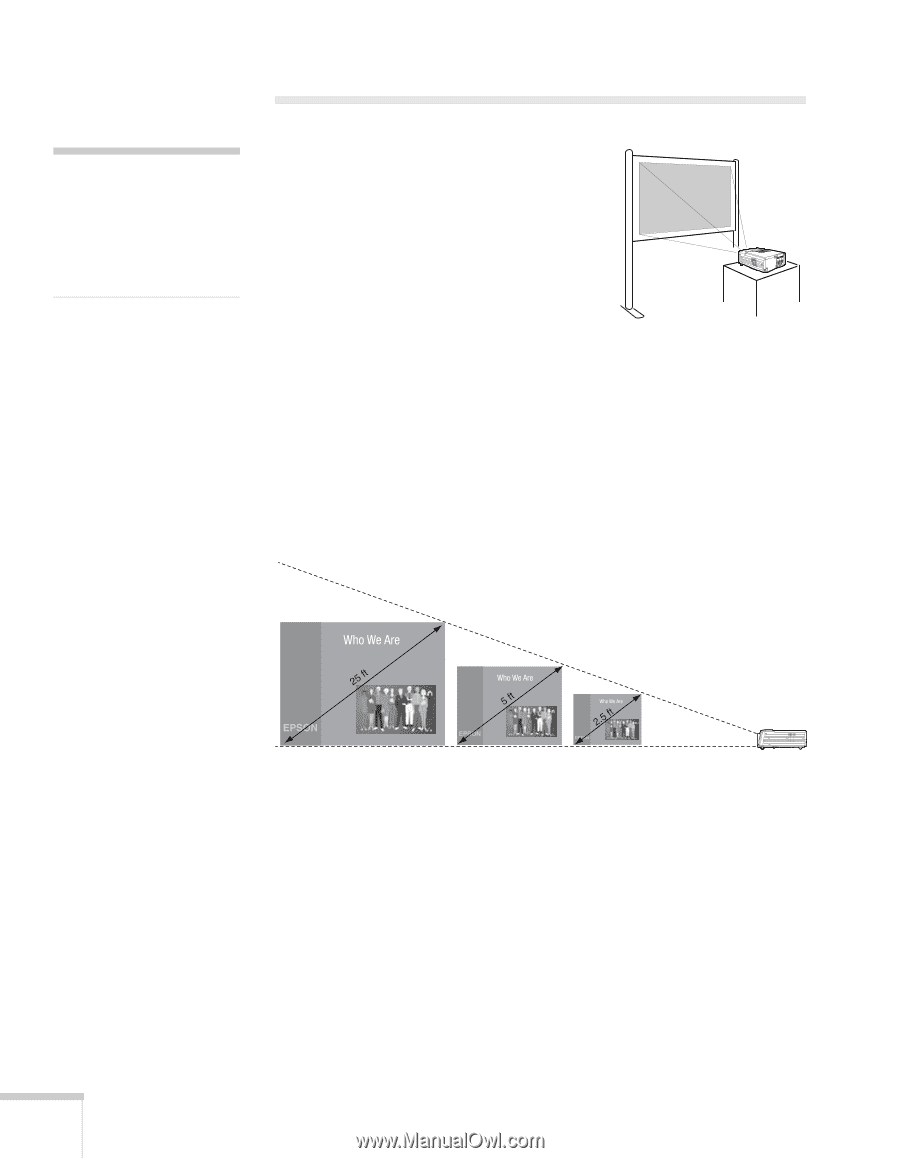
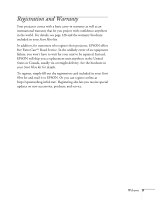
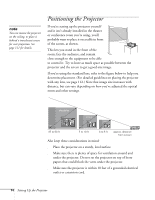
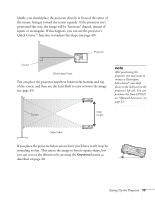
note You can mount the projector on the ceiling, or place it behind a translucent screen for rear projection. See page 111 for details. Positioning the Projector If you're setting up the projector yourself and it isn't already installed in the theater or conference room you're using, you'll probably want to place it on a table in front of the screen, as shown. a This lets you stand in the front of the room, face the audience, and remain close enough to the equipment to be able to control it. Try to leave as much space as possible between the projector and the screen to get a good-size image. If you're using the standard lens, refer to the figure below to help you determine placement. (For detailed guidelines on placing the projector with any lens, see page 112.) Note that image size increases with distance, but can vary depending on how you've adjusted the optical zoom and other settings. TBD 37 to 50 ft 7 to 10 ft 3 to 5 ft approx. distance from screen Also keep these considerations in mind: ■ Place the projector on a sturdy, level surface. ■ Make sure there is plenty of space for ventilation around and under the projector. Do not set the projector on top of loose papers that could block the vents under the projector. ■ Make sure the projector is within 10 feet of a grounded electrical outlet or extension cord. 14 Setting Up the Projector
-
 1
1 -
2
-
3
-
4
-
5
-
6
-
7
-
8
-
 9
9 -
 10
10 -
 11
11 -
 12
12 -
 13
13 -
 14
14 -
 15
15 -
 16
16 -
 17
17 -
 18
18 -
 19
19 -
20
-
21
-
22
-
23
-
24
-
25
-
26
-
27
-
28
-
29
-
30
-
31
-
32
-
33
-
34
-
35
-
36
-
37
-
38
-
39
-
40
-
41
-
42
-
43
-
44
-
45
-
46
-
47
-
48
-
49
-
50
-
51
-
52
-
53
-
54
-
55
-
56
-
57
-
58
-
59
-
60
-
61
-
62
-
63
-
64
-
65
-
66
-
67
-
68
-
69
-
70
-
71
-
72
-
73
-
74
-
75
-
76
-
77
-
78
-
79
-
80
-
81
-
82
-
83
-
84
-
85
-
86
-
87
-
88
-
89
-
90
-
91
-
92
-
93
-
94
-
95
-
96
-
97
-
98
-
99
-
100
-
101
-
102
-
103
-
104
-
105
-
106
-
107
-
108
-
109
-
110
-
111
-
112
-
113
-
114
-
115
-
116
-
117
-
118
-
119
-
120
-
121
-
122
-
123
-
124
-
125
-
126
-
127
-
128
-
129
-
130
-
131
-
132
-
133
-
134
-
135
-
136
-
137
-
138
 |
 |