Epson 8300NL User Manual - Page 67
Adjusting the Image Size, Shape, and Position
 |
UPC - 010343846029
View all Epson 8300NL manuals
Add to My Manuals
Save this manual to your list of manuals |
Page 67 highlights
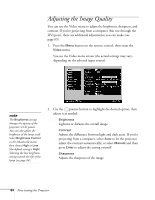
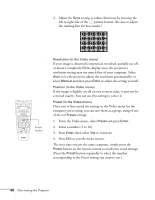
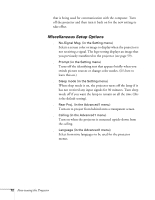
Adjusting the Image Size, Shape, and Position Whether you're projecting from a computer or video player, you can use these settings to adjust the size, shape, and position of the image. ■ Resize button Adjusts how an image fits into the display area. For computer images, resizing is normally unnecessary, since the projector automatically resizes the image to make the best use of the display area. If you press the Resize button on the remote control, the projector displays the image at the output resolution of the computer (which make the image larger or smaller, depending on its resolution). If the resolution of the image is the same as the projector's (1024 × 768), pressing Resize has no effect. For video images, pressing resize switches the aspect ratio between 4:3 and 16:9. This lets you play certain digital video images or movies recorded on certain DVDs in 16:9 widescreen format. ■ Keystone (in the Setting menu) Squares up the shape of the image after the projector has been tilted upward or angled to one side (see page 40). If you notice lines or edges looking jagged after adjusting the shape, decrease the Sharpness setting (see page 64). ■ Position (in the Video menu) If the image is slightly cut off on one or more sides, it may not be centered exactly. You can use this setting to center it. note If your computer image is stretched, compressed, or doesn't fit correctly on the screen, you should try adjusting the Resolution setting first (see page 66). Fine-tuning the Projector 67
-
 1
1 -
2
-
3
-
4
-
5
-
6
-
7
-
8
-
9
-
10
-
11
-
12
-
13
-
14
-
15
-
16
-
17
-
18
-
19
-
20
-
21
-
22
-
23
-
24
-
25
-
26
-
27
-
28
-
29
-
30
-
31
-
32
-
33
-
34
-
35
-
36
-
37
-
38
-
39
-
40
-
41
-
42
-
43
-
44
-
45
-
46
-
47
-
48
-
49
-
50
-
51
-
52
-
53
-
54
-
55
-
56
-
57
-
58
-
59
-
60
-
61
-
 62
62 -
 63
63 -
 64
64 -
 65
65 -
 66
66 -
 67
67 -
 68
68 -
 69
69 -
 70
70 -
 71
71 -
 72
72 -
73
-
74
-
75
-
76
-
77
-
78
-
79
-
80
-
81
-
82
-
83
-
84
-
85
-
86
-
87
-
88
-
89
-
90
-
91
-
92
-
93
-
94
-
95
-
96
-
97
-
98
-
99
-
100
-
101
-
102
-
103
-
104
-
105
-
106
-
107
-
108
-
109
-
110
-
111
-
112
-
113
-
114
-
115
-
116
-
117
-
118
-
119
-
120
-
121
-
122
-
123
-
124
-
125
-
126
-
127
-
128
-
129
-
130
-
131
-
132
-
133
-
134
-
135
-
136
-
137
-
138
 |
 |