Epson LW-700 Users Guide - Page 46
Feeding and Cutting the Tape, Adjusting Print Density, Auto cut, Print copies, Feed and cut
 |
View all Epson LW-700 manuals
Add to My Manuals
Save this manual to your list of manuals |
Page 46 highlights
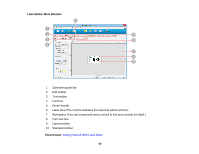
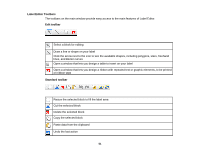
2. Use the key to highlight Auto cut and press the key. 3. Use the key to highlight Off and press the key. 4. Do one of the following: • To print a long ribbon with a repeated pattern (or multiple copies of the same label), press the key and select Print copies. • To print a single label, press the button. 5. To remove the labels or ribbon, cut it with scissors, or press the key + the button and select Feed and cut. Parent topic: Printing Labels Using the Built-In Keyboard Feeding and Cutting the Tape You can feed the tape to add length to a label or ribbon design. You can also feed and cut a label or ribbon that has been printed without cutting. 1. Press the key + the button. 2. Use the key to highlight one of the following settings and press the key: • Tape feed • Feed and cut Parent topic: Printing Labels Using the Built-In Keyboard Adjusting Print Density If your labels are printing too dark or too light, you can adjust the print density. 1. Press the + keys. 2. Use the key to highlight Print density and press the key. 3. Do one of the following: • To make the print lighter, select one of the - settings. • To make the print darker, select one of the + settings. 4. Try printing again to make sure the density is adjusted as desired. Parent topic: Printing Labels Using the Built-In Keyboard 46
-
 1
1 -
2
-
3
-
4
-
5
-
6
-
7
-
8
-
9
-
10
-
11
-
12
-
13
-
14
-
15
-
16
-
17
-
18
-
19
-
20
-
21
-
22
-
23
-
24
-
25
-
26
-
27
-
28
-
29
-
30
-
31
-
32
-
33
-
34
-
35
-
36
-
37
-
38
-
39
-
40
-
 41
41 -
 42
42 -
 43
43 -
 44
44 -
 45
45 -
 46
46 -
 47
47 -
 48
48 -
 49
49 -
 50
50 -
 51
51 -
52
-
53
-
54
-
55
-
56
-
57
-
58
-
59
-
60
-
61
-
62
-
63
-
64
-
65
-
66
-
67
-
68
-
69
-
70
-
71
-
72
-
73
-
74
-
75
-
76
-
77
-
78
-
79
-
80
-
81
-
82
-
83
-
84
-
85
-
86
-
87
-
88
-
89
-
90
-
91
-
92
-
93
-
94
-
95
-
96
-
97
-
98
-
99
-
100
-
101
-
102
-
103
-
104
-
105
-
106
-
107
-
108
-
109
-
110
-
111
-
112
-
113
-
114
-
115
-
116
-
117
-
118
-
119
-
120
-
121
-
122
-
123
-
124
-
125
-
126
-
127
-
128
-
129
 |
 |
