Epson PhotoPC 750Z User Manual - Page 139
Cleaning the Print Heads, is highlighted.
 |
View all Epson PhotoPC 750Z manuals
Add to My Manuals
Save this manual to your list of manuals |
Page 139 highlights
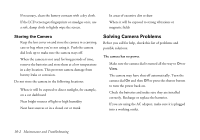
5 Go to the Color menu and select the color format you want to use for your printout. (See page 9-10.) 6 To change the print mode, go to the Mode menu and select Fast or Fine. (See page 9-10.) 7 When you're ready to print your contact sheet, follow the steps under "Producing Your Printout" on page 9-11. Cleaning the Print Heads If you notice that your photos are printing too light, or if dots are missing from an image, you can run a printer cleaning cycle from the camera. This standard maintenance procedure unclogs the nozzles in the print heads. Follow these steps: 1 From the Print menu, press the cleaning is highlighted. button until Head 2 Press the SEL button to start the cleaning cycle. The 9 LCD screen goes blank and the display panel shows a star flashing across it while the cycle runs. Cleaning takes about two minutes, during which the printer makes some noise and the power light flashes. When it's finished, the LCD screen displays the menu A again. 3 Press the ESC button to exit the Direct Print program. B Printing Directly From the Camera 9-17
-
 1
1 -
2
-
3
-
4
-
5
-
6
-
7
-
8
-
9
-
10
-
11
-
12
-
13
-
14
-
15
-
16
-
17
-
18
-
19
-
20
-
21
-
22
-
23
-
24
-
25
-
26
-
27
-
28
-
29
-
30
-
31
-
32
-
33
-
34
-
35
-
36
-
37
-
38
-
39
-
40
-
41
-
42
-
43
-
44
-
45
-
46
-
47
-
48
-
49
-
50
-
51
-
52
-
53
-
54
-
55
-
56
-
57
-
58
-
59
-
60
-
61
-
62
-
63
-
64
-
65
-
66
-
67
-
68
-
69
-
70
-
71
-
72
-
73
-
74
-
75
-
76
-
77
-
78
-
79
-
80
-
81
-
82
-
83
-
84
-
85
-
86
-
87
-
88
-
89
-
90
-
91
-
92
-
93
-
94
-
95
-
96
-
97
-
98
-
99
-
100
-
101
-
102
-
103
-
104
-
105
-
106
-
107
-
108
-
109
-
110
-
111
-
112
-
113
-
114
-
115
-
116
-
117
-
118
-
119
-
120
-
121
-
122
-
123
-
124
-
125
-
126
-
127
-
128
-
129
-
130
-
131
-
132
-
133
-
 134
134 -
 135
135 -
 136
136 -
 137
137 -
 138
138 -
 139
139 -
 140
140 -
 141
141 -
 142
142 -
 143
143 -
 144
144 -
145
-
146
-
147
-
148
-
149
-
150
-
151
-
152
-
153
-
154
-
155
-
156
-
157
-
158
-
159
-
160
-
161
-
162
-
163
-
164
-
165
-
166
-
167
-
168
-
169
-
170
 |
 |
