Epson PhotoPC 750Z User Manual - Page 42
Selecting Pictures to Erase, If you choose
 |
View all Epson PhotoPC 750Z manuals
Add to My Manuals
Save this manual to your list of manuals |
Page 42 highlights
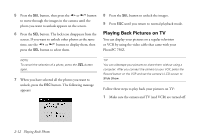
Selecting Pictures to Erase You select pictures to erase using the Photo Control menu. You can either select individual pictures, or choose to erase all the pictures in the camera. Using the same menu, you can select pictures to lock (protect from erasing) or lock all pictures. See pages 2-9 to 2-12 for information about locking and unlocking pictures. Make sure the camera is set to Play, and follow these steps to erase pictures: 1 Press the SEL button to display the LCD screen menus. 2 Press the or button until you see the Photo Control menu, then press the SEL button to display the menu options: 3 Press the SEL button to enter the Erase mode. The following menu is displayed: 4 Press the or or Erase All: button to choose Select Photo If you want to erase just one or some of the photos, choose Select Photo. Then continue with Step 5. If you choose Erase All. Then press the SEL button. A message appears asking you to confirm that you want to erase the photos. Press the SEL button to erase the photos; or press the ESC button to return to the Photo Control menu without erasing the photos. 5 Press the SEL button, then press the or button to move through the images in the camera until the photo you want appears on the screen. 2-8 Playing Back Photos
-
 1
1 -
2
-
3
-
4
-
5
-
6
-
7
-
8
-
9
-
10
-
11
-
12
-
13
-
14
-
15
-
16
-
17
-
18
-
19
-
20
-
21
-
22
-
23
-
24
-
25
-
26
-
27
-
28
-
29
-
30
-
31
-
32
-
33
-
34
-
35
-
36
-
 37
37 -
 38
38 -
 39
39 -
 40
40 -
 41
41 -
 42
42 -
 43
43 -
 44
44 -
 45
45 -
 46
46 -
 47
47 -
48
-
49
-
50
-
51
-
52
-
53
-
54
-
55
-
56
-
57
-
58
-
59
-
60
-
61
-
62
-
63
-
64
-
65
-
66
-
67
-
68
-
69
-
70
-
71
-
72
-
73
-
74
-
75
-
76
-
77
-
78
-
79
-
80
-
81
-
82
-
83
-
84
-
85
-
86
-
87
-
88
-
89
-
90
-
91
-
92
-
93
-
94
-
95
-
96
-
97
-
98
-
99
-
100
-
101
-
102
-
103
-
104
-
105
-
106
-
107
-
108
-
109
-
110
-
111
-
112
-
113
-
114
-
115
-
116
-
117
-
118
-
119
-
120
-
121
-
122
-
123
-
124
-
125
-
126
-
127
-
128
-
129
-
130
-
131
-
132
-
133
-
134
-
135
-
136
-
137
-
138
-
139
-
140
-
141
-
142
-
143
-
144
-
145
-
146
-
147
-
148
-
149
-
150
-
151
-
152
-
153
-
154
-
155
-
156
-
157
-
158
-
159
-
160
-
161
-
162
-
163
-
164
-
165
-
166
-
167
-
168
-
169
-
170
 |
 |
