Epson PhotoPC 750Z User Manual - Page 24
Automatic Continuous Shooting, pictures you want. The red light flashes as the camera
 |
View all Epson PhotoPC 750Z manuals
Add to My Manuals
Save this manual to your list of manuals |
Page 24 highlights
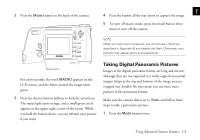
4 Press button until cont/quick is selected and then press SEL to view the continuous/quick shot menu. 5 Press or to change the setting to Cont. 6 Press SEL, then press the ESC button twice to return to view mode. A red frame appears around the previewed image, and the word CONTINUOUS appears briefly. You see the continuous shooting icon at the bottom of the screen. The display panel shows a blinking arrow next to the Cnt (continuous) symbol. 7 Press and hold the shutter button all the way down. The status light flashes red and the camera beeps as it captures each picture. 8 Release the shutter button when you have captured the pictures you want. The red light flashes as the camera processes the images. 9 To switch back to normal picture taking, follow steps 1 through 5 above, but turn off the continuous mode. Automatic Continuous Shooting You can combine continuous shooting with the timer for delayed automatic capture of sixteen images in eight seconds. This allows you to photograph yourself in motion. Follow these steps: 1 Secure the camera on a flat surface or on a tripod. (See page A-2 for information on attaching the camera to a tripod.) 2 Turn the camera dial to View. 1-8 Using Advanced Camera Features
-
 1
1 -
2
-
3
-
4
-
5
-
6
-
7
-
8
-
9
-
10
-
11
-
12
-
13
-
14
-
15
-
16
-
17
-
18
-
 19
19 -
 20
20 -
 21
21 -
 22
22 -
 23
23 -
 24
24 -
 25
25 -
 26
26 -
 27
27 -
 28
28 -
 29
29 -
30
-
31
-
32
-
33
-
34
-
35
-
36
-
37
-
38
-
39
-
40
-
41
-
42
-
43
-
44
-
45
-
46
-
47
-
48
-
49
-
50
-
51
-
52
-
53
-
54
-
55
-
56
-
57
-
58
-
59
-
60
-
61
-
62
-
63
-
64
-
65
-
66
-
67
-
68
-
69
-
70
-
71
-
72
-
73
-
74
-
75
-
76
-
77
-
78
-
79
-
80
-
81
-
82
-
83
-
84
-
85
-
86
-
87
-
88
-
89
-
90
-
91
-
92
-
93
-
94
-
95
-
96
-
97
-
98
-
99
-
100
-
101
-
102
-
103
-
104
-
105
-
106
-
107
-
108
-
109
-
110
-
111
-
112
-
113
-
114
-
115
-
116
-
117
-
118
-
119
-
120
-
121
-
122
-
123
-
124
-
125
-
126
-
127
-
128
-
129
-
130
-
131
-
132
-
133
-
134
-
135
-
136
-
137
-
138
-
139
-
140
-
141
-
142
-
143
-
144
-
145
-
146
-
147
-
148
-
149
-
150
-
151
-
152
-
153
-
154
-
155
-
156
-
157
-
158
-
159
-
160
-
161
-
162
-
163
-
164
-
165
-
166
-
167
-
168
-
169
-
170
 |
 |
