Epson PictureMate PM-400 User Manual - Page 33
Using WPS to Connect to a Network, Viewing the Network Status
 |
View all Epson PictureMate PM-400 manuals
Add to My Manuals
Save this manual to your list of manuals |
Page 33 highlights
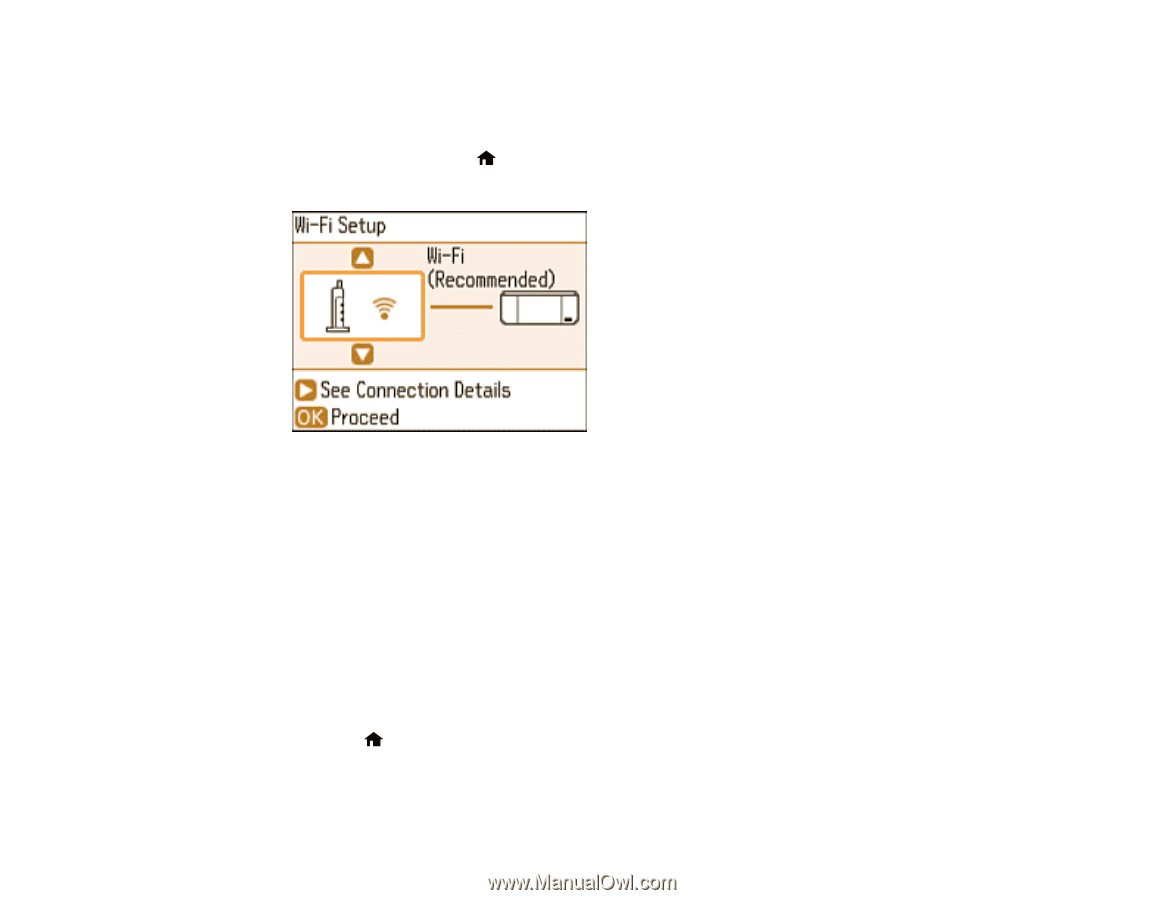
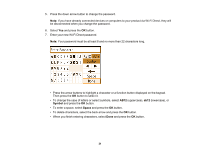
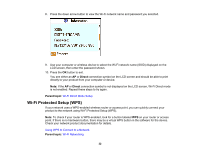
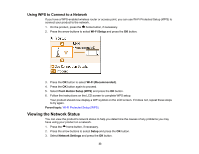
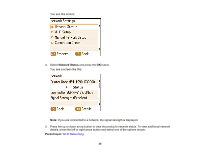
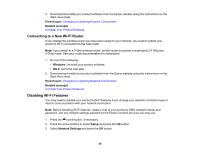
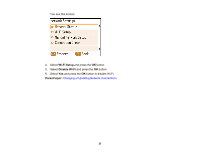
Using WPS to Connect to a Network If you have a WPS-enabled wireless router or access point, you can use Wi-Fi Protected Setup (WPS) to connect your product to the network. 1. On the product, press the home button, if necessary. 2. Press the arrow buttons to select Wi-Fi Setup and press the OK button. 3. Press the OK button to select Wi-Fi (Recommended). 4. Press the OK button again to proceed. 5. Select Push Button Setup (WPS) and press the OK button. 6. Follow the instructions on the LCD screen to complete WPS setup. Your product should now display a WiFi symbol on the LCD screen. If it does not, repeat these steps to try again. Parent topic: Wi-Fi Protected Setup (WPS) Viewing the Network Status You can view the product's network status to help you determine the causes of any problems you may have using your product on a network. 1. Press the home button, if necessary. 2. Press the arrow buttons to select Setup and press the OK button. 3. Select Network Settings and press the OK button. 33
-
 1
1 -
2
-
3
-
4
-
5
-
6
-
7
-
8
-
9
-
10
-
11
-
12
-
13
-
14
-
15
-
16
-
17
-
18
-
19
-
20
-
21
-
22
-
23
-
24
-
25
-
26
-
27
-
 28
28 -
 29
29 -
 30
30 -
 31
31 -
 32
32 -
 33
33 -
 34
34 -
 35
35 -
 36
36 -
 37
37 -
 38
38 -
39
-
40
-
41
-
42
-
43
-
44
-
45
-
46
-
47
-
48
-
49
-
50
-
51
-
52
-
53
-
54
-
55
-
56
-
57
-
58
-
59
-
60
-
61
-
62
-
63
-
64
-
65
-
66
-
67
-
68
-
69
-
70
-
71
-
72
-
73
-
74
-
75
-
76
-
77
-
78
-
79
-
80
-
81
-
82
-
83
-
84
-
85
-
86
-
87
-
88
-
89
-
90
-
91
-
92
-
93
-
94
-
95
-
96
-
97
-
98
-
99
-
100
-
101
-
102
-
103
-
104
-
105
-
106
-
107
-
108
-
109
-
110
-
111
-
112
-
113
-
114
-
115
-
116
-
117
-
118
-
119
-
120
-
121
-
122
-
123
-
124
-
125
-
126
-
127
-
128
-
129
-
130
-
131
-
132
-
133
-
134
-
135
-
136
-
137
-
138
-
139
-
140
-
141
-
142
-
143
-
144
-
145
-
146
-
147
-
148
-
149
-
150
-
151
-
152
-
153
-
154
-
155
-
156
-
157
-
158
-
159
-
160
-
161
-
162
-
163
-
164
 |
 |