Epson PowerLite 810p User Manual - Page 41
Zooming Your Image, Resizing the Image, pixels. If only part of your computer
 |
View all Epson PowerLite 810p manuals
Add to My Manuals
Save this manual to your list of manuals |
Page 41 highlights
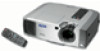
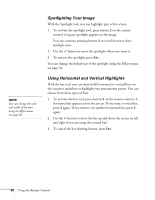
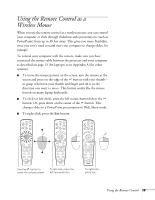
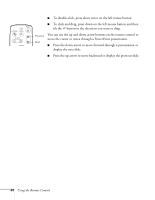
Zooming Your Image You can zoom in on a portion of the image using the E-Zoom button on the remote control. 1. Press the E-Zoom button. A crosshair indicating the center of the zoom-in area appears on the screen. 2. Use the button to move the crosshair where you want it. 3. Press the right side of the E-Zoom button to enlarge the selected area. I Press the button repeatedly to enlarge it up to four times in 25 steps. I Press and hold the button to zoom in to the size you want. I You can use the button to scroll around the image. 4. Press the left side of the E-Zoom button to zoom out. You can also press the Resize or Esc button to return to the original size. Resizing the Image Some computer images need to be resized to display in the projector's native format-1024 × 768 pixels. If only part of your computer image is displayed, you can correct it with the Resize button. I Press the Resize button on the remote control (or on the projector's control panel). The screen image is automatically compressed. I Continue pressing the Resize button to pan around the screen in the original resolution. If you're projecting from video equipment, pressing the Resize button switches the aspect ratio between 4:3 and 16:9. If you've zoomed in on your image (using the E-Zoom button on the remote), you can press the Resize button to return it to the original display size. Power A/V Mute Freeze E-Zoom Using the Remote Control 35
-
 1
1 -
2
-
3
-
4
-
5
-
6
-
7
-
8
-
9
-
10
-
11
-
12
-
13
-
14
-
15
-
16
-
17
-
18
-
19
-
20
-
21
-
22
-
23
-
24
-
25
-
26
-
27
-
28
-
29
-
30
-
31
-
32
-
33
-
34
-
35
-
 36
36 -
 37
37 -
 38
38 -
 39
39 -
 40
40 -
 41
41 -
 42
42 -
 43
43 -
 44
44 -
 45
45 -
 46
46 -
47
-
48
-
49
-
50
-
51
-
52
-
53
-
54
-
55
-
56
-
57
-
58
-
59
-
60
-
61
-
62
-
63
-
64
-
65
-
66
-
67
-
68
-
69
-
70
-
71
-
72
-
73
-
74
-
75
-
76
-
77
-
78
-
79
-
80
-
81
-
82
-
83
-
84
-
85
-
86
-
87
-
88
-
89
-
90
-
91
-
92
-
93
-
94
-
95
-
96
-
97
-
98
-
99
-
100
-
101
-
102
-
103
-
104
-
105
-
106
-
107
-
108
-
109
-
110
-
111
-
112
-
113
-
114
-
115
-
116
-
117
-
118
-
119
-
120
 |
 |
