Epson PowerLite 810p User Manual - Page 56
Customizing the Highlighting Tools
 |
View all Epson PowerLite 810p manuals
Add to My Manuals
Save this manual to your list of manuals |
Page 56 highlights
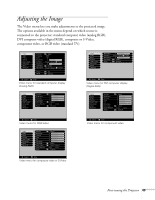
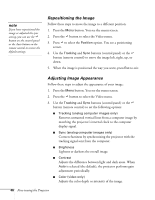
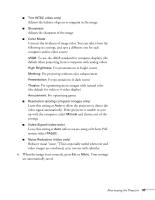
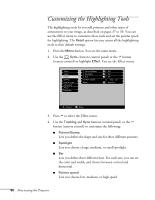
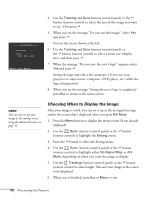
Customizing the Highlighting Tools The highlighting tools let you add pointers and other types of annotations to your image, as described on pages 37 to 39. You can use the Effect menu to customize these tools and set the pointer speed for highlighting. The Reset option lets you return all the highlighting tools to their default settings. 1. Press the Menu button. You see the main menu. 2. Use the Sync- button (control panel) or the button (remote control) to highlight Effect. You see the Effect menu: 3. Press to select the Effect menu. 4. Use the Tracking and Sync buttons (control panel) or the button (remote control) to customize the following: I Pointer/Stamp Lets you define the shape and size for three different pointers. I Spotlight Lets you choose a large, medium, or small spotlight. I Bar Lets you define three different bars. For each one, you can set the color and width, and choose between vertical and horizontal. I Pointer speed Lets you choose low, medium, or high speed. 50 Fine-tuning the Projector
-
 1
1 -
2
-
3
-
4
-
5
-
6
-
7
-
8
-
9
-
10
-
11
-
12
-
13
-
14
-
15
-
16
-
17
-
18
-
19
-
20
-
21
-
22
-
23
-
24
-
25
-
26
-
27
-
28
-
29
-
30
-
31
-
32
-
33
-
34
-
35
-
36
-
37
-
38
-
39
-
40
-
41
-
42
-
43
-
44
-
45
-
46
-
47
-
48
-
49
-
50
-
 51
51 -
 52
52 -
 53
53 -
 54
54 -
 55
55 -
 56
56 -
 57
57 -
 58
58 -
 59
59 -
 60
60 -
 61
61 -
62
-
63
-
64
-
65
-
66
-
67
-
68
-
69
-
70
-
71
-
72
-
73
-
74
-
75
-
76
-
77
-
78
-
79
-
80
-
81
-
82
-
83
-
84
-
85
-
86
-
87
-
88
-
89
-
90
-
91
-
92
-
93
-
94
-
95
-
96
-
97
-
98
-
99
-
100
-
101
-
102
-
103
-
104
-
105
-
106
-
107
-
108
-
109
-
110
-
111
-
112
-
113
-
114
-
115
-
116
-
117
-
118
-
119
-
120
 |
 |
