Garmin GPSMAP 67i Owners Manual
Garmin GPSMAP 67i Manual
 |
View all Garmin GPSMAP 67i manuals
Add to My Manuals
Save this manual to your list of manuals |
Garmin GPSMAP 67i manual content summary:
- Garmin GPSMAP 67i | Owners Manual - Page 1
GPSMAP® 67i Owner's Manual - Garmin GPSMAP 67i | Owners Manual - Page 2
of this manual without obligation to notify any person or organization of such changes or improvements. Go to www.garmin.com for current updates and supplemental information concerning the use of this product. Garmin®, the Garmin logo, ANT+®, Auto Lap®, AutoLocate®, City Navigator®, GPSMAP®, inReach - Garmin GPSMAP 67i | Owners Manual - Page 3
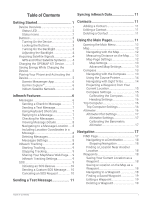
Backlight 4 Acquiring Satellite Signals 4 GPS and Other Satellite Systems....... 4 Charging the GPSMAP 67i Device.......... 5 Saving Energy While Charging the Device 5 Pairing Your Phone and Activating the Device 5 Garmin Messenger App 6 Garmin Explore 6 Iridium Satellite Network 6 inReach - Garmin GPSMAP 67i | Owners Manual - Page 4
... 34 Viewing an Active Weather Map...... 34 Adding an Active Weather Location 34 Switching the Active Weather Location 35 Deleting an Active Weather Location 35 Garmin Adventures 35 ii Table of Contents - Garmin GPSMAP 67i | Owners Manual - Page 5
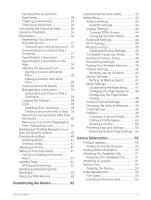
Alarm 41 Editing or Deleting a Proximity Alarm 41 Satellite Page 41 GPS Satellite Settings 42 Sending and Receiving Data Wirelessly 42 Using the Settings.. 50 Device Information 50 Product Updates 50 Setting Up Garmin Express 50 Getting More Information 51 Attaching the Carabiner Clip 51 - Garmin GPSMAP 67i | Owners Manual - Page 6
label Regulatory and Compliance Information 54 Appendix 55 Data Fields 55 Optional Accessories 57 tempe 57 Tips for Pairing Wireless Sensors.... 58 Troubleshooting 58 Maximizing Battery Life 58 Long-Term Storage 58 Restarting the Device 58 About Heart Rate Zones 58 Fitness Goals 58 Heart - Garmin GPSMAP 67i | Owners Manual - Page 7
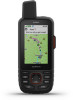
Getting Started WARNING See the Important Safety and Product Information guide in the product box for product warnings and other important information. Device Overview Internal Iridium® and GNSS antenna Power button SOS button Buttons USB port ( - Garmin GPSMAP 67i | Owners Manual - Page 8
mode. An inReach message failed to send. The device is below 10-percent battery power. The device is in SOS mode. GPS signal strength Charging battery Charging complete Bluetooth® technology status Wi‑Fi® status Sending, receiving, or searching for inReach messages and tracking points - Garmin GPSMAP 67i | Owners Manual - Page 9
Buttons FIND MARK QUIT ENTER MENU PAGE Press to open the search menu. Hold to mark your current location as a man overboard (MOB) location and activate navigation. Press to save your current location as a waypoint. Press to cancel or return to the previous menu or page. Press to scroll through the - Garmin GPSMAP 67i | Owners Manual - Page 10
signal strength. When the device acquires satellite signals, it automatically starts recording your path as an activity. GPS and Other Satellite Systems Using GPS and another satellite system together offers increased performance in challenging environments and faster position acquisition than using - Garmin GPSMAP 67i | Owners Manual - Page 11
device before you use it outdoors. The GPSMAP 67i device works best when it is paired with the Garmin Messenger™ app. The app allows you Garmin Messenger app, and follow the on-screen instructions to complete the pairing process. 4 Follow the on-screen instructions to activate a subscription service - Garmin GPSMAP 67i | Owners Manual - Page 12
use the Garmin Messenger app for tracking, SOS, inReach Weather, and managing your service plan. You can also use the app to message other inReach device users, as well as friends and family. The app works to be used. Messages Your GPSMAP 67i device sends and receives text messages - Garmin GPSMAP 67i | Owners Manual - Page 13
Send Quick Text. NOTE: You can add and edit quick text messages on the Garmin Explore website. • To write a custom message, select Type Message. 4 Select feature, it checks for messages at your tracking interval. You can manually force a message check by checking for messages, sending a message, or - Garmin GPSMAP 67i | Owners Manual - Page 14
For example, if your recipient has an older model phone that does not support viewing maps or is outside of a mobile data coverage area and cannot view a map. inReach Tracking You can use the tracking feature on your GPSMAP 67i device to record track points and transmit them over the Iridium - Garmin GPSMAP 67i | Owners Manual - Page 15
the device is intended to be used. During an emergency, you can use your GPSMAP 67i device to contact the Garmin ResponseSM center to request help. Pressing the SOS button sends a message to the Garmin Response team, and they notify the appropriate emergency responders of your situation. You can - Garmin GPSMAP 67i | Owners Manual - Page 16
can also initiate an SOS rescue and interact with the Garmin Response team using the Garmin Messenger app. You must have an active satellite subscription to you can cancel an SOS request after it is sent to the emergency response service. 1 Lift the protective cap, and hold the SOS button. 2 Select - Garmin GPSMAP 67i | Owners Manual - Page 17
your device using the app. 1 Open the paired Garmin Messenger or Garmin Explore app. 2 Wait while your data syncs. TIP: You can check the connection status on the Device tab in the app. Contacts You can add, delete, and edit contacts on the GPSMAP 67i device. Adding a Contact 1 Press MENU twice to - Garmin GPSMAP 67i | Owners Manual - Page 18
Opening the Main Menu The main menu gives you access to tools and setup screens for waypoints, activities, routes, and more (Main Menu Tools, page 32, Setup Menu, page 43). From any page, press MENU twice. Map represents your location on the map. As you travel, moves and displays your path. - Garmin GPSMAP 67i | Owners Manual - Page 19
Setup. Auto Zoom: Automatically selects the appropriate zoom level for optimal use on your map. When Off is selected, you must zoom in or out manually. Detail: Sets the amount of detail shown on the map. Showing more detail may cause the map to redraw more slowly. Shaded Relief: Shows detail - Garmin GPSMAP 67i | Owners Manual - Page 20
Using the Course Pointer The course pointer is most useful when you are navigating to your destination in a straight line, such as when you are navigating on water. It can help you navigate back to the course line when you go off-course to avoid obstacles or hazards. 1 Press PAGE to scroll to the - Garmin GPSMAP 67i | Owners Manual - Page 21
lines. The GPSMAP 67i device has a 3-axis electronic compass. You should calibrate the compass after moving long distances or experiencing temperature changes. 1 Press PAGE to scroll to the compass page. 2 Press MENU. 3 Select Calibrate Compass > Start. 4 Follow the on-screen instructions. Using - Garmin GPSMAP 67i | Owners Manual - Page 22
to the destination. Compass: Automatically switches from an electronic compass to a GPS compass when you are traveling at a higher rate of speed for a the heading reference, select Grid. • To set the magnetic variation value manually, select User, enter the magnetic variance, and select Done. Trip - Garmin GPSMAP 67i | Owners Manual - Page 23
data, which can be helpful when you are watching for pressure fronts. Plot Type: Records elevation Calibrate Altimeter: Allows you to manually calibrate the barometric altimeter (Calibrating . 7 Select Calibrate. Navigation You can use the GPS navigation features on your device to navigate a saved - Garmin GPSMAP 67i | Owners Manual - Page 24
Navigating to a Destination 1 Press FIND. 2 Select a category. 3 If necessary, press MENU to narrow the search. 4 If necessary, select Spell Search, and enter the destination name or part of the name. 5 Select a destination. 6 Select Go. Your route appears as a magenta line on the map. 7 Navigate - Garmin GPSMAP 67i | Owners Manual - Page 25
by averaging the location data. When averaging, the device takes several GPS readings at the same location and uses the average value to provide to the waypoint location. 7 Select Start. 8 Follow the on-screen instructions. 9 When the confidence status bar reaches 100%, select Save. For best - Garmin GPSMAP 67i | Owners Manual - Page 26
Projecting a Waypoint from a Saved Waypoint You can save a new waypoint by projecting the distance and bearing from a saved waypoint to a new location. 1 Press MENU twice to open the main menu. 2 Select Waypoint Manager. 3 Select a waypoint. 4 Press MENU. 5 Select Project Waypoint. 6 Enter the - Garmin GPSMAP 67i | Owners Manual - Page 27
Adding a Waypoint to a Route 1 Press MENU twice to open the main menu. 2 Select Waypoint Manager. 3 Select a waypoint. 4 Press MENU. 5 Select Add to Route. 6 Select a route. Repositioning a Waypoint to Your Current Location You can change the position of a waypoint. For example, if you move your - Garmin GPSMAP 67i | Owners Manual - Page 28
menu. 2 Select Route Planner. 3 Select a route. 4 Press MENU. 5 Select Edit Route. 6 Select a point. 7 Select an option: • To view the point on the map, select Review. • To change the order of the points on the route, select Move Up or Move Down. • To insert an additional point on the route, select - Garmin GPSMAP 67i | Owners Manual - Page 29
as a FIT or a GPX and FIT file (File Types, page 52). The FIT option records your activity with fitness information that is tailored for the Garmin Connect™ application and can be used for navigation. The FIT and GPX option records your activity as both a traditional track that can be viewed on - Garmin GPSMAP 67i | Owners Manual - Page 30
starts recording your path as an activity when it is turned on and has acquired satellite signals. You can pause and start recording manually. 1 Press MENU twice to open the main menu. 2 Select Recording Controls. 3 Press and to view an option: • To control the current activity recording - Garmin GPSMAP 67i | Owners Manual - Page 31
saved using different file types than activities (File Types, page 52). This allows you to share your track wirelessly with other compatible Garmin devices. 1 Press MENU twice to open the main menu. 2 Select Recorded Activities. 3 Select an activity. 4 Press MENU. 5 Select Save as Track. Reversing - Garmin GPSMAP 67i | Owners Manual - Page 32
Deleting a Saved Activity 1 Press MENU twice to open the main menu. 2 Select Recorded Activities. 3 Select an activity. 4 Press MENU. 5 Select Delete. Courses A course can have multiple destinations, and can be navigated point to point or on routable roads. Courses are saved as FIT files on the - Garmin GPSMAP 67i | Owners Manual - Page 33
2 Select Course Planner. 3 Select a course. 4 Press MENU. 5 Select Edit Course. 6 Select a point. 7 Select an option: • To view the point on the map, select Review. • To edit the name of the point, select Edit Name. • To edit the symbol used to represent the point, select Edit Icon. • To change the - Garmin GPSMAP 67i | Owners Manual - Page 34
can be navigated using Garmin devices that do not support course navigation. 1 services. For more information, go to buy.garmin.com or contact your Garmin dealer. Purchasing Additional Maps 1 Go to your device product page at www.garmin.com. 2 Click the Maps tab. 3 Follow the on-screen instructions - Garmin GPSMAP 67i | Owners Manual - Page 35
allows your contacts to view your live data on a MapShare tracking page using your Garmin Explore account. Phone notifications: Displays phone notifications and messages on your GPSMAP 67i device using the Garmin Explore app. Software Updates: Allows you to receive updates for your device software - Garmin GPSMAP 67i | Owners Manual - Page 36
device from Garmin and GPSMAP 67i device with your smartphone (Pairing Your Phone and Activating the Device, page 5). 1 From the app store on your smartphone, install and open the Connect IQ app. 2 If necessary, select your device. 3 Select a Connect IQ feature. 4 Follow the on-screen instructions - Garmin GPSMAP 67i | Owners Manual - Page 37
.garmin.com, and sign in. 3 Select a Connect IQ feature, and download it. 4 Follow the on-screen instructions. Viewing Connect IQ Widgets 1 Press to open the status page. 2 Select or to scroll through the widgets. Data Use and History You can view plan details and data use on the GPSMAP 67i device - Garmin GPSMAP 67i | Owners Manual - Page 38
). Adventures: Displays a list of adventures from the BaseCamp™ application (Garmin Adventures, page 35). Alarm Clock: Sets an audible alarm. If you a Route Using Route Planner, page 21). Satellite: Displays your current GPS satellite information (Satellite Page, page 41). Saved Tracks: Displays a - Garmin GPSMAP 67i | Owners Manual - Page 39
Displays sunrise and sunset times, along with the moon phase, based on your GPS position. Tracking: Allows you to record track points and transmit them over the camera controls when you have a VIRB® camera paired with your GPSMAP 67i navigator (Using the VIRB Remote, page 42). Waypoint Averaging: - Garmin GPSMAP 67i | Owners Manual - Page 40
MENU. 5 Select Delete. Viewing an Active Weather Forecast While your GPSMAP 67i navigator is connected to your phone or to a Wi‑Fi network and Location You can add a weather location to view active weather for waypoints, GPS coordinates, or other locations. 1 View an active weather forecast. 2 Press - Garmin GPSMAP 67i | Owners Manual - Page 41
the trip, photos of the trip, and geocaches you hunted. You can use BaseCamp to create and manage your adventures. For more information, go to garmin .com/basecamp. Sending Files to and from BaseCamp 1 Open BaseCamp. 2 Connect the device to your computer. 3 Select an option: • Select an item from - Garmin GPSMAP 67i | Owners Manual - Page 42
ANT+ connections are disabled in SOS mode. Geocaches Geocaching is a treasure hunting activity in which players hide or search for hidden caches using clues and GPS coordinates. 36 Main Menu Tools - Garmin GPSMAP 67i | Owners Manual - Page 43
to the Garmin Connect app. • Connect to a Wi‑Fi network. Downloading Geocaches Using a Computer You can load geocaches manually onto your com. 3 If necessary, create an account. 4 Sign in. 5 Follow the instructions at geocaching.com to find and download geocaches to your device. Searching for a - Garmin GPSMAP 67i | Owners Manual - Page 44
. 3 Select a filter. 4 Select an item to edit. Viewing Geocache Details 1 Press MENU twice to open the main menu. 2 Select Geocaching. 3 Select a geocache. 4 Press MENU. 5 Select Review Point. The geocache description and logs appear. 38 Main Menu Tools - Garmin GPSMAP 67i | Owners Manual - Page 45
Done. If you are signed in to www.geocaching.com, the log uploads to your www.geocaching.com account automatically. chirp A chirp is a small Garmin accessory that is programmed and left in a geocache. You can use your device to find a chirp in a geocache. Enabling chirp Searching 1 Press MENU twice - Garmin GPSMAP 67i | Owners Manual - Page 46
from the Device You can remove live geocache data to show only geocaches manually loaded on the device using a computer. 1 Press MENU twice to + subscription for your navigator, select Check Subscription. NOTE: Go to garmin.com/outdoormaps for information about purchasing a subscription. 4 Press OK, - Garmin GPSMAP 67i | Owners Manual - Page 47
the alarm on a map, select View Map. • To delete the alarm, select Delete. Satellite Page The satellite page shows your current location, GPS accuracy, satellite locations, and signal strength. You can select or to view additional satellite constellations when they are enabled. Main Menu Tools 41 - Garmin GPSMAP 67i | Owners Manual - Page 48
Calculates your GPS position using the Garmin AutoLocate® data. 4 Follow the on-screen instructions. Using the VIRB Remote Before you Manual for more information. The VIRB remote function allows you to control your VIRB camera using your navigator. 1 Turn on your VIRB camera. 2 On your GPSMAP 67i - Garmin GPSMAP 67i | Owners Manual - Page 49
. USB Mode: Sets the device to use MTP (media transfer protocol) or Garmin mode when connected to a computer. Satellite Settings Press MENU twice to open the to GPS only, multiple satellite systems, or Demo Mode (GPS off). Multi-Band: Enables the use of multi-band systems on the GPSMAP 67i device. - Garmin GPSMAP 67i | Owners Manual - Page 50
of the display background and selection highlight (Changing the Color Mode, page 44). Screen Capture: Allows you to save the image on the device screen. Review Text Size: Changes the size of the text on the screen. Turning Off the Screen To save battery power and prolong the battery life, you - Garmin GPSMAP 67i | Owners Manual - Page 51
mode to prolong the battery life. In expedition mode, the screen shuts off, the device enters low power mode, and the device collects fewer GPS track points. 1 Press MENU twice to open the main menu. 2 Select Setup > Expedition Mode. 3 Select an option: • To enable the device to prompt you - Garmin GPSMAP 67i | Owners Manual - Page 52
For example, you can connect a heart rate monitor with your navigator. For more information about compatibility and purchasing optional sensors, go to buy.garmin.com. 1 Bring the navigator within 3 m (10 ft.) of the sensor. NOTE: Stay 10 m (33 ft.) away from other sensors while pairing. 2 Press MENU - Garmin GPSMAP 67i | Owners Manual - Page 53
Marine Settings Press MENU twice to open the main menu. Select Setup > Marine. Marine Chart Mode: Sets the type of chart the device uses when displaying marine data. Nautical displays various map features in different colors so the marine POIs are more readable and so the map reflects the drawing - Garmin GPSMAP 67i | Owners Manual - Page 54
Changing the Page Sequence 1 Press MENU twice to open the main menu. 2 Select Setup > Menus > Page Sequence > Edit Page Sequence. 3 Select a page. 4 Select an option: • To move the page up or down in the list, select Move. • To add a new page to the page sequence, select Insert, and select a - Garmin GPSMAP 67i | Owners Manual - Page 55
hour or 24-hour format. Time Zone: Sets the time zone for the device. The Automatic option sets the time zone automatically based on your GPS position. Daylight Saving Time: Sets the device to use daylight saving time. Profiles Profiles are a collection of settings that optimize your device based on - Garmin GPSMAP 67i | Owners Manual - Page 56
easy access to these services for Garmin devices: • Software updates • Map updates • Data uploads to Garmin Explore • Product registration Setting Up Garmin Express 1 Connect the device to your computer using a USB cable. 2 Go to garmin.com/express. 3 Follow the on-screen instructions. 50 Device - Garmin GPSMAP 67i | Owners Manual - Page 57
Information You can find more information about this product on the Garmin website. • Go to support.garmin.com for additional manuals, articles, and software updates. • Go to buy.garmin.com, or contact your Garmin dealer for information about optional accessories and replacement parts. Attaching the - Garmin GPSMAP 67i | Owners Manual - Page 58
compatible with Windows® 95, 98, Me, Windows NT®, and Mac® OS 10.3 and earlier. File Types The handheld device supports these file types: • Files from Garmin Explore. • GPX route, track, and waypoint files. • GPX geocache files (Downloading Geocaches Using a Computer, page 37). • JPEG photo files - Garmin GPSMAP 67i | Owners Manual - Page 59
do not know the purpose of a file, do not delete it. Your device memory contains important system files that should not be deleted. 1 Open the Garmin drive or volume. 2 If necessary, open a folder or volume. 3 Select a file. 4 Press the Delete key on your keyboard. NOTE: If you are using an Apple - Garmin GPSMAP 67i | Owners Manual - Page 60
to 165 hr. with inReach technology enabled with 10 minute tracking interval Up to 180 hr. in GPS mode Up to 425 hr. in expedition mode with inReach technology enabled Up to 840 hr. in of up to 1 m for up to 30 min. For more information, go to www.garmin.com/waterrating. 54 Device Information - Garmin GPSMAP 67i | Owners Manual - Page 61
. Temperature: The minimum temperature recorded in the last 24 hours from a compatible temperature sensor. Accuracy of GPS: The margin of error for your exact location. For example, your GPS location is accurate to within +/- 3.65 m (12 ft.). Activity Distance: The distance traveled for the current - Garmin GPSMAP 67i | Owners Manual - Page 62
elevation. You must be navigating for this data to appear. GPS Elevation: The altitude of your current location using GPS. GPS Heading: The direction you are moving based on GPS. GPS Signal Strength: The strength of the GPS satellite signal. Grade: The calculation of rise (elevation) over run - Garmin GPSMAP 67i | Owners Manual - Page 63
GPS position. Sunrise/Sunset: The time of the next sunrise or sunset based on your GPS position. Sunset: The time of sunset based on your GPS are available at http:/ /buy.garmin.com or from your Garmin dealer. tempe Your device is instructions for your tempe sensor for more information. Appendix 57 - Garmin GPSMAP 67i | Owners Manual - Page 64
When paired, your Garmin device receives data from only your sensor, and you can go near other sensors. Troubleshooting Maximizing Battery Life You (Bluetooth Settings, page 44). • Turn off additional satellite systems (GPS and Other Satellite Systems, page 4). Long-Term Storage When you do - Garmin GPSMAP 67i | Owners Manual - Page 65
Heart Rate Zone Calculations Zone % of Maximum Heart Rate Perceived Exertion 1 50-60% Relaxed, easy pace, rhythmic breathing 2 60-70% 3 70-80% 4 80-90% 5 90-100% Comfortable pace, slightly deeper breathing, conversation possible Moderate pace, more difficult to hold conversation Fast pace and - Garmin GPSMAP 67i | Owners Manual - Page 66
support.garmin.com March 2023 GUID-11021D65-32D1-4558-A83E-F7F74FF88D7E v1
-
 1
1 -
 2
2 -
 3
3 -
 4
4 -
 5
5 -
 6
6 -
 7
7 -
8
-
9
-
10
-
11
-
12
-
13
-
14
-
15
-
16
-
17
-
18
-
19
-
20
-
21
-
22
-
23
-
24
-
25
-
26
-
27
-
28
-
29
-
30
-
31
-
32
-
33
-
34
-
35
-
36
-
37
-
38
-
39
-
40
-
41
-
42
-
43
-
44
-
45
-
46
-
47
-
48
-
49
-
50
-
51
-
52
-
53
-
54
-
55
-
56
-
57
-
58
-
59
-
60
-
61
-
62
-
63
-
64
-
65
-
66
 |
 |

GPSMAP
®
67i
Owner’s Manual