Garmin GPSMAP 67i Owners Manual - Page 11
Charging the GPSMAP 67i Device, Saving Energy While Charging the Device
 |
View all Garmin GPSMAP 67i manuals
Add to My Manuals
Save this manual to your list of manuals |
Page 11 highlights
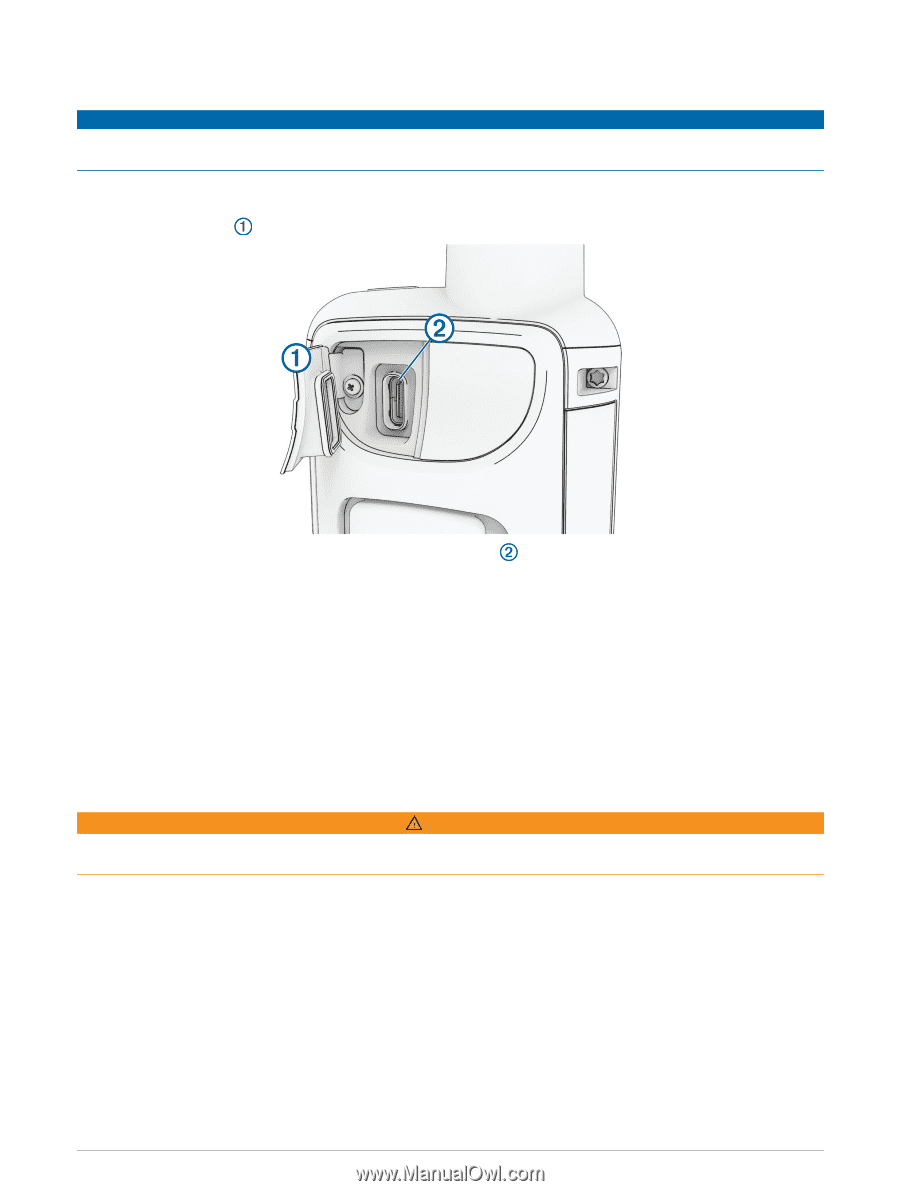
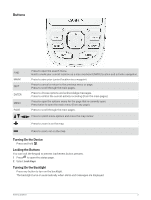
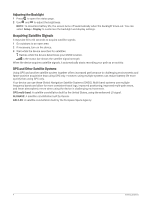
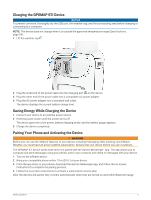
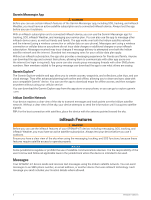
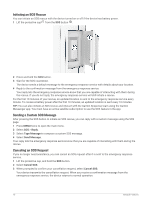
Charging the GPSMAP 67i Device NOTICE To prevent corrosion, thoroughly dry the USB port, the weather cap, and the surrounding area before charging or connecting to a computer. NOTE: The device does not charge when it is outside the approved temperature range (Specifications, page 54). 1 Lift the weather cap . 2 Plug the small end of the power cable into the charging port on the device. 3 Plug the other end of the power cable into a compatible AC power adapter. 4 Plug the AC power adapter into a standard wall outlet. The device displays the current battery charge level. Saving Energy While Charging the Device 1 Connect your device to an external power source. 2 Hold the power button until the screen turns off. The device goes into a low power, battery charging mode, and the battery gauge appears. 3 Charge the device completely. Pairing Your Phone and Activating the Device WARNING Before you can use the inReach features of your device, including messaging, SOS, tracking, and inReach Weather, you must have an active satellite subscription. Always test your device before you use it outdoors. The GPSMAP 67i device works best when it is paired with the Garmin Messenger™ app. The app allows you to compose and send messages using your phone, and to sync contacts and check-in messages with your device. 1 Turn on the inReach device. 2 Bring your compatible phone within 10 m (33 ft.) of your device. 3 From the app store on your phone, download the Garmin Messenger app, and follow the on-screen instructions to complete the pairing process. 4 Follow the on-screen instructions to activate a subscription service plan. After the devices are paired, they connect automatically when they are turned on and within Bluetooth range. Getting Started 5
-
 1
1 -
2
-
3
-
4
-
5
-
 6
6 -
 7
7 -
 8
8 -
 9
9 -
 10
10 -
 11
11 -
 12
12 -
 13
13 -
 14
14 -
 15
15 -
 16
16 -
17
-
18
-
19
-
20
-
21
-
22
-
23
-
24
-
25
-
26
-
27
-
28
-
29
-
30
-
31
-
32
-
33
-
34
-
35
-
36
-
37
-
38
-
39
-
40
-
41
-
42
-
43
-
44
-
45
-
46
-
47
-
48
-
49
-
50
-
51
-
52
-
53
-
54
-
55
-
56
-
57
-
58
-
59
-
60
-
61
-
62
-
63
-
64
-
65
-
66
 |
 |