HP 2420 HP LaserJet 2400 Series - User Guide - Page 122
Clearing jams, Typical jam locations
 |
UPC - 829160289205
View all HP 2420 manuals
Add to My Manuals
Save this manual to your list of manuals |
Page 122 highlights
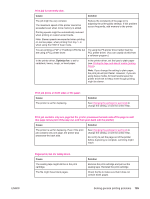
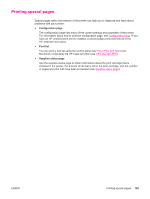
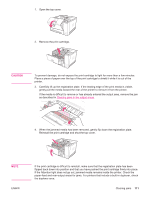
Clearing jams Occasionally, media can become jammed during a print job. The following are some of the causes: ● Trays are loaded improperly or overfilled. ● Tray 2 or tray 3 is removed during a print job. ● The top cover is opened during a print job. ● The media that is being used does not meet HP specifications (see Paper specifications). ● The media that is being used is outside of the supported size range (see Paper specifications). Typical jam locations Jams can occur at four locations: 1 3 2 4 NOTE 1 Print-cartridge area (see Clearing jams in the print-cartridge area) 2 Input-tray areas (see Clearing jams in the input trays) 3 Output-bin areas (see Clearing jams in the output areas) 4 Duplexer area (applies only to models that include a duplexer) (see Clearing jams in the duplexer area) Find and remove the jammed media by using the instructions that are provided in this section. If the location of the jam is not obvious, look first in the print cartridge area. Be sure to remove all torn pieces of media that remain in the printer. Loose toner might remain in the printer after a jam. This should clear after a few sheets have been printed. Clearing jams in the print-cartridge area Jams in this area might result in loose toner on the page. If you get any toner on your clothes or hands, wash them in cold water. (Hot water will set the toner into the fabric.) 110 Chapter 4 Problem solving ENWW
-
 1
1 -
2
-
3
-
4
-
5
-
6
-
7
-
8
-
9
-
10
-
11
-
12
-
13
-
14
-
15
-
16
-
17
-
18
-
19
-
20
-
21
-
22
-
23
-
24
-
25
-
26
-
27
-
28
-
29
-
30
-
31
-
32
-
33
-
34
-
35
-
36
-
37
-
38
-
39
-
40
-
41
-
42
-
43
-
44
-
45
-
46
-
47
-
48
-
49
-
50
-
51
-
52
-
53
-
54
-
55
-
56
-
57
-
58
-
59
-
60
-
61
-
62
-
63
-
64
-
65
-
66
-
67
-
68
-
69
-
70
-
71
-
72
-
73
-
74
-
75
-
76
-
77
-
78
-
79
-
80
-
81
-
82
-
83
-
84
-
85
-
86
-
87
-
88
-
89
-
90
-
91
-
92
-
93
-
94
-
95
-
96
-
97
-
98
-
99
-
100
-
101
-
102
-
103
-
104
-
105
-
106
-
107
-
108
-
109
-
110
-
111
-
112
-
113
-
114
-
115
-
116
-
 117
117 -
 118
118 -
 119
119 -
 120
120 -
 121
121 -
 122
122 -
 123
123 -
 124
124 -
 125
125 -
 126
126 -
 127
127 -
128
-
129
-
130
-
131
-
132
-
133
-
134
-
135
-
136
-
137
-
138
-
139
-
140
-
141
-
142
-
143
-
144
-
145
-
146
-
147
-
148
-
149
-
150
-
151
-
152
-
153
-
154
-
155
-
156
-
157
-
158
-
159
-
160
-
161
-
162
-
163
-
164
-
165
-
166
-
167
-
168
-
169
-
170
-
171
-
172
-
173
-
174
-
175
-
176
-
177
-
178
-
179
-
180
-
181
-
182
-
183
-
184
-
185
-
186
-
187
-
188
-
189
-
190
-
191
-
192
-
193
-
194
-
195
-
196
-
197
-
198
-
199
-
200
-
201
-
202
-
203
-
204
-
205
-
206
-
207
-
208
-
209
-
210
-
211
-
212
-
213
-
214
-
215
-
216
-
217
-
218
-
219
-
220
-
221
-
222
-
223
-
224
-
225
-
226
-
227
-
228
-
229
-
230
-
231
-
232
-
233
-
234
-
235
-
236
-
237
-
238
-
239
-
240
-
241
-
242
-
243
-
244
-
245
-
246
-
247
-
248
-
249
-
250
-
251
-
252
 |
 |
