HP 4100n HP LaserJet 4100 series printers - Getting Started Guide - Page 32
Step 14: Distribute software to network clients (optional), Creating disk images with the Installer's
 |
View all HP 4100n manuals
Add to My Manuals
Save this manual to your list of manuals |
Page 32 highlights
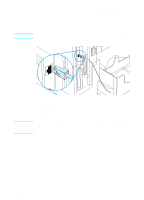
English Step 14: Distribute software to network clients (optional) Note Before a network client can print to the printer, the printing system software must be installed on the client workstation. Rather than distribute the contents of the CD to each client, you can place disk images of the installation software onto a public directory. The software's Customization Utility allows you to copy disk images only for Windows operating systems to a designated directory. Creating disk images with the Installer's Customization Utility 1 Insert the CD into the CD drive. If AutoPlay does not automatically begin the installer program, click Start and then click Run. Type D:\Setup.exe at the prompt (this assumes your CD drive is the D: drive). 2 When prompted to choose the method of installation, click Customization Utility. 3 Select the language and operating system versions for which you want to create disk images, and then choose the drivers you want included in the disk images. 4 Assign a path to the drive and directory where you want to copy the disk images. 5 Follow the instructions on the screen. EN Step 14: Distribute software to network clients (optional) 1-31
-
 1
1 -
2
-
3
-
4
-
5
-
6
-
7
-
8
-
9
-
10
-
11
-
12
-
13
-
14
-
15
-
16
-
17
-
18
-
19
-
20
-
21
-
22
-
23
-
24
-
25
-
26
-
 27
27 -
 28
28 -
 29
29 -
 30
30 -
 31
31 -
 32
32 -
 33
33 -
 34
34 -
 35
35 -
 36
36 -
 37
37 -
38
-
39
-
40
-
41
-
42
-
43
-
44
-
45
-
46
-
47
-
48
-
49
-
50
-
51
-
52
-
53
-
54
-
55
-
56
-
57
-
58
-
59
-
60
-
61
-
62
-
63
-
64
-
65
-
66
-
67
-
68
-
69
-
70
-
71
-
72
-
73
-
74
 |
 |
