HP DeskJet Ink Advantage 5200 User Guide - Page 69
Case F: Shared voice/fax line with voice mail
 |
View all HP DeskJet Ink Advantage 5200 manuals
Add to My Manuals
Save this manual to your list of manuals |
Page 69 highlights
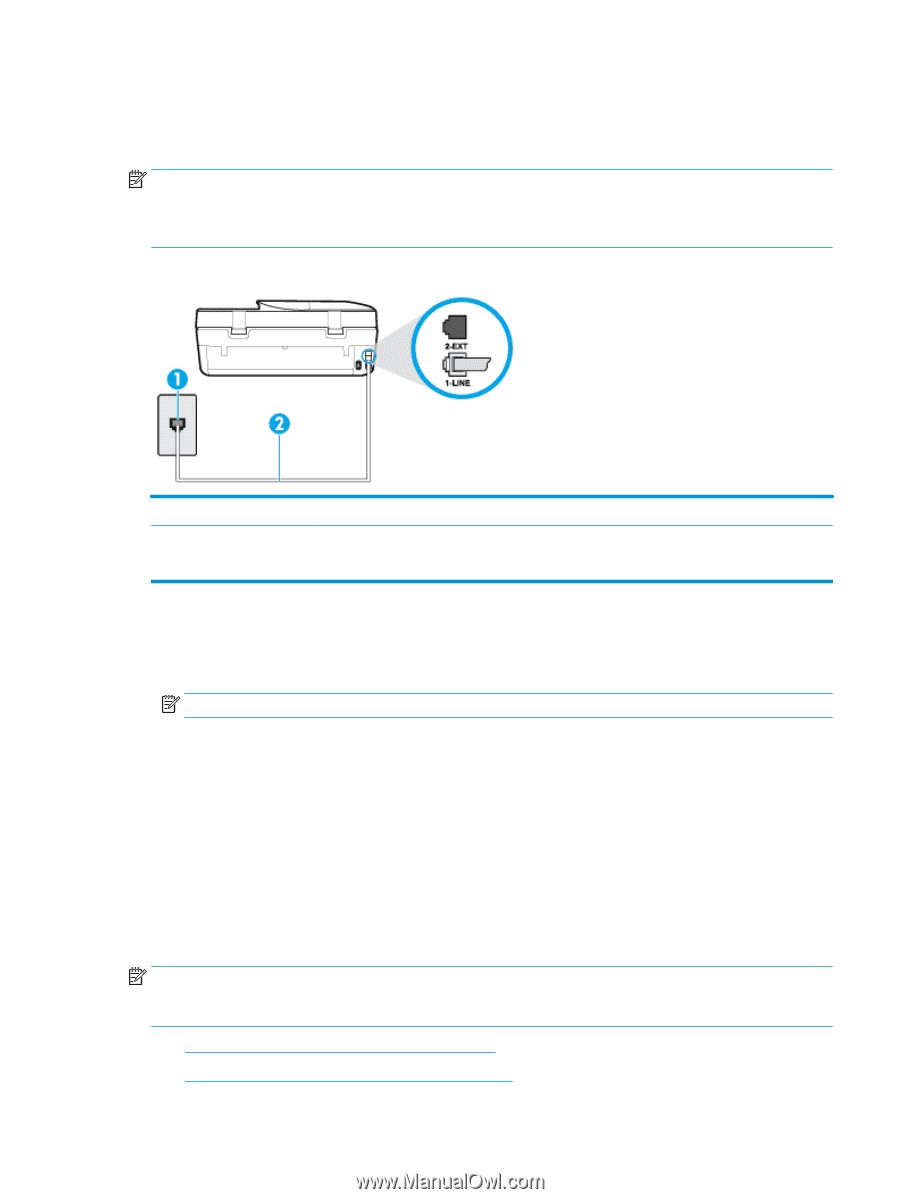
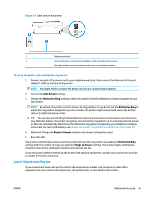
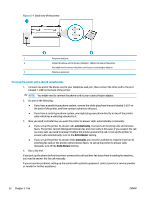
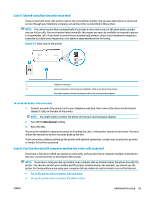
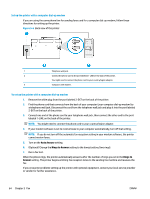
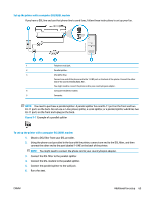
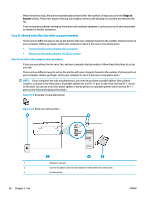
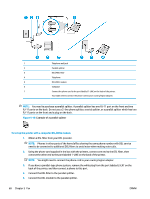
Case F: Shared voice/fax line with voice mail If you receive both voice calls and fax calls at the same phone number, and you also subscribe to a voice mail service through your telephone company, set up the printer as described in this section. NOTE: You cannot receive faxes automatically if you have a voice mail service at the same phone number you use for fax calls. You must receive faxes manually; this means you must be available to respond in person to incoming fax calls. If you want to receive faxes automatically instead, contact your telephone company to subscribe to a distinctive ring service, or to obtain a separate phone line for faxing. Figure 5-5 Back view of the printer 1 Telephone wall jack. 2 Connect the phone cord to the port labelled 1-LINE on the back of the printer. You might need to connect the phone cord to your country/region adapter. To set up the printer with voice mail 1. Connect one end of the phone cord to your telephone wall jack, then connect the other end to the port labeled 1-LINE on the back of the printer. NOTE: You might need to connect the phone cord to your country/region adapter. 2. Turn off the Auto Answer setting. 3. Run a fax test. You must be available to respond in person to incoming fax calls, or the printer cannot receive faxes. You must initiate the manual fax before voicemail picks up the line. If you encounter problems setting up the printer with optional equipment, contact your local service provider or vendor for further assistance. Case G: Fax line shared with computer modem (no voice calls received) If you have a fax line on which you receive no voice calls, and you also have a computer modem connected on this line, set up the printer as described in this section. NOTE: If you have a computer dial-up modem, your computer dial-up modem shares the phone line with the printer. You cannot use both your modem and the printer simultaneously. For example, you cannot use the printer for faxing while you are using your computer dial-up modem to send an email or access the Internet. ● Set up the printer with a computer dial-up modem ● Set up the printer with a computer DSL/ADSL modem ENWW Additional fax setup 63
-
 1
1 -
2
-
3
-
4
-
5
-
6
-
7
-
8
-
9
-
10
-
11
-
12
-
13
-
14
-
15
-
16
-
17
-
18
-
19
-
20
-
21
-
22
-
23
-
24
-
25
-
26
-
27
-
28
-
29
-
30
-
31
-
32
-
33
-
34
-
35
-
36
-
37
-
38
-
39
-
40
-
41
-
42
-
43
-
44
-
45
-
46
-
47
-
48
-
49
-
50
-
51
-
52
-
53
-
54
-
55
-
56
-
57
-
58
-
59
-
60
-
61
-
62
-
63
-
 64
64 -
 65
65 -
 66
66 -
 67
67 -
 68
68 -
 69
69 -
 70
70 -
 71
71 -
 72
72 -
 73
73 -
 74
74 -
75
-
76
-
77
-
78
-
79
-
80
-
81
-
82
-
83
-
84
-
85
-
86
-
87
-
88
-
89
-
90
-
91
-
92
-
93
-
94
-
95
-
96
-
97
-
98
-
99
-
100
-
101
-
102
-
103
-
104
-
105
-
106
-
107
-
108
-
109
-
110
-
111
-
112
-
113
-
114
-
115
-
116
-
117
-
118
-
119
-
120
-
121
-
122
-
123
-
124
-
125
-
126
-
127
-
128
-
129
-
130
-
131
-
132
-
133
-
134
-
135
-
136
-
137
-
138
-
139
-
140
-
141
-
142
-
143
-
144
-
145
-
146
-
147
-
148
-
149
-
150
-
151
-
152
-
153
-
154
-
155
-
156
-
157
-
158
-
159
-
160
-
161
-
162
 |
 |